Last weekend, my friends and I, went to a Hackathon, in the field of Medicine. And WON :)
As a Hackathon can be - At first a Real-World problems presented to us from the realm hospitality. Some of the problems where interesting and some not.At first, we chose the "patient monitoring problem", where a patient is monitored, it's location is being tracked and it's vitals also can be gathered.
Then we have made a reality pivot, and concentrated at the "patient identification & verification" problem, Which brings the challenge for detecting in a secure manner a patient, so that damages of being mis-identified (thus getting the wrong treatment) are minimized.
Well, as part of being young and enthusiastic software students, we went for the whole lot (which in my opinion, quite revolutionary idea):
A Smart bracelet that use B.T for tracking patient's location inside the hospital, and has BIO feedback sensing suit, that transmit data to a central server.
As you all probably know, one have only 24 hr's in a Hackathon, to accomplish an idea from scratch. So it was obvious we need a tune down, luckily, we have had great mentors all around us.
The MENTOR:
Its a holy position in a Hackathon, a mentor suppose to have some experience in problems realm. They are here to help us understand the problem better, so we could define it in our own language, for us software guy's:
UML's, some other diagrams, and lots of screaming at each other (in a fun and motivate way).
The MENTOR:
Its a holy position in a Hackathon, a mentor suppose to have some experience in problems realm. They are here to help us define the problem in our language, for us software guy's:
UML's, some other diagrams, and lots of screaming at each other (in an fun and motivate way).
Our project:
FRINGERS - FingerPrint Registration & Identification
Well, after few hours arguing with mentors 'bout how know best, it seems that we finally could describe properly the problem we want to solve:
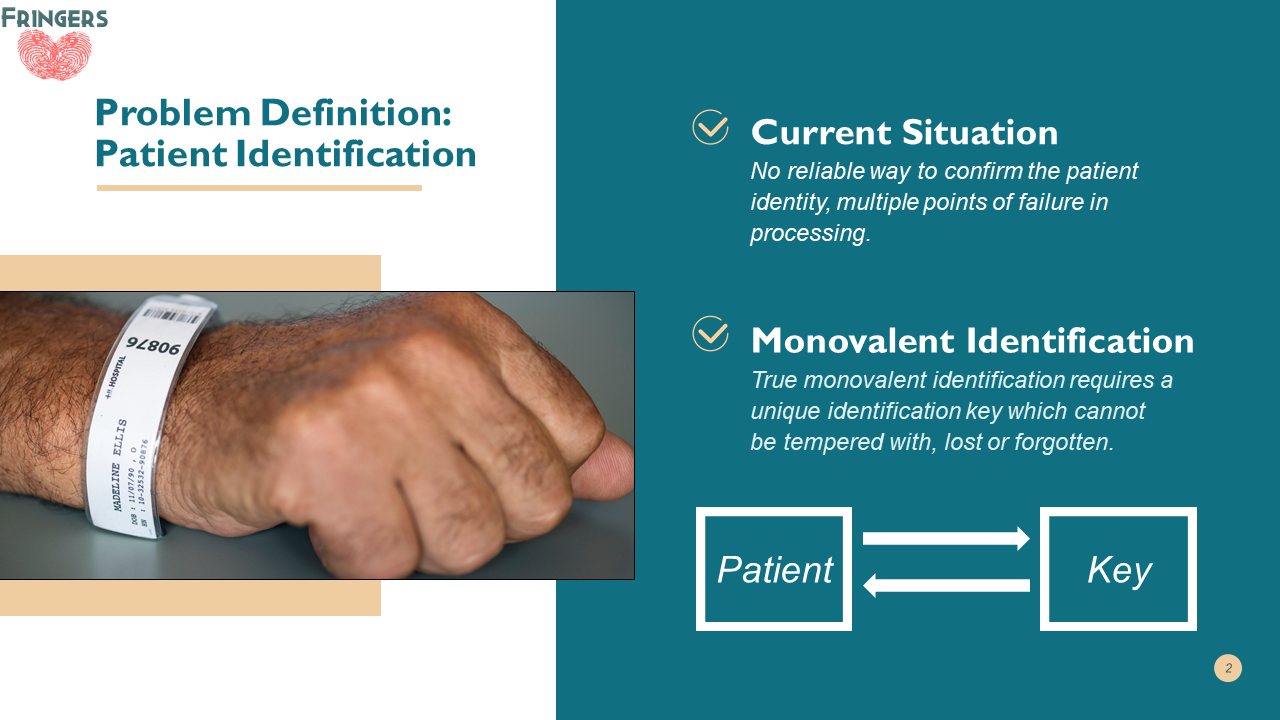
We did some research, and it seems that 98,000 patiens dies per year, from patient miss-identification,in the US alone!.
(From “Incidence of Averse Events and negligence in Hospitalized patients” – T. Brennan, L. Leape, L. Hebert)
Our solution:
Using fingerprint scanner for initial processing, then producing RFID tag for day-to-day operations.
From this part on, the MAKING being MAKE :)
Things needed to be done:
1. Build a simple web app.
2. Learn how to work with RFID.
3. Implement simple server & database.
4. Build a fingerprint device.
Build a simple web app:
Luckily, as almost everything in this world, someone has already done it before us. hance there's a repository out there, so all we had to do is git clone this Hospital-management-nodejs, than some reverse engineering, for inserting our functionality.
Implement simple server & database:
In this repository, the server side is NODE.js. Client side is HTML's
Working with the RFID scanner:

This weird RFID scanner is SO straight forward, a REAL plug&play:
It connects to a computer with USB, and simply dumps a read into OS standard input. So if you have a text editor open, and pass a rfidtag near the reader, it'll dump the ID of this rfidtag into the text editor.
Basically - It making the computer think that someone pressed the keyboard.
We used that in our favor. And added a prompt in html's script, so that when a user identification is required, a text_input popup's and when the tag is read, its ID is dumped into this popup. KISS :)
In the add patients html, we have added this function:
function scanRFID() {
      var txt;
      var person = prompt("Please put the RFID Sensor near the reader");
      if (person == null || person == "") {
      txt = "User cancelled the prompt.";
      } else {
      txt = "RFID ID WILL BE SCANNED INTO TXT";
      }
      document.getElementById("RFID").value = person;
      }
Meanwhile, when the add patient button is pressed, in server side:
we have added the following lines to the add-patient handler:
const port = new SerialPort("COM4", { baudRate: 9600 });
    const parser = new Readline();
    port.pipe(parser);

    parser.on('data', line => console.log(`> ${line}`));
    function kaki(){
        port.close(function (err) {
        console.log('port closed', err);})
    }
    function waitforinroll(){
        port.write('INROLL'+userID+'\n');
        req.body.finger=userID;
        userID=userID+1;
        //port.close();
        setTimeout(kaki,10000);
    };
    setTimeout(waitforinroll,2000);
    req.body.finger=userID;
Lets break it down:
const port = new SerialPort("COM4", { baudRate: 9600 });
Here were starting a Serial communication with the Fingerprint module.
const parser = new Readline();
    port.pipe(parser);

    parser.on('data', line => console.log(`> ${line}`));
Here were adding the port object a Readline() parser, so it'l know how to parse new data in the buffer, than we setting a debug - dump new data into terminal.
function kaki(){
        port.close(function (err) {
        console.log('port closed', err);})
    }
Here we define an function for closing the serial communication, and we attaching this function to a timer.
function waitforinroll(){
        port.write('INROLL'+userID+'\n');
        req.body.finger=userID;
        userID=userID+1;
        //port.close();
        setTimeout(kaki,10000);
    };
This is the main function of this module, Here we are writing to serial communication the desired command + new userID to be attached to the new finger(aka new user).
setTimeout(kaki,10000);
Here we are activating the timer for closing the Serial communication.
We did the same when seeking for a patient in the DATABASE, weve added to this function:
const port = new SerialPort("COM4", { baudRate: 9600 });
    const parser = new Readline();
    port.pipe(parser);

    parser.on('data', line => console.log(`> ${line}`));
    function kaki(){
        port.close(function (err) {
        console.log('port closed', err);})
    }
    function waitforinroll(){
        port.write('GETFINGERID\n');
        port.read();

        Patient.find({"finger":port.read()}).then((patients) => {
        res.status(200).send(patients);
        }).catch((err) => {
            console.log(err);
            res.status(400).send();
        });
        setTimeout(kaki,10000);
    };
    setTimeout(waitforinroll,2000);
As you can see it's quite simmilar to addpatient, but few changes:
in waitforinroll:
port.write('GETFINGERID\n');
port.read();

Patient.find({"finger":port.read()}).then((patients)
We now writing to Serial: GETFINGERID, this tells the Finger sensor module to read a finger, and bring back it's already stored ID.
Than we searching the returned stored id in the database, to fetch all other patient DATA, finally, we send the complete patient object back to client.
MONGO database:
Working with mongoDB, is so fun, fast, and intuitive. Its a NOSQL, which means, no tables, no queries, no ugly. Instead - Pure json objects. all we had to do is defining a json scripts of our patient object, and poof! we have a database! super fast.
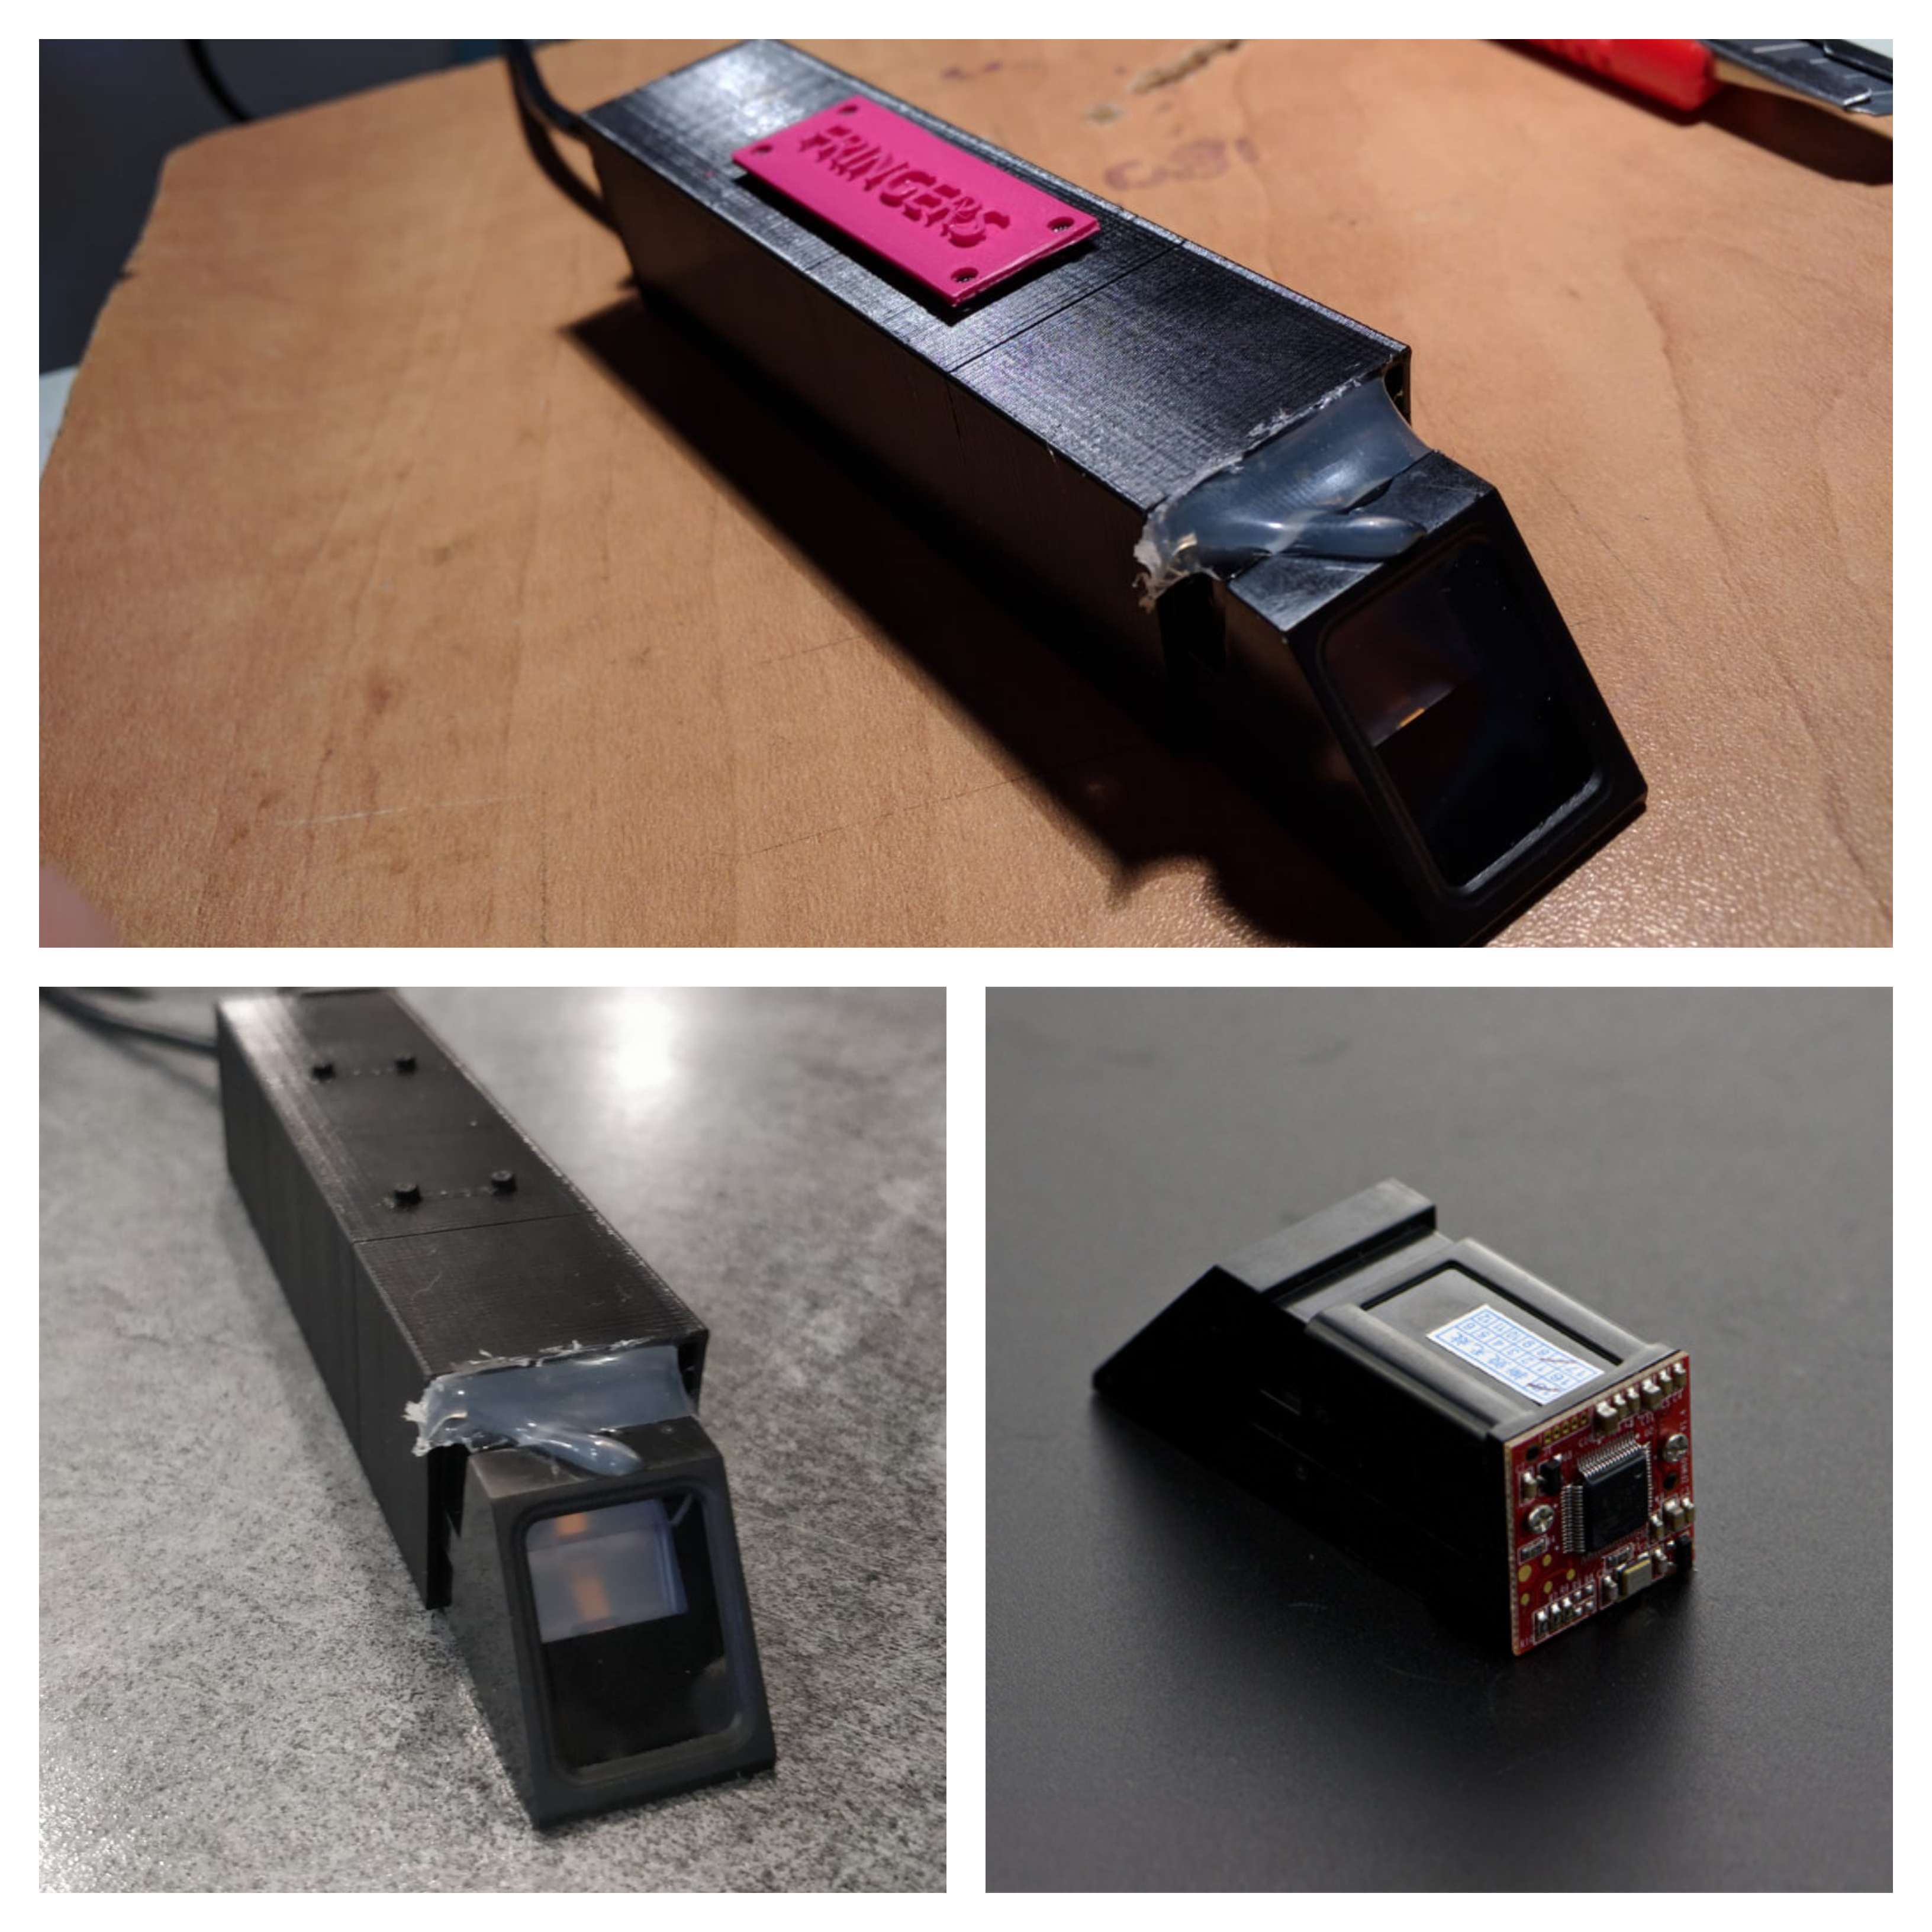
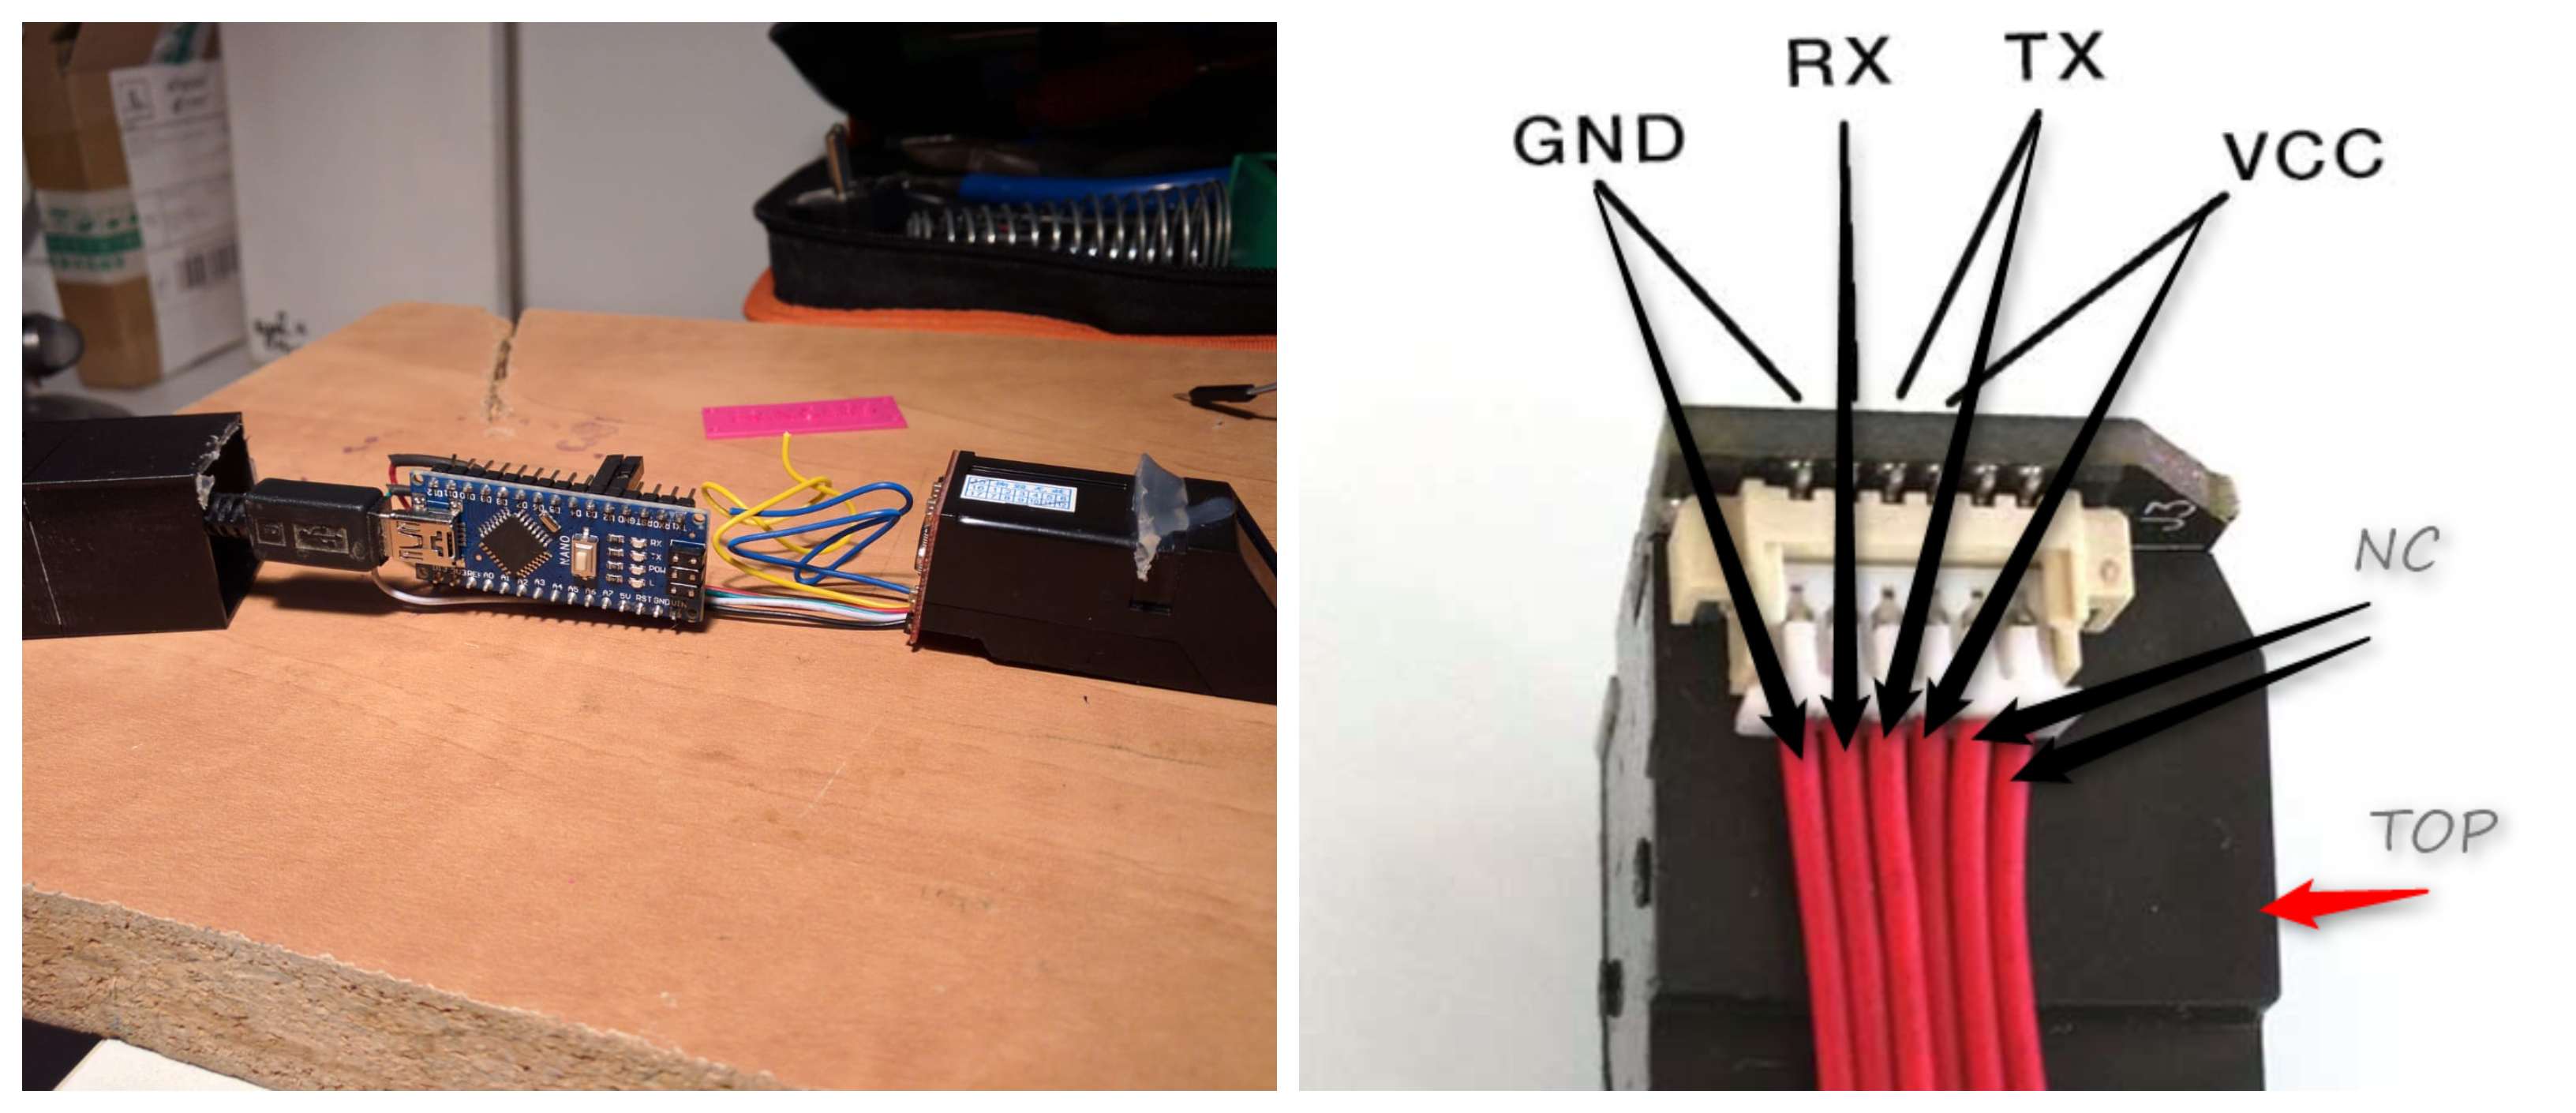
Build a fingerprint device:
We got this finger sensor
This sensor does the finger-matching-to-ID work for you, Inside its belly it has 2 things:
- Storage for 162 fingers.
- Image matching algorithm.
It has a Real cool tutorial, that helps you learn all you need, to get up and running as quickly as possible.
When that being said, Lets dive in!
The sensor comes with a Serial communication, so we worked with Arduino.
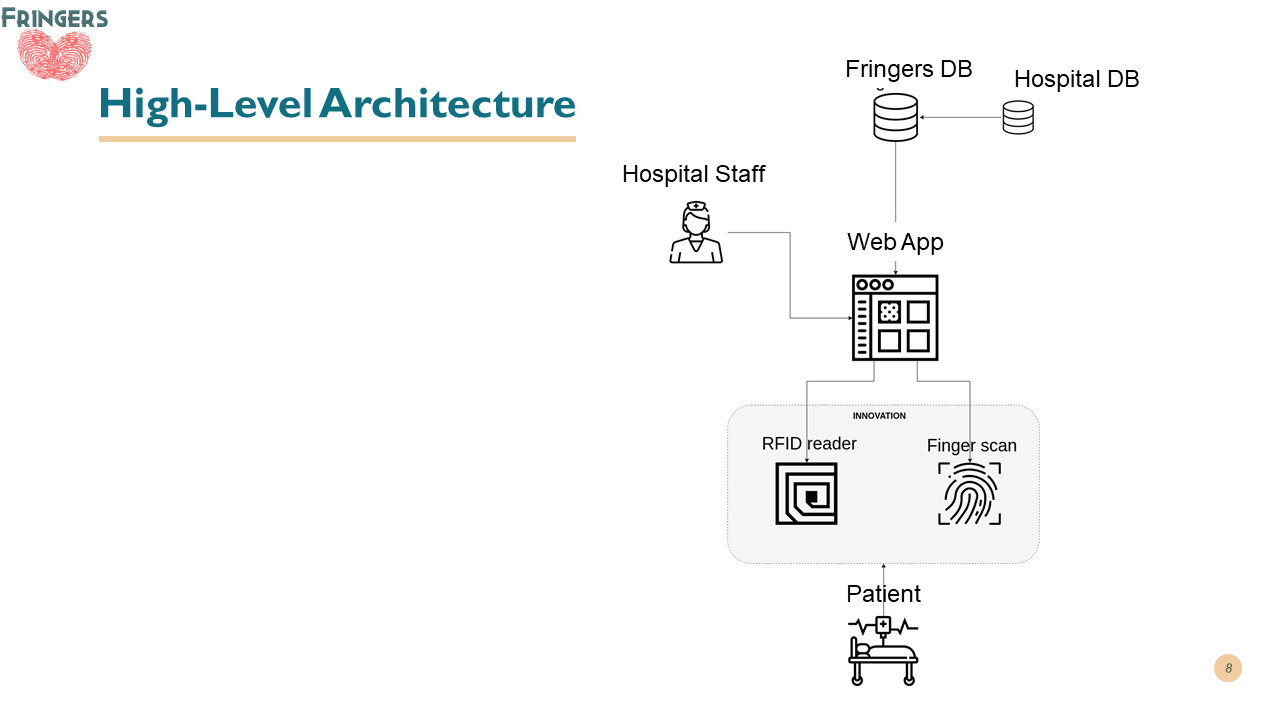
The system communication worked as followed:
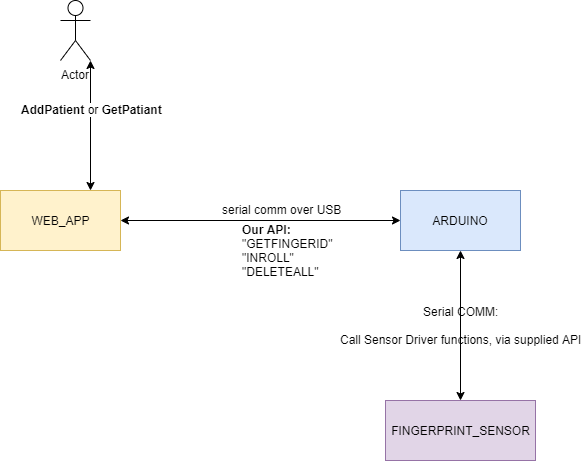
We developed our API in python (later moved to node.js):
This script is called from the WEB_APP, to talk with the Arduino
Usage example - calling "DELETEALL":
""" This module will DELETE all fingers in sensor database.
USAGE: python ./delete_all.py
"""

import serial
import time

returned_id = None

# set up the serial line
with serial.Serial('/dev/ttyUSB0', 9800, timeout=1) as ser:
    time.sleep(2)

    finger_id = 'DELETEALL' + '\n'
    to_bytes = bytes(finger_id, "utf8")
    print(to_bytes)
    b = ser.write(to_bytes)  # read a byte string
    time.sleep(2)

    while read_val != "Now database is empty :)":
        read_val = ser.read(size=64)
        decoded = read_val.decode("utf-8")
        print(decoded)
    ser.close()
A little breakdown:
with serial.Serial('/dev/ttyUSB0', 9800, timeout=) as ser:
Keep in mind, that in UBUNTU, device are treated as "path" (instead of COMMx as in windows). So here were opening a Serial communication with the Arduino.
finger_id = 'DELETEALL' + '\n'
    to_bytes = bytes(finger_id, "utf8")
    print(to_bytes)
    b = ser.write(to_bytes)  # read a byte string
Than we prepare our package, convert it to Bytes, and use Serial.write to write data to the opened PORT.
while read_val != "Now database is empty :)":
        read_val = ser.read(size=64)
        decoded = read_val.decode("utf-8")
        print(decoded)
    ser.close()
Than we wait for input from the PORT - meaning we have a response from the Arduino.
Inside the Arduino, our LOOP function does the follows:
- Weit to Serial input.
- Check what is this serial input (string compare).
- Call the relevant function from the FingerPrint sensor driver.
- Write to Serial the result.
We also have a SerialEvent handler (Arduino builtin), That handles serial communication, and saves the input in a global buffer.
And that's it :)
This hackathon was all about having FUN, and learn new things.
In my opinion - Sitting with friends all night, working on new tech, trying to build an idea from scratch, with a deadline hovering above, that's where the magic happens.
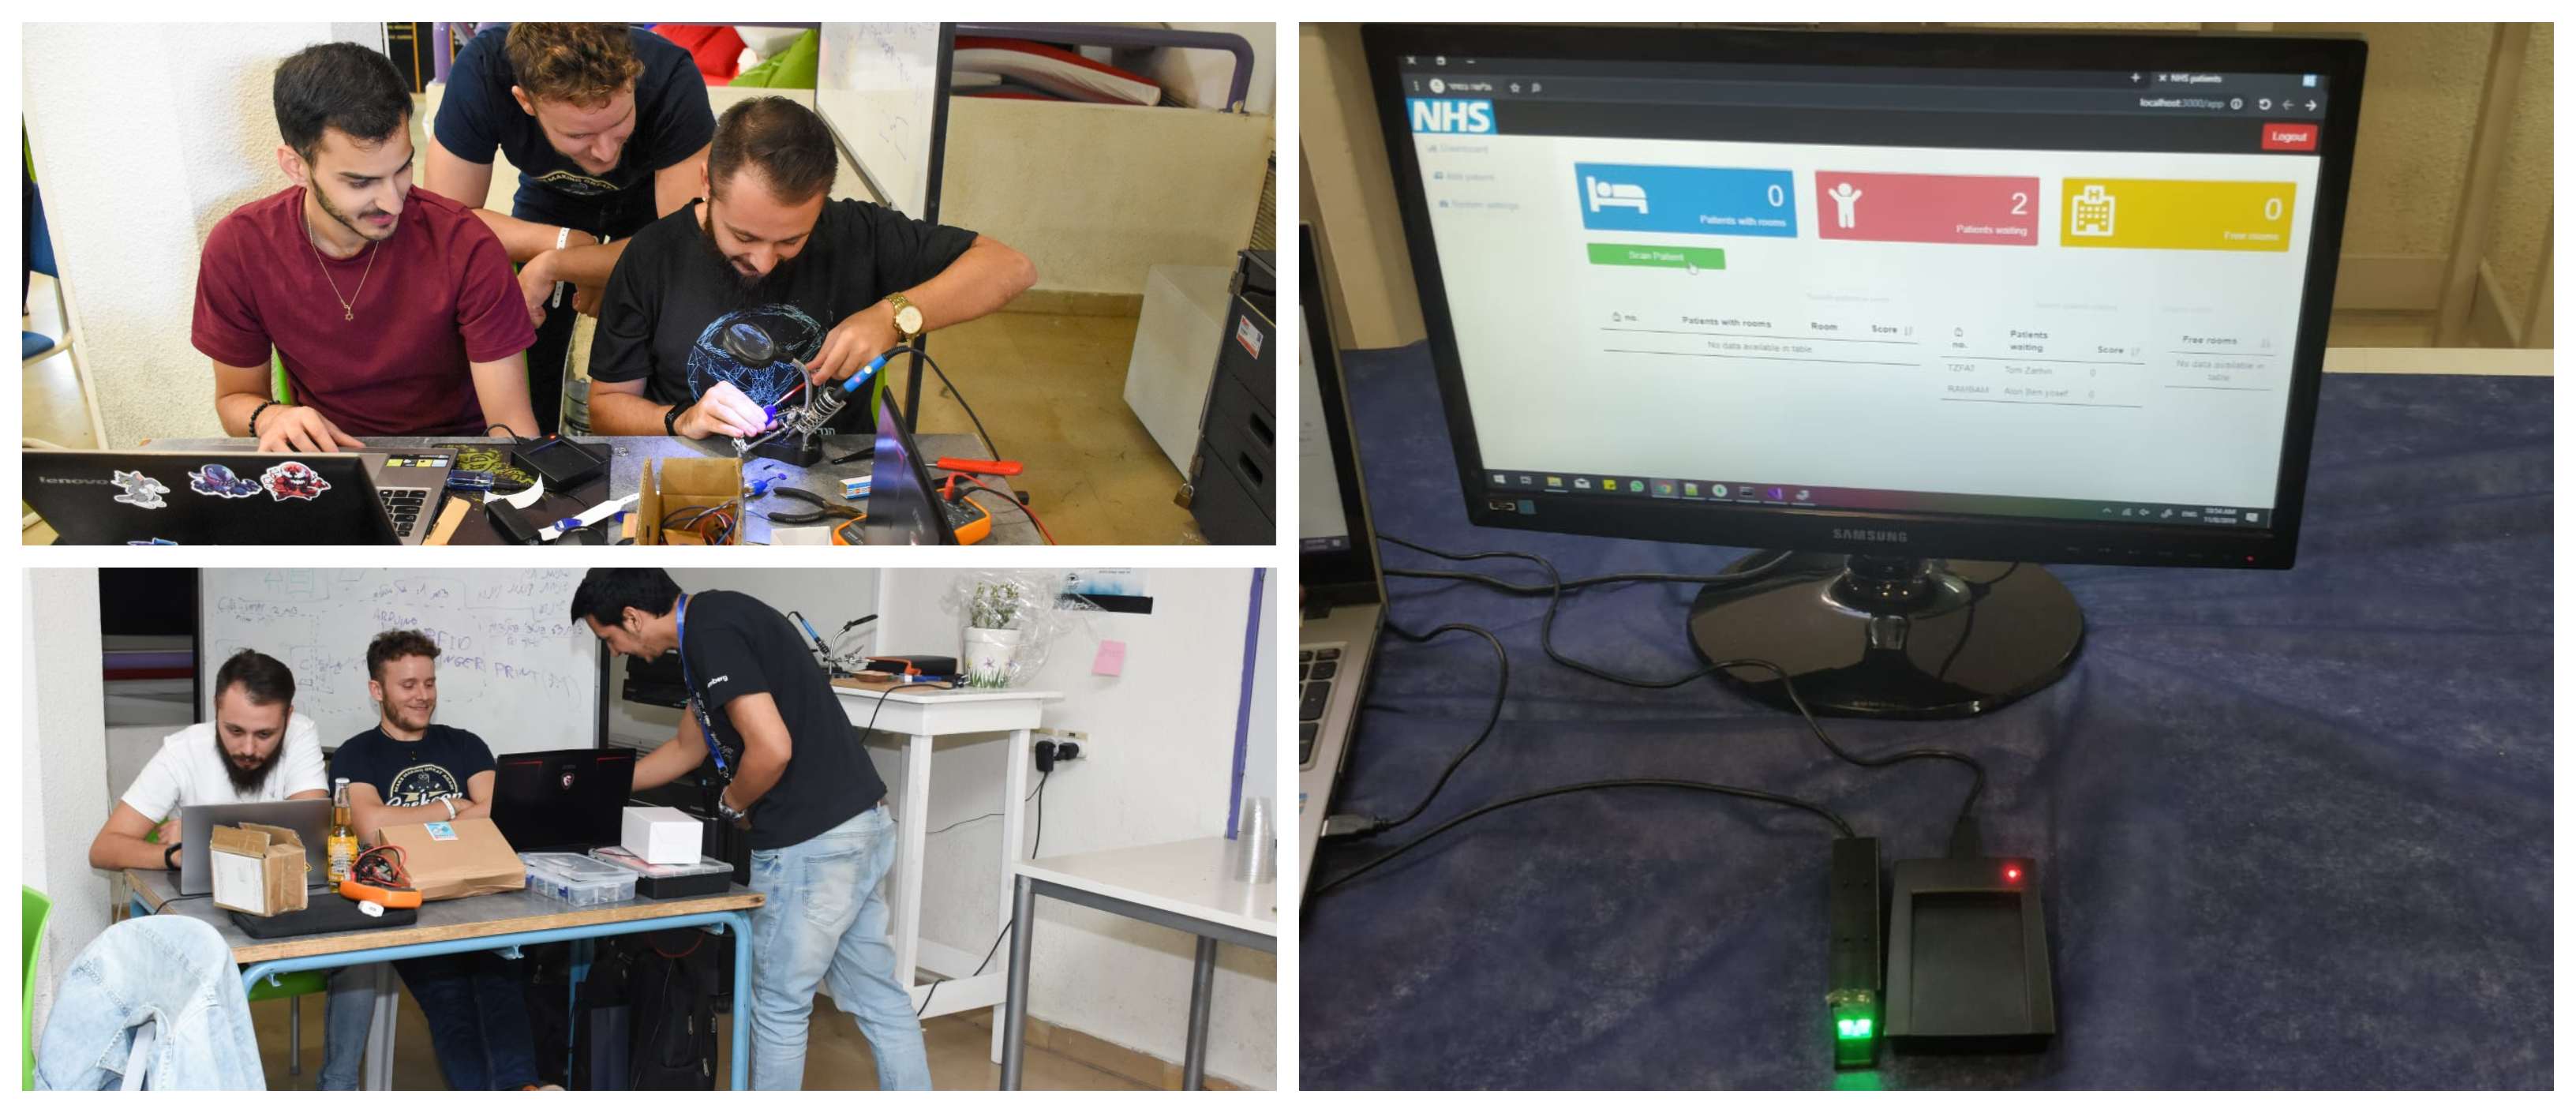 On the right - Our final product (Web app, RFID scanner,FingerPrint kit).
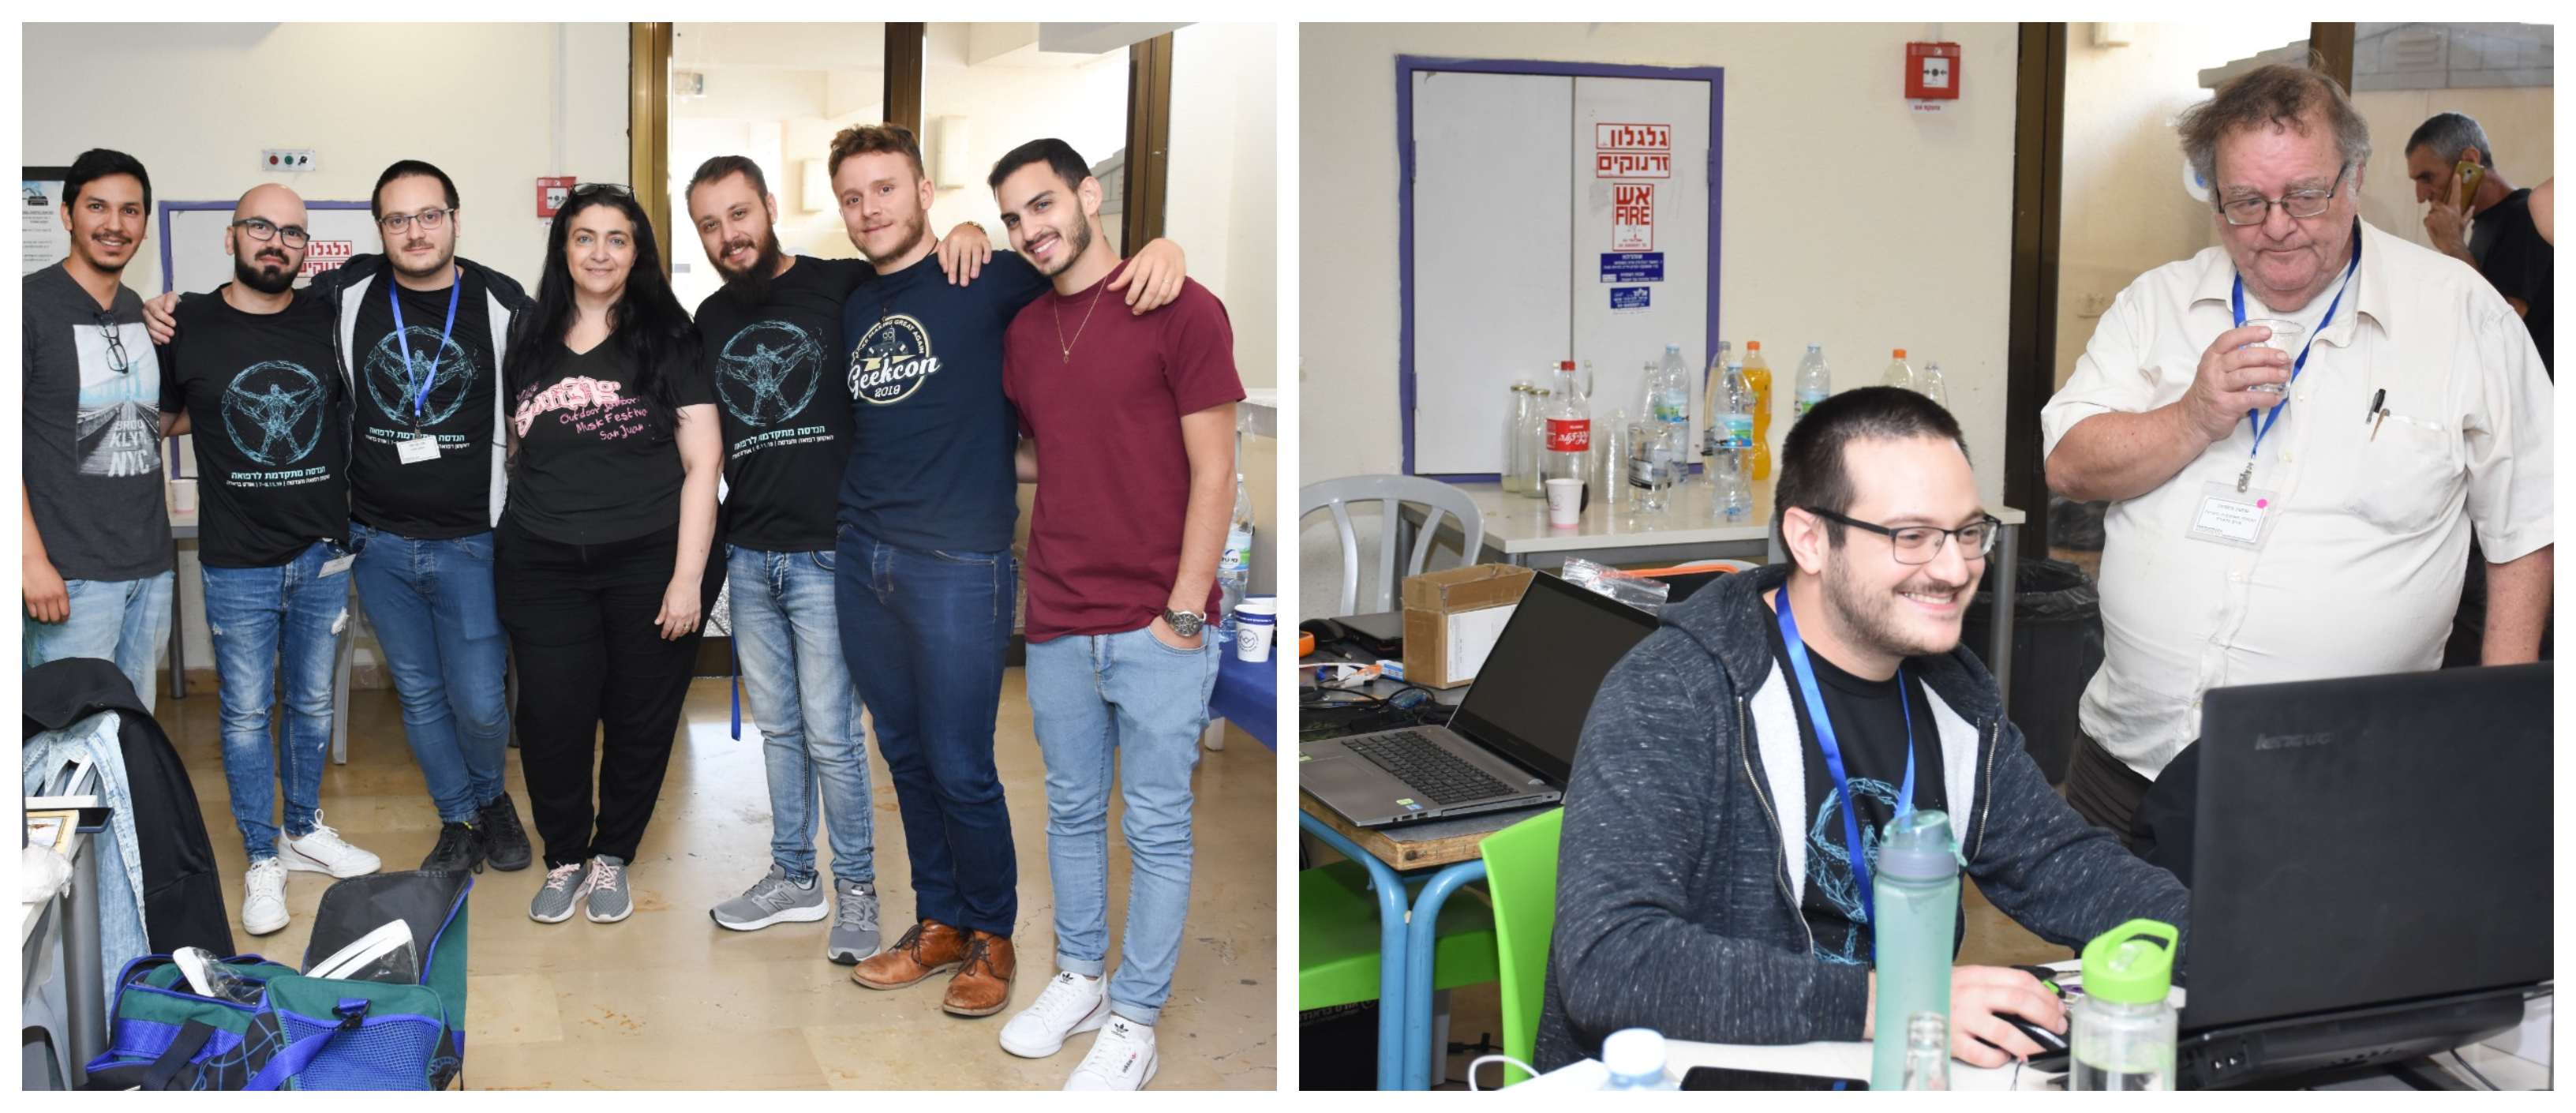 On the left, With head of Faculty of Software Engineering.
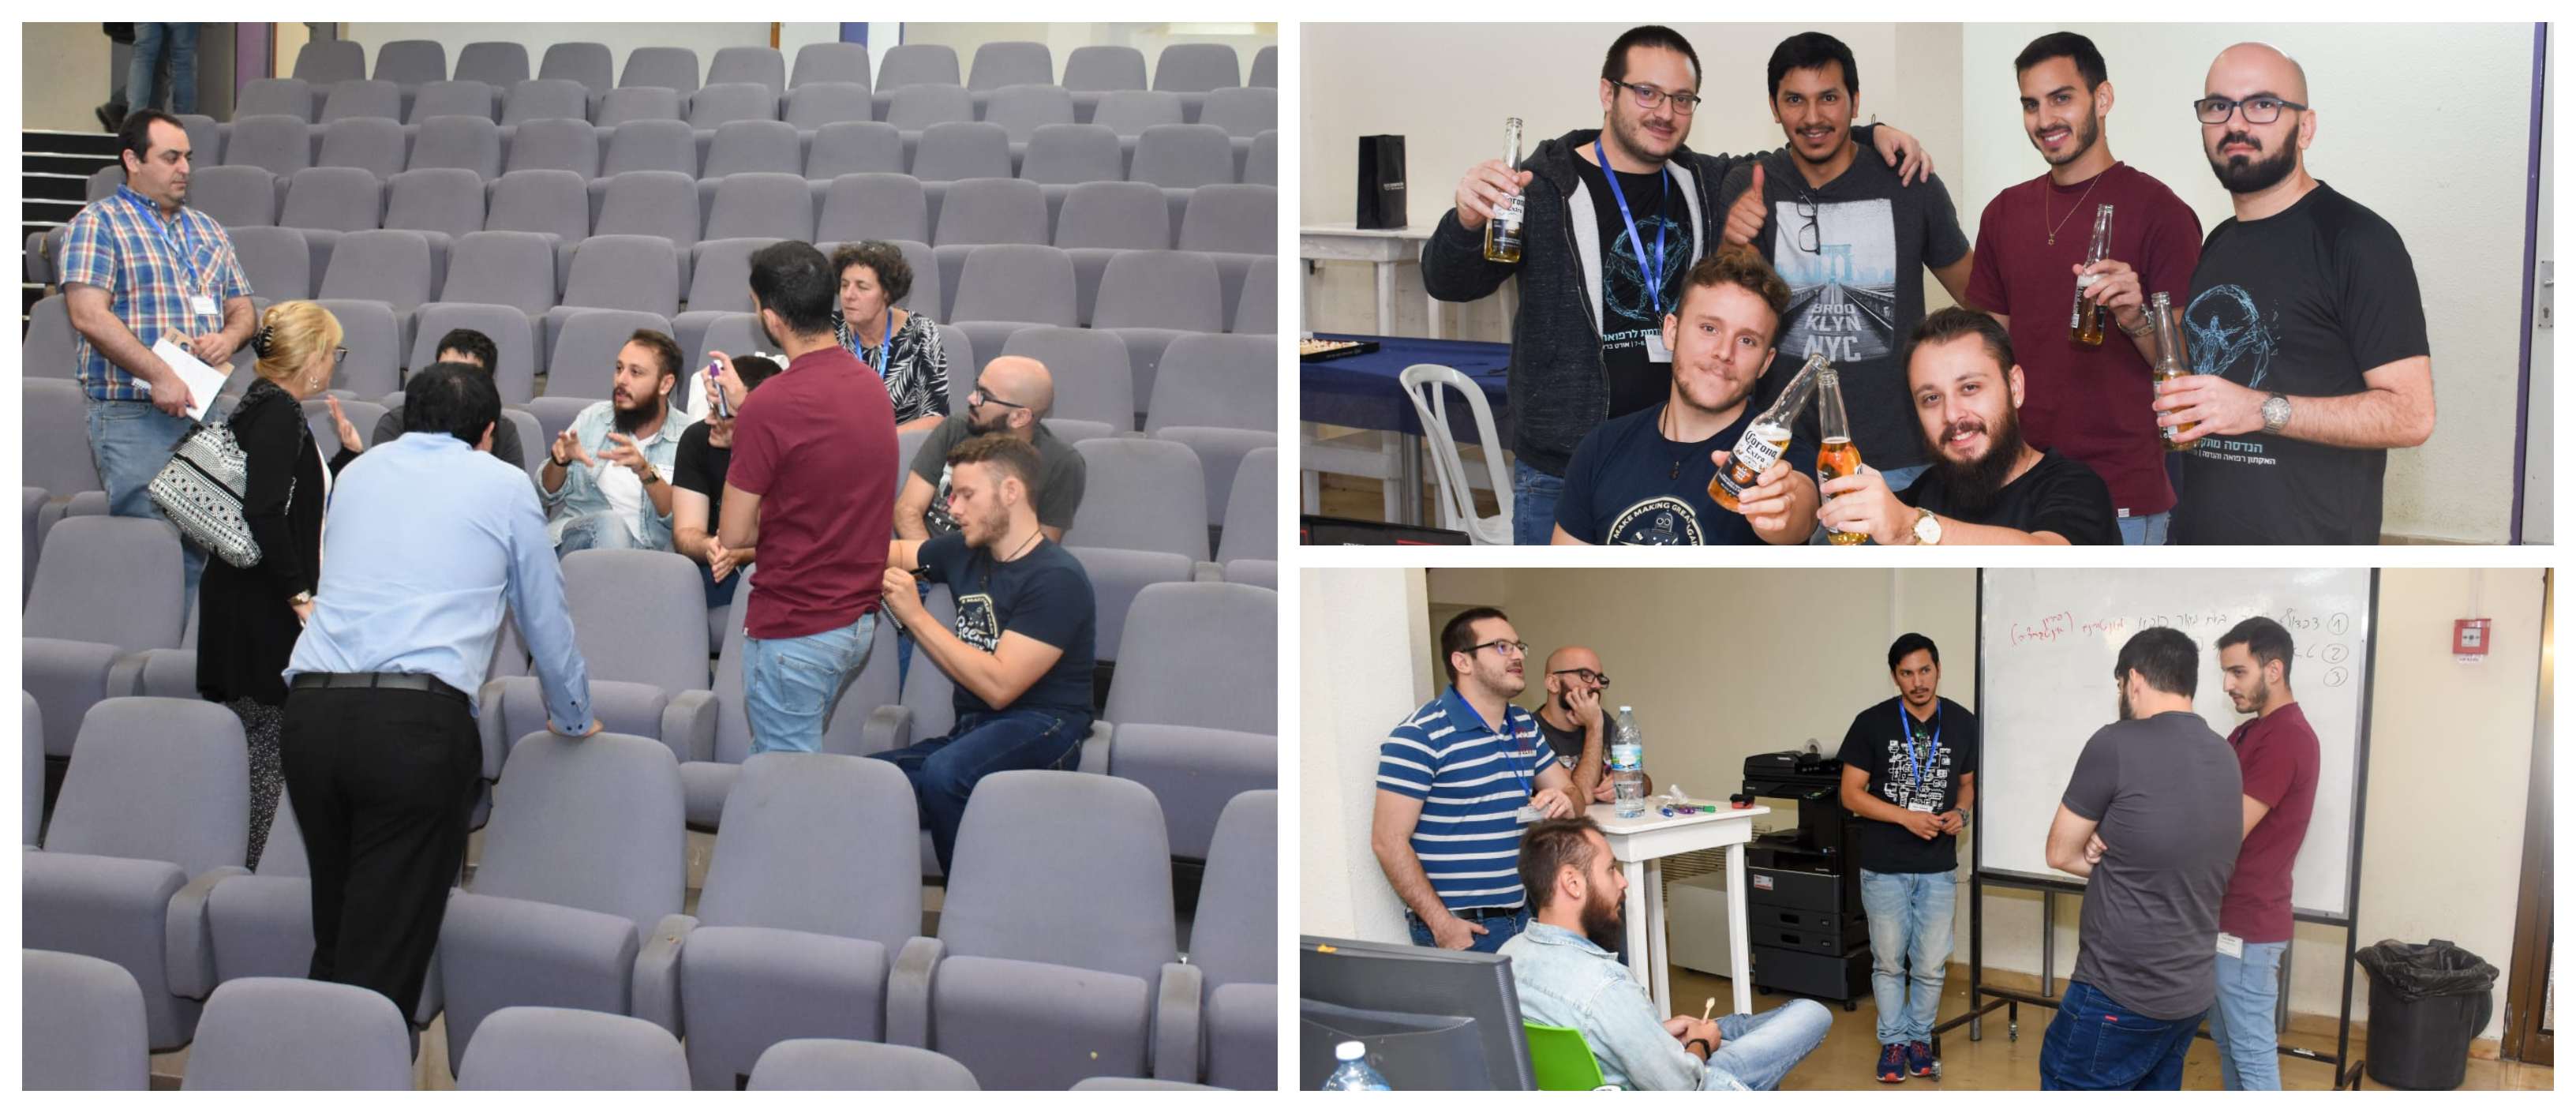 Heaving fun in stand-up meeting
With love the FRINGERS team:
Cheers Gal.
KISS: Keep It Simple Stupid