Ask your iPhone for weather conditions and it'll display data from a sensor somewhere nearby - often at the local airport - which might be miles away from your current location.
And at home, you may have IoT sensors that tell you the temperature in your bedroom or kitchen.
But what if you want to know the temperature, humidity, air pressure and humidity WHERE YOU'RE STANDING RIGHT NOW? Even your mighty cellphone can't tell you all that.
This post will tell you how to construct a simple device that does just that.
Parts
You'll only need three parts. All the links below are to WIN SOURCE.

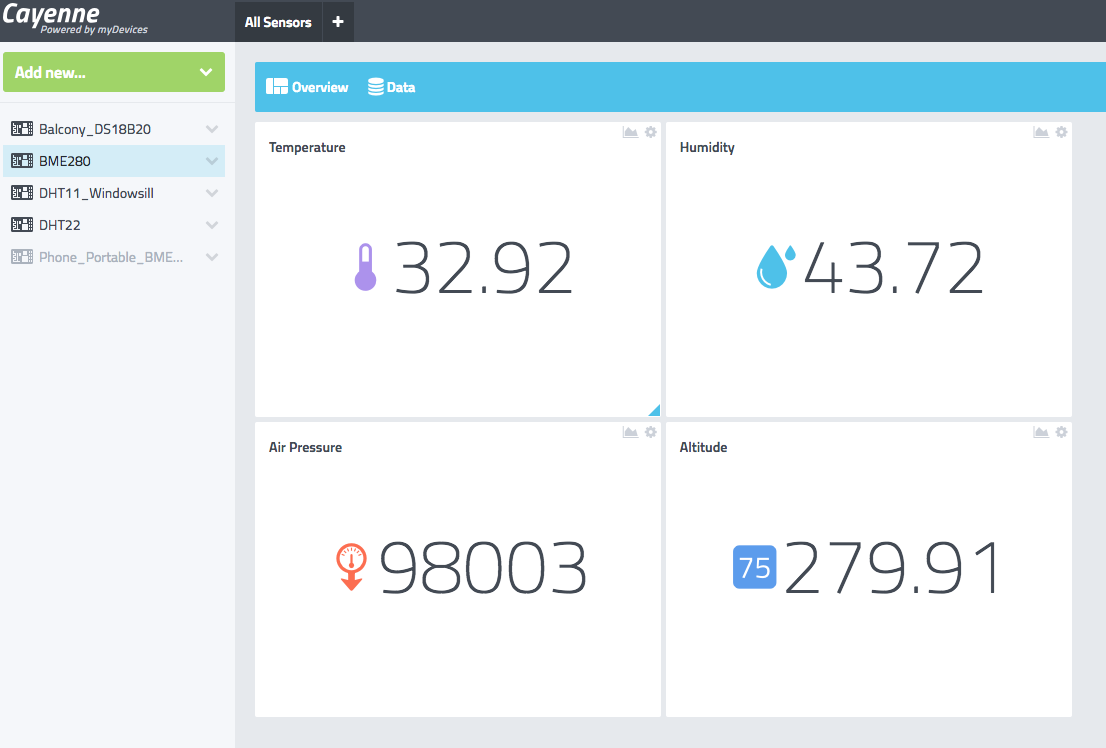
Cayenne for data collection
For some time I've been using Cayenne from MyDevices to collect data from my IoT devices. It's cloud-based, very simple to set up, and supports the ESP. Obviously this project can be set up with another service but you'll need to find your own code.
Flashing the ESP
Before you flash your ESP, you need to prepare and test your Sketch. This means you'll need to set up Cayenne. You'll need:
char username[] = "xxxxxxxxxxxxxxxxxxxxxxx";
char mqtt_password[] = "xxxxxxxxxxxxxxxxxxxxxxxxx";
char client_id[] = "xxxxxxxxxxxxxxxxxxxxxxxxxxxxxx";
You'll also need to set up tethering in your phone so that you can incorporate it into your sketch:
char ssid[] = "yourmobilephonetetherssid"; // your network SSID (name)
char pass[] = "yourmobilephonepassword"; // your network password
I strongly suggest you test your code before you proceed any further because once you've taken the pins off your ESP, it'll be much harder to flash it.
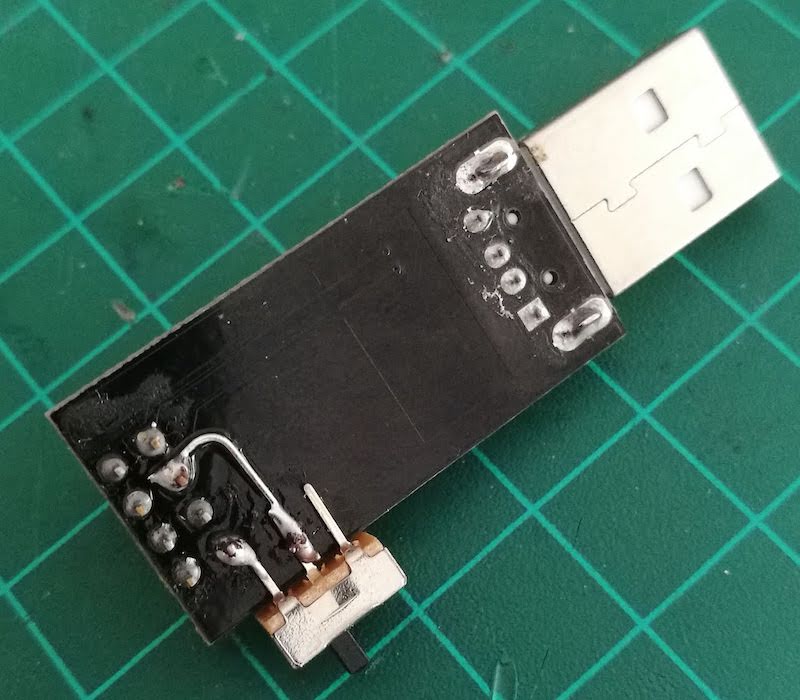
Once you've prepared your code, you'll flash your ESP. I use this great little programming board.
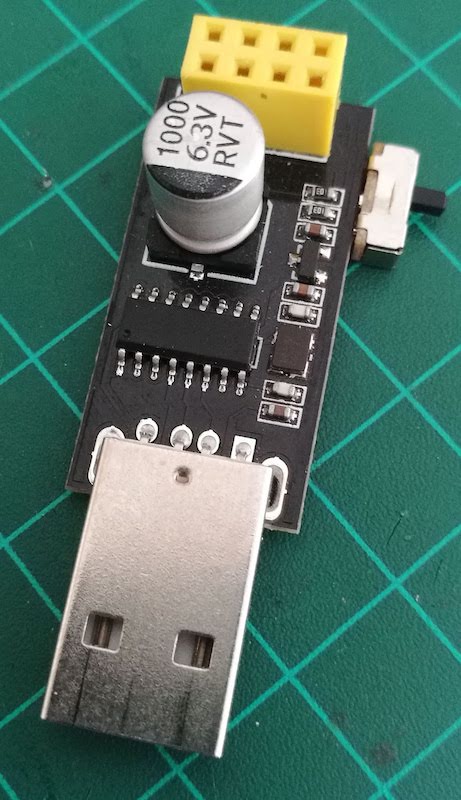
As you'll see, I've attached a switch to the back to set GPIO-0 to GND for flashing.
I2C - Changing Adafruit Library
As you'll see from the sketch below, we'll be using Adafruit libraries.
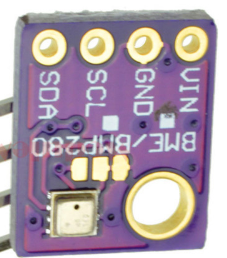
We also use the I2C protocol that allows us to read data through just two wires - connected to SDA and SCL. If, like me, you bought the BME280 from a cheap source on WIN SOURCE, you'll probably need to change the address of the device in the Adafruit Library. (Only try this if your code doesn't work, as not all boards are the same.)
To change the address you'll need to edit the Adafruit_BME280.h file in our Arduino library. Change this line:
#define BME280_ADDRESS (0x77)
to:
#define BME280_ADDRESS (0x76)
Also on the subject of I2C, you'll need to make sure this line in the sketch corresponds to the physical position of the SDA and SCL pins on the BME180. See below for a more detailed explanation.
Wire.begin(0, 2); // SDA, SDL
Construction
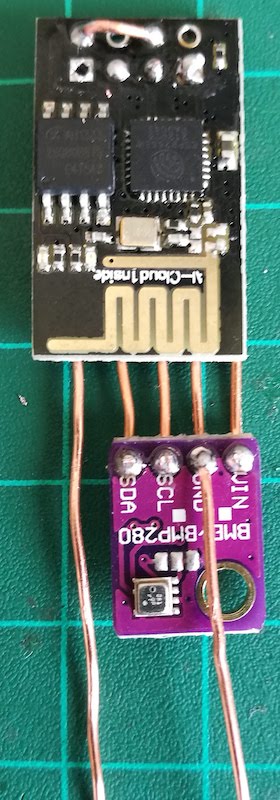
I wanted to make the smallest, most compact device I could - something that would be easy to carry around and deploy.
Pin Alignment
The order of pins on my BME380 was like this:
This was fortunate because the pinout of the ESP8266_01 is like this:
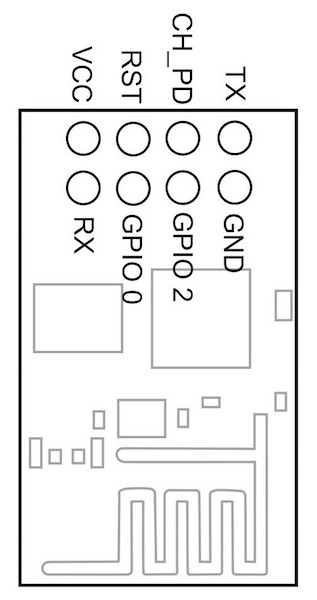
So the pins GND, SCL and SDA of the BME280 can slip directly on to the pins GND, GPIO-2 and GPIO-0 of the ESP. (This is why it's important to get the pins in the correct order in the code above.)
 If SCL and SDA are reversed on your board, you'll need to reverse the code. You'll also need to run your wires accordingly.
Wire.begin(2, 0); // SDA, SDL
Removing Headers from ESP
As I said above, do this only after you've flashed and tested your ESP and the sketch.
It took me a while to learn how to remove headers cleanly and efficiently but once I understood, it's pretty easy to do.
First, remove the stabilising plastic from the pins:
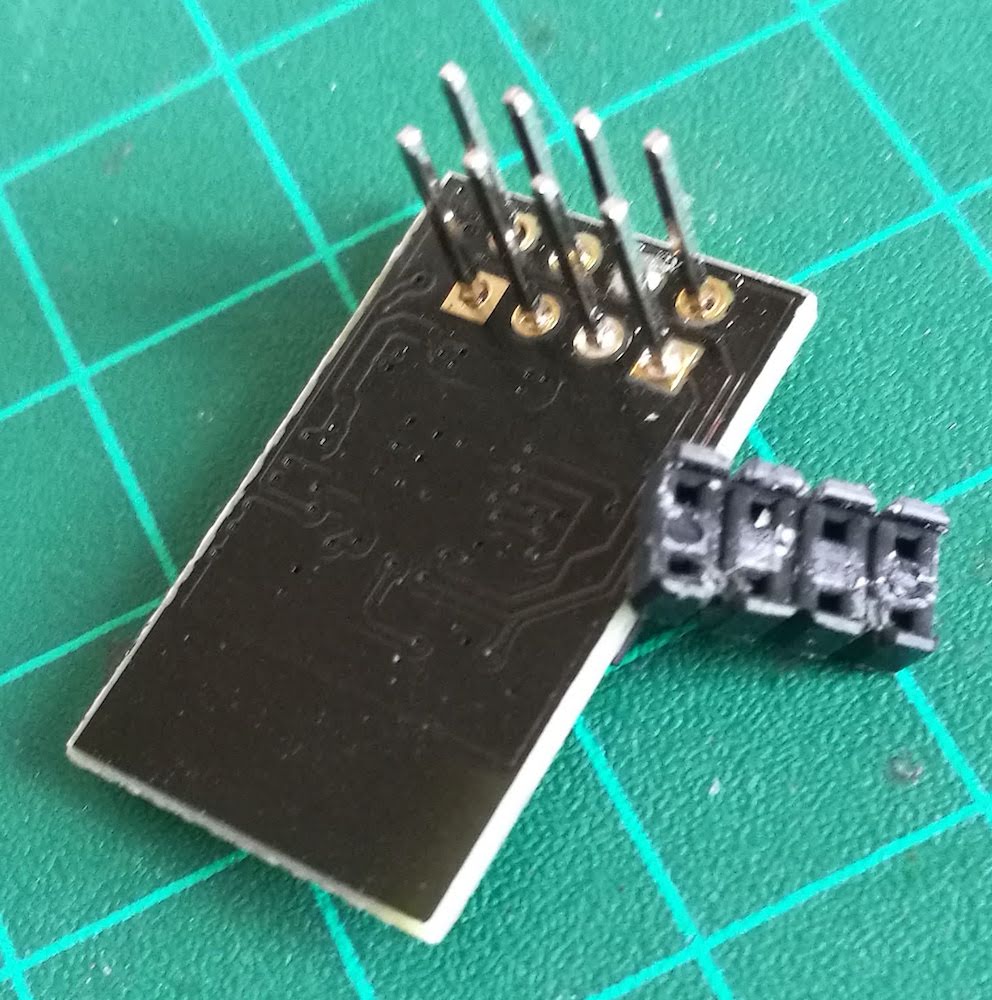
Then, while holding the ESP in your hand, heat the solder on the first pin until it melts. While it's still molten strike your hand sharply on the table with the pin facing down. It will shoot out, taking the solder with it. Repeat for all pins.
Running the Wires
Note for educated electrical engineers: Yes, I know I shouldn't be using stripped wire that's liable to cause a short. I also know that my signal wires are close to the ESP's antenna and could cause interference. This is a proof of concept. It's simple to create the same thing with insulated and re-routed wires.
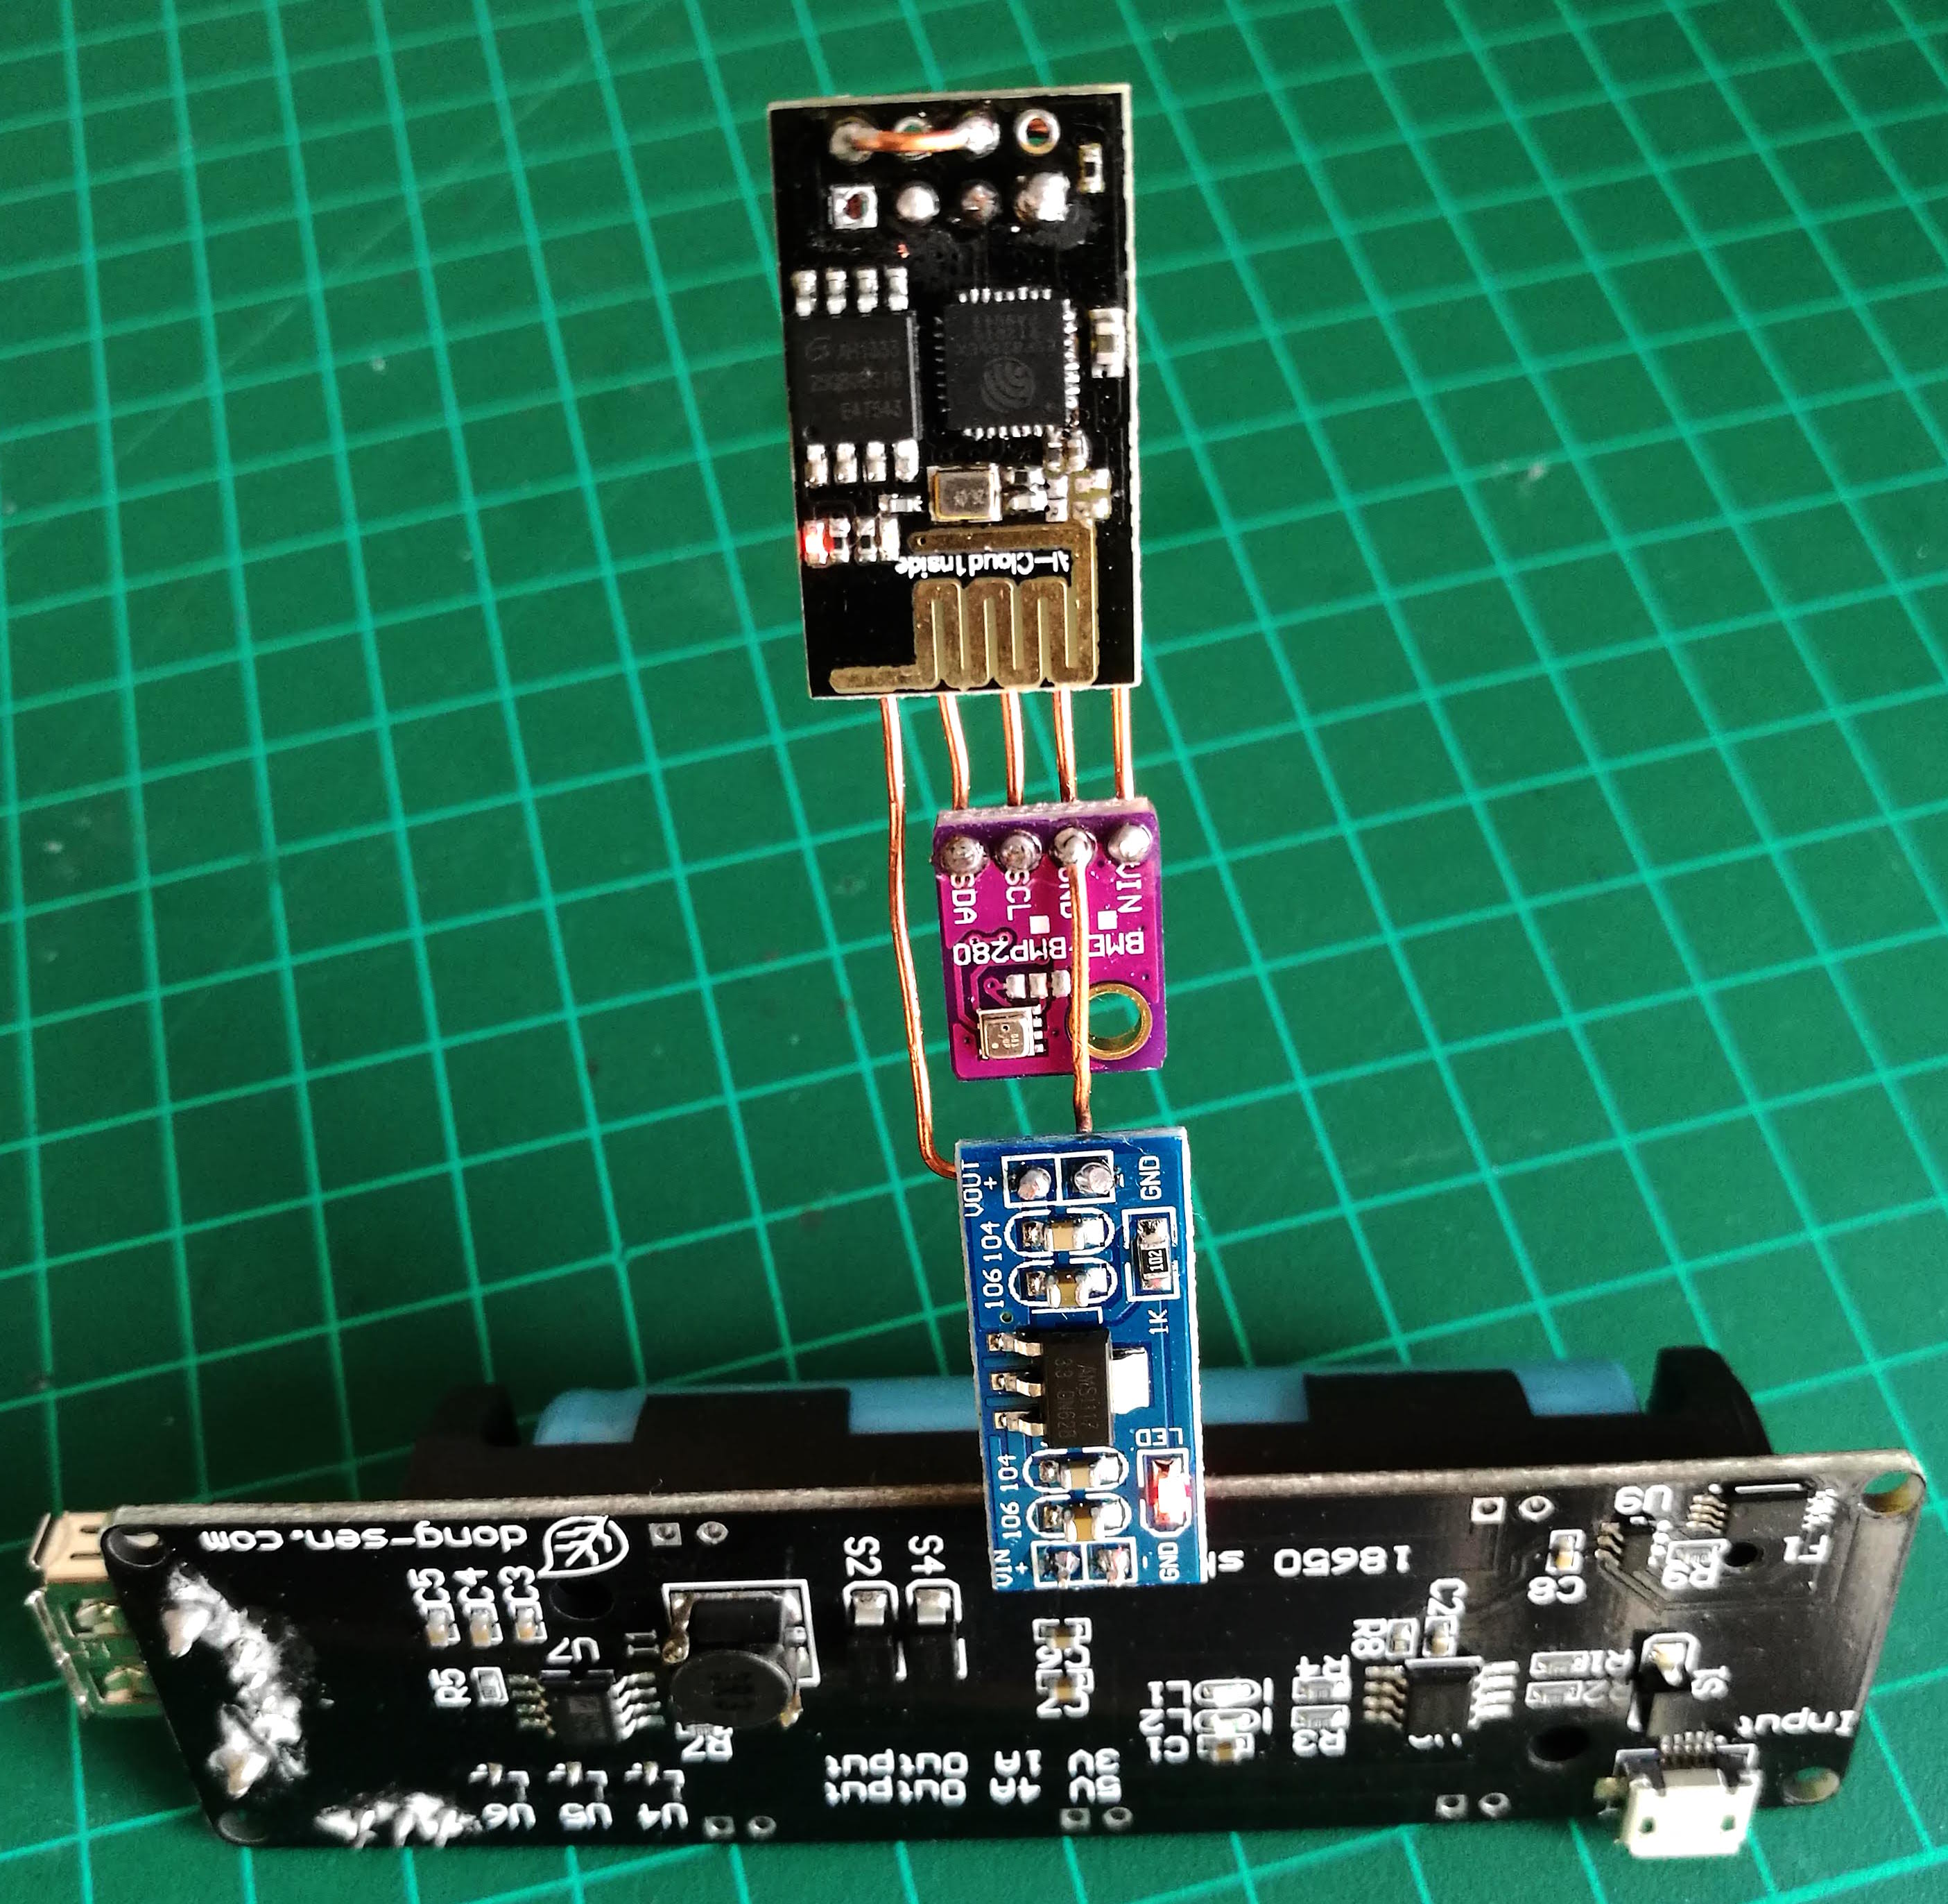
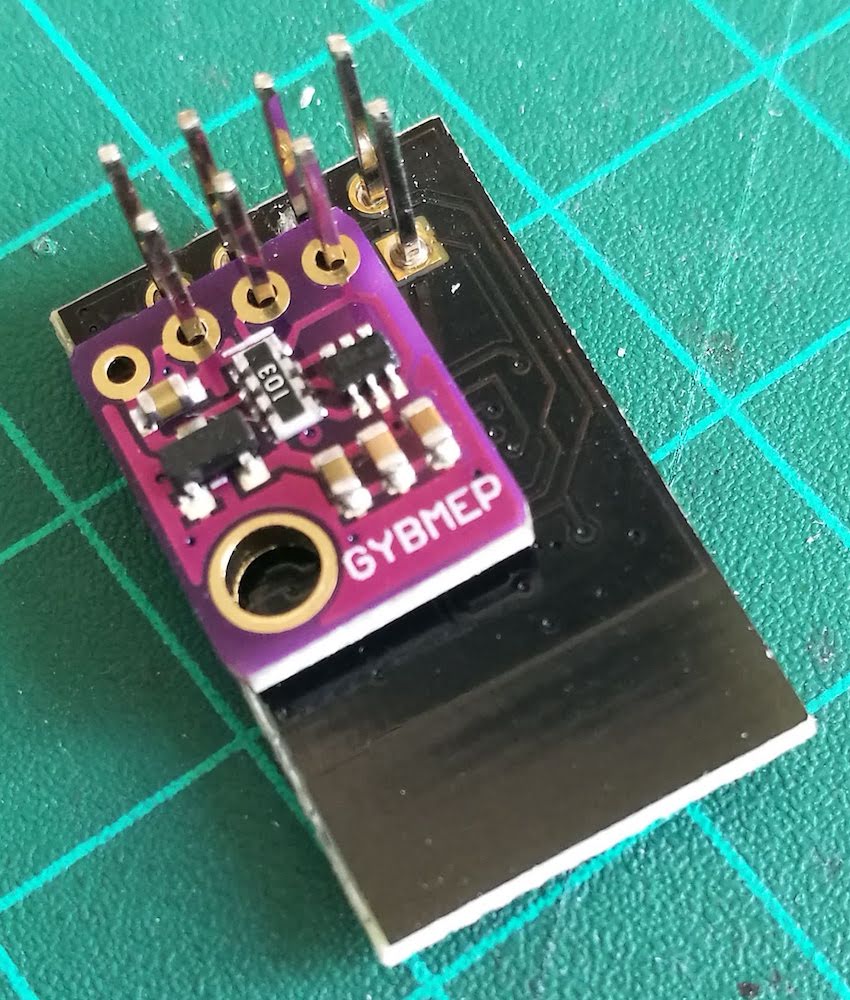
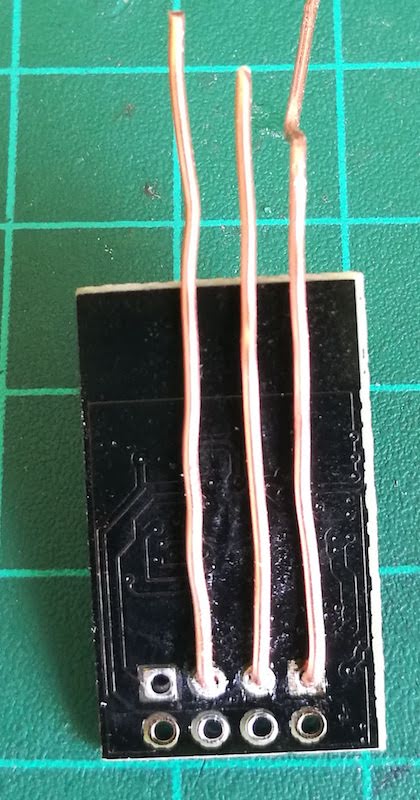
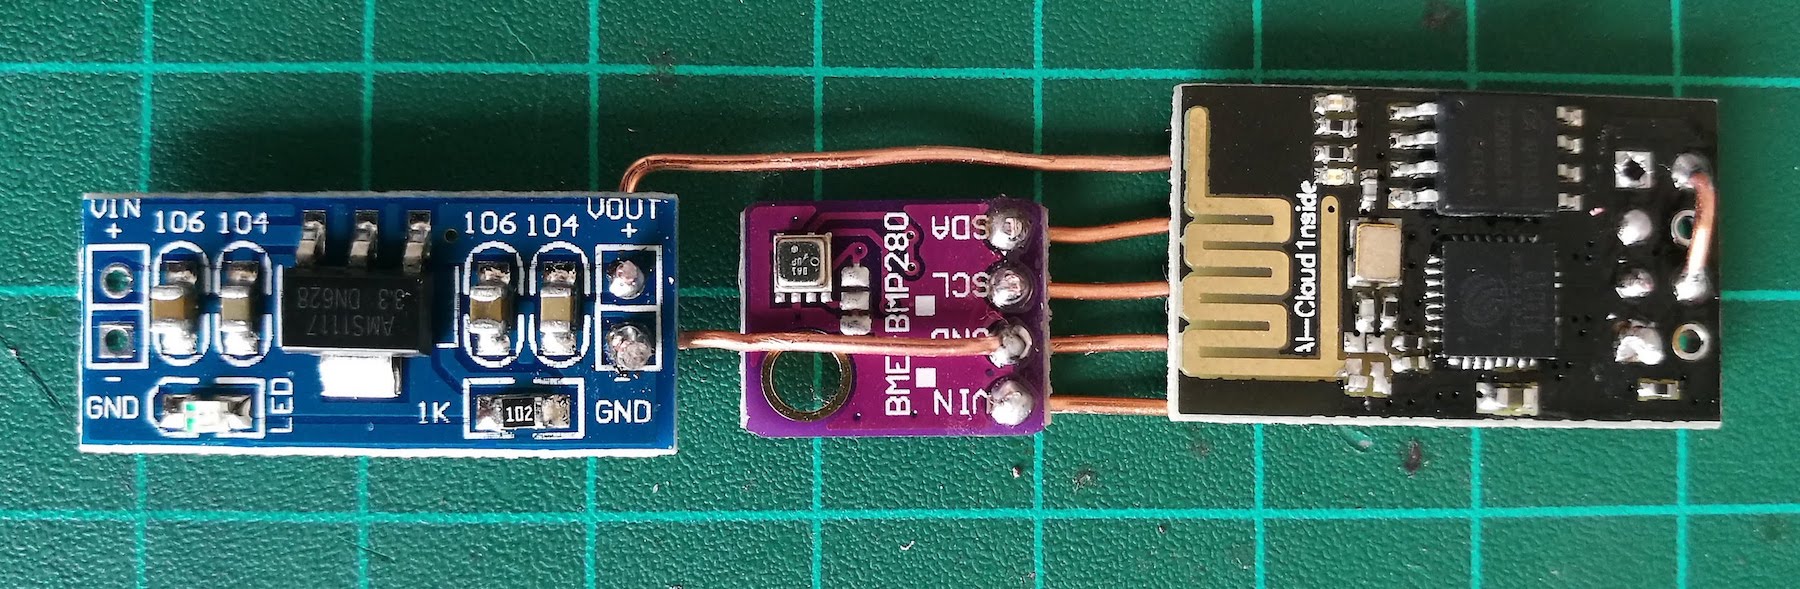
I used stiff single-core copper wire to add rigidity to my construction. I started with the GND, SCL, and SDA pins.
Then I connected the BME280.
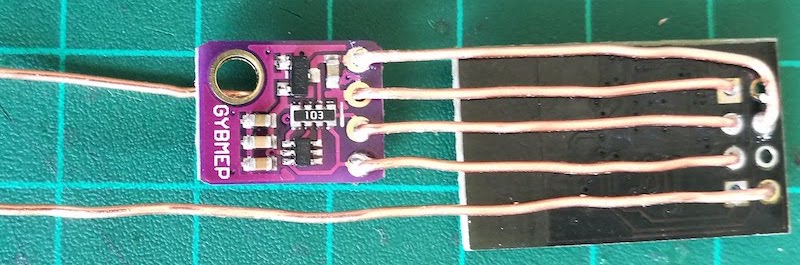
For the VIN and GND wires, I threaded them through from one side of the respective board to the other.
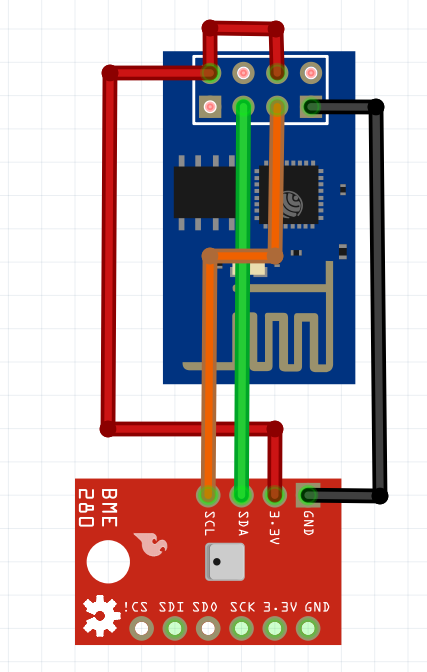
Here's a picture of the circuit diagram. (I couldn't find the precise BME280 board in Fritzing. Notice, I've had to cross the SDA and SCL wires for this board.)
It was simple then to add the AMS1117 module to provide 3.3v:
Tethering - Setting up a Hotspot
US Carriers
I don't live in the US but I understand that some carriers - in their never-ending quest to rip us off - restrict phone tethering. If that's the case, you'll need to take it up with them.
The Principle
The principle of tethering is that you use your phone as an access point. So, our little weather station will connect to the internet through our phone and send its data to Cayenne. We can then view Cayenne on the phone's screen.
Android
For "How to set up a Wi-Fi hotspot on an Android phone" click this link.
iPhone
For "How to set up a Personal Hotspot on your iPhone or iPad" click this link.
The Code
Out and About
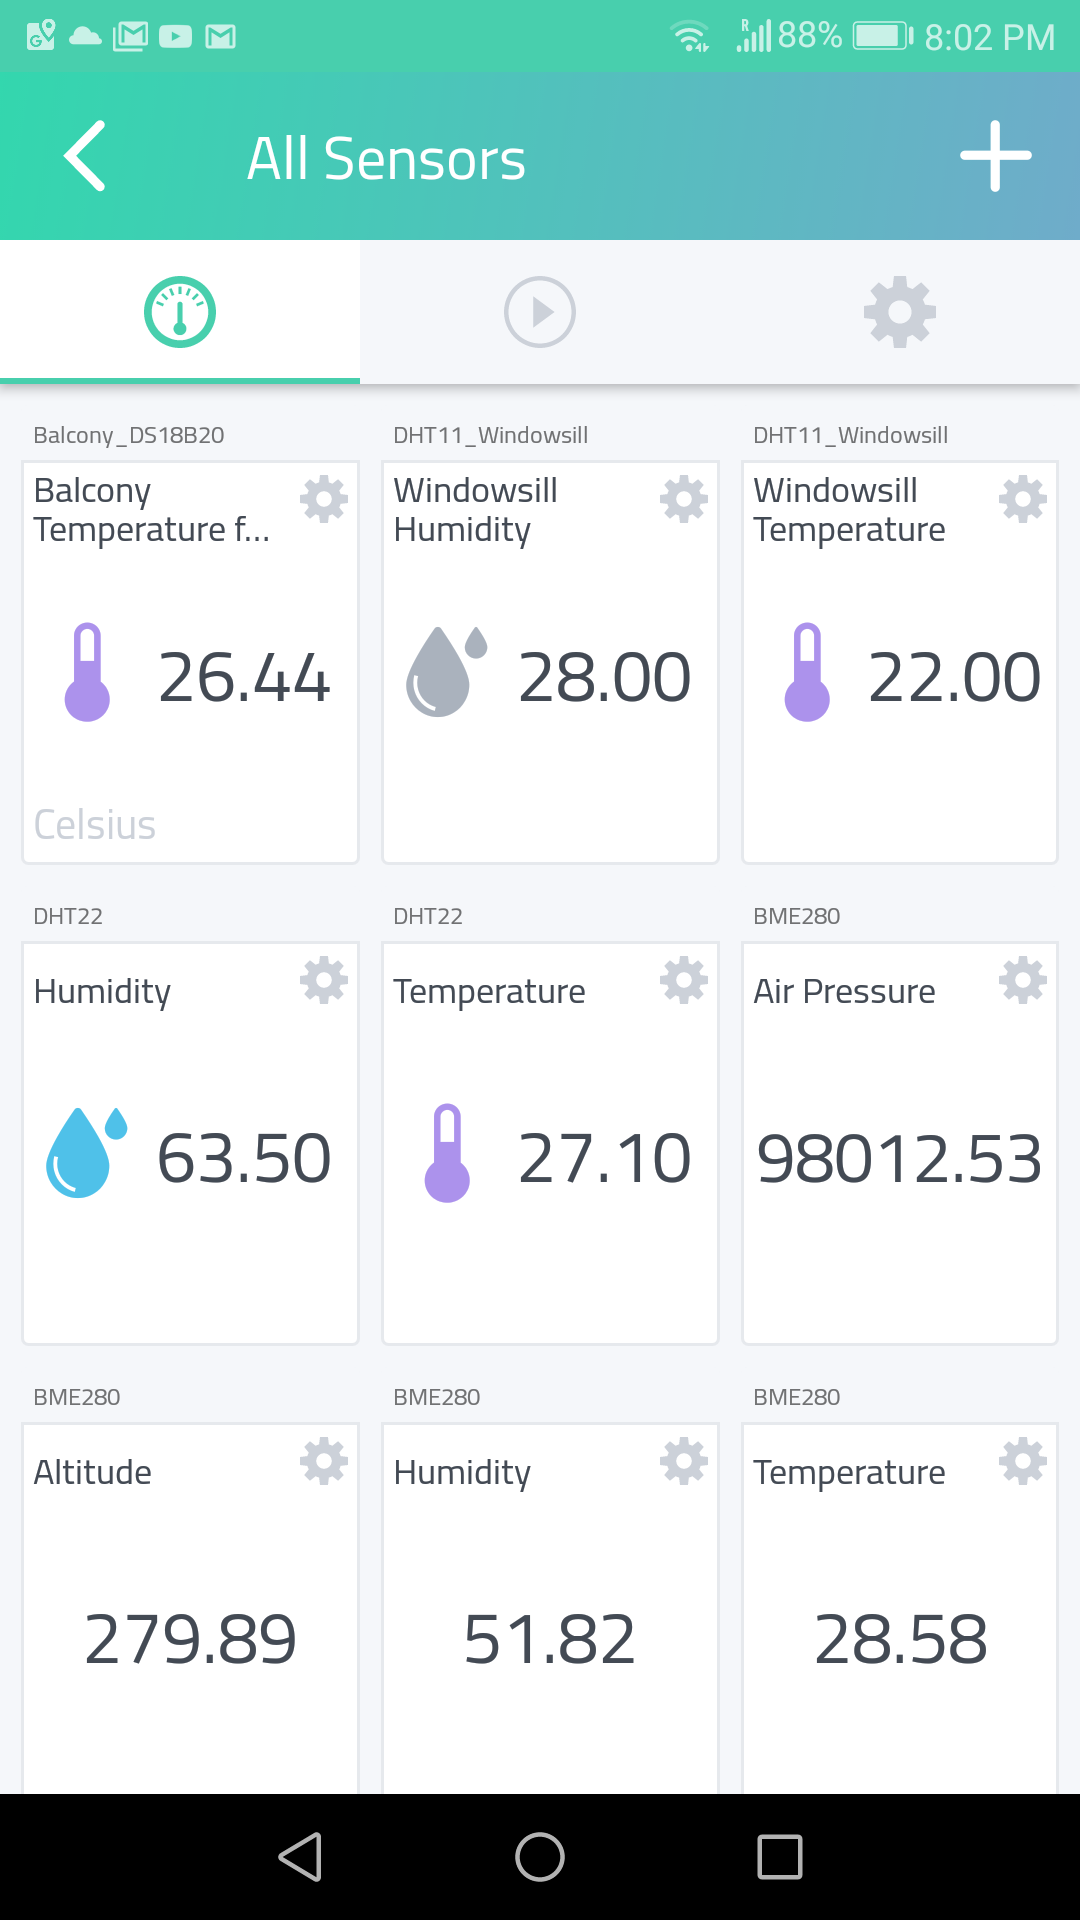
So, when you're out in the field, turn on your phone's tethering, power up your weather station, and log into Cayenne. You may need to give your BME280 a few minutes to settle down, but on your screen you'll get precise measurements for your exact location - a full blown personal weather station for less than $10!
Powering
If you have one of those USB 18650 control boards, it fits very nicely into the 5v rail. (In fact my board has 3.3v at the other side so I could have done away with the AMS1117 3.3V module, but I wanted to leave the project open for alternative power options.)