My addiction to clocks started a few years back when I got it into my head that I wanted to build a mechanical timepiece. I spent months scouring Google for a clock kit and all I came up with were mass-produced electronic movements.
That's until I found Dave Atkinson, a craftsman and master clock builder. Dave sells exquisite clock kits at his site, woodentimes (well worth a visit).
In the end, I built one of Dave's clocks. It was made of paper and sticks and its pendulum swayed slowly for several months before giving out.
His beautiful wooden clocks last for generations.
If you want to read about this extraordinary Englishman, there's an article about him here.
From Cogs to Bytes
Having mastered the mechanical clock, the next challenge was the electronic clock.
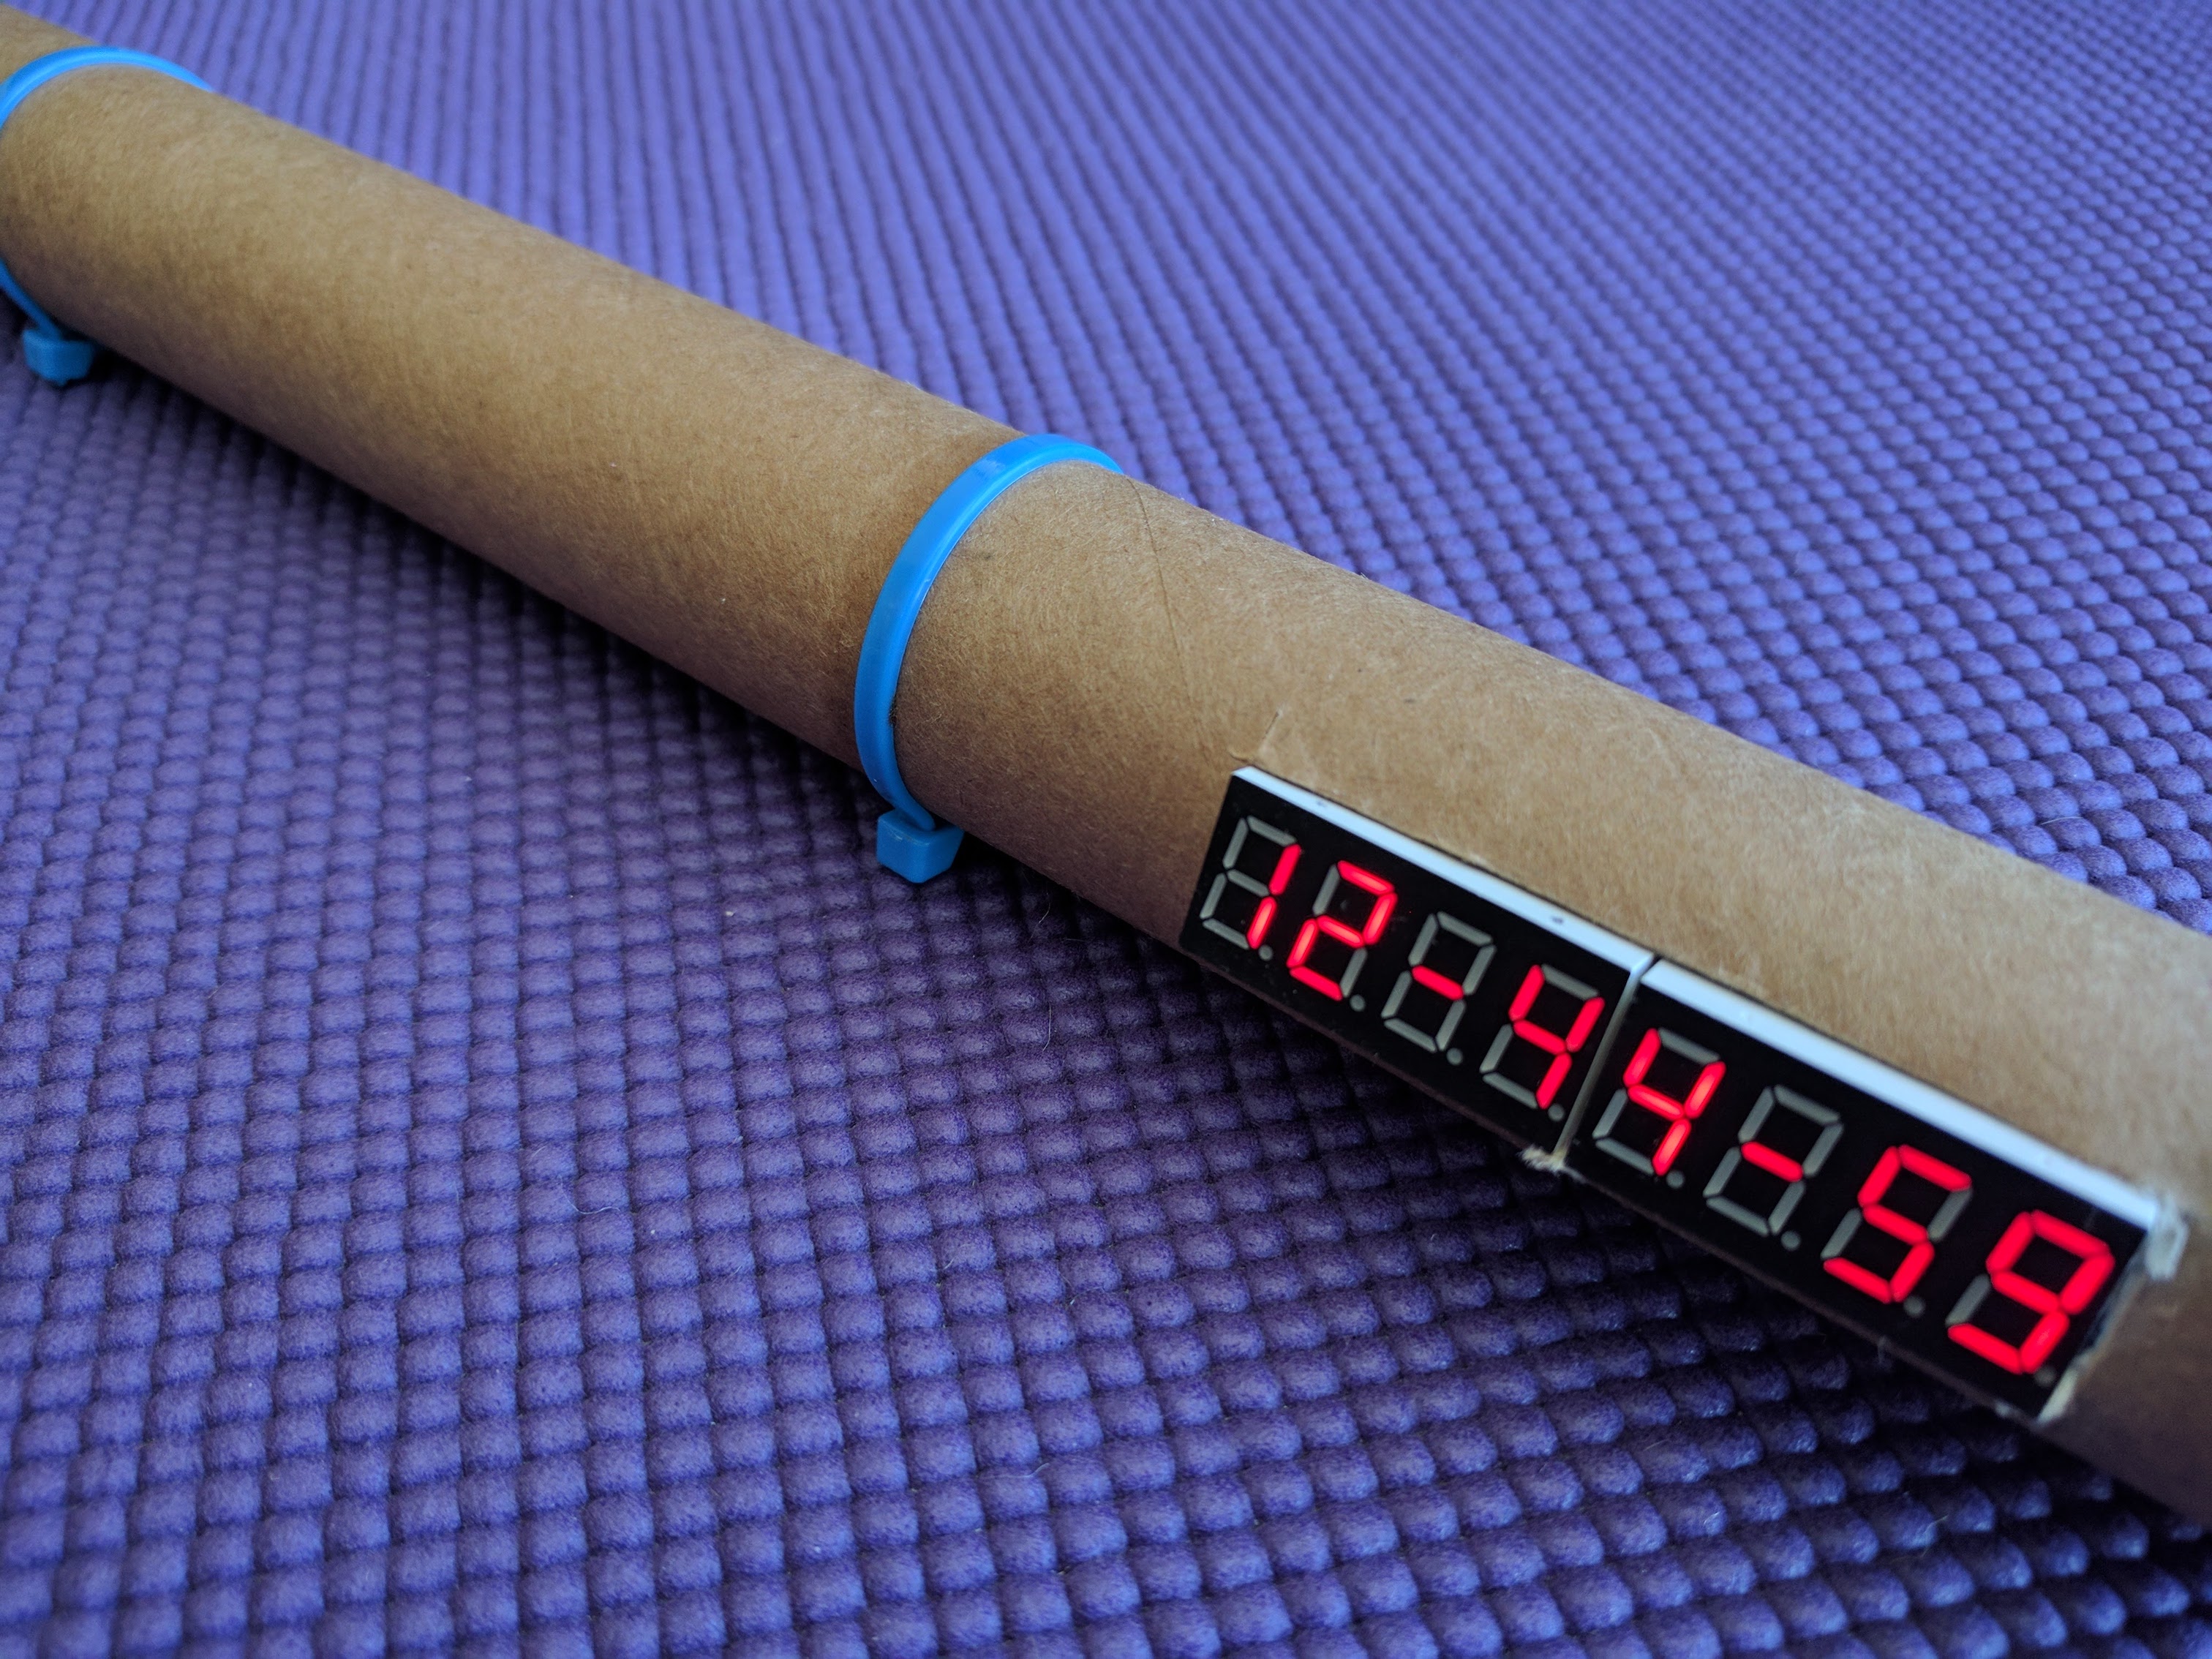
The internet is awash with people's Arduino/Raspberry Pi/ESP8266 clock builds, but for reasons I cannot fathom, I couldn't find one that worked for my specific components. I wanted an 8-digit 7-segment display with time, date, and temperature.
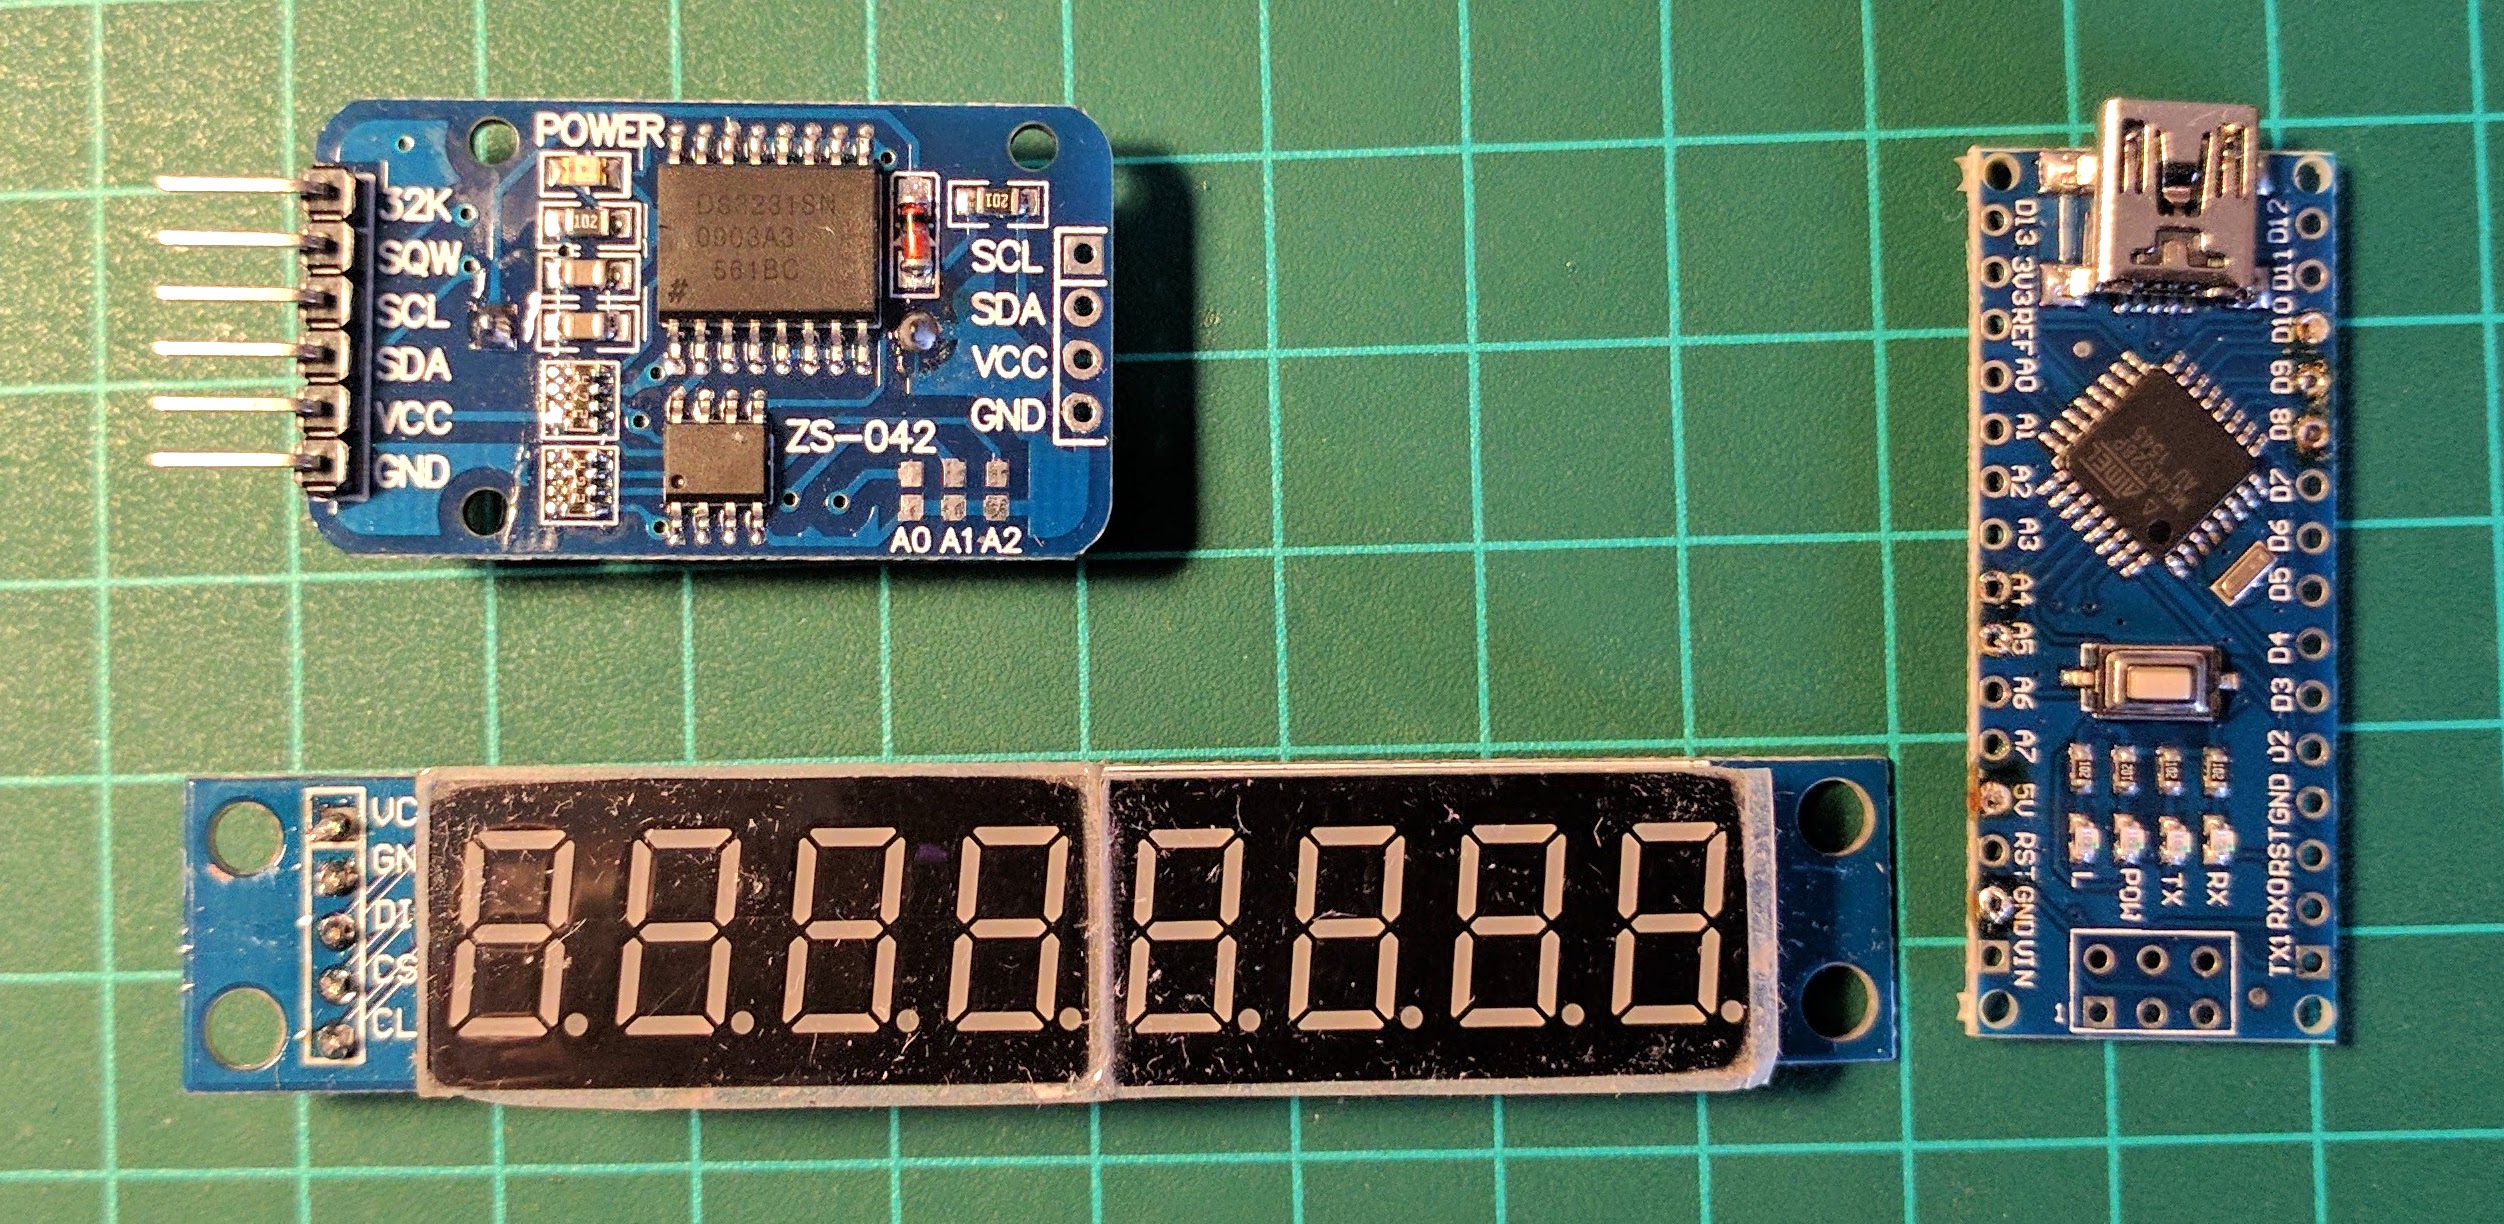 Here's my component list:
- Cheap Chinese Arduino nano
- 8-digit, 7-segment display with Max7219 chip
- DS3231 real time clock (RTC)
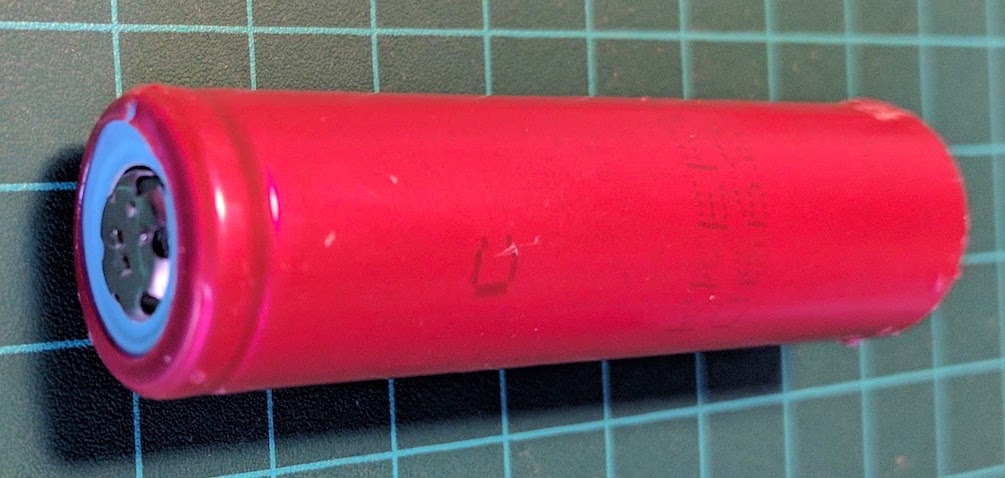
- 18650 Lithium Ion battery (acquired from old laptop). This isn't ideal as it's voltage is too low, but it works for a few hours. 5v through the USB is probably better. **
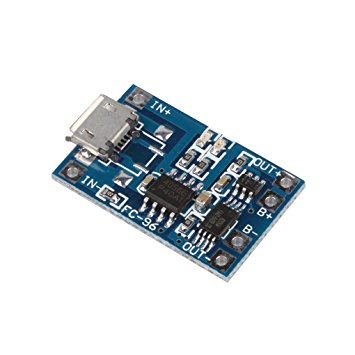
- TP4056 USB Lithium Ion charging and protection board **
** Optional
A word about the 18650
Many people acquire 18650s from old laptops. They're great, versatile Lithium Ions. However, 18650s pulled from laptops are unregulated - because breaking them out removes the laptop's built-in regulation. If you're using an 18650, you'll need a regulator; over-discharge can kill them altogether, and over-charging can get nasty with Lithium.
So, get yourself some LiPo charging/protection boards. I recommend the cheap but effective TP4056 pictured here.
Keeping time
Arduino nanos are dumb. Booted they can control just about anything, but the moment you cut the power, they brick. They have no idea what time it is.
Enter the DS3231. It's a Real Time Clock with built-in temperature gauge. With its button battery, once you've programmed the time, it'll remember until the power runs out. The DS3231 is slowly replacing the DS1307. It's advertised as an "extremely accurate I²C real-time clock" - and it gets its accuracy from an on-board temperature regulator.
Most electronic circuits keep time by counting vibrations in a crystal when a voltage passes through. (We're talking tens of thousands per second). When something vibrates at such speeds it naturally gets hot - affecting its oscillation - which in turn affects timekeeping - which is the DS1307.
The newer DS3231 monitors the crystal's temperature and automatically compensates for changes - ensuring accurate timekeeping.
And we benefit from excellent timekeeping, but also a built-in temperature sensor.
Putting it all together
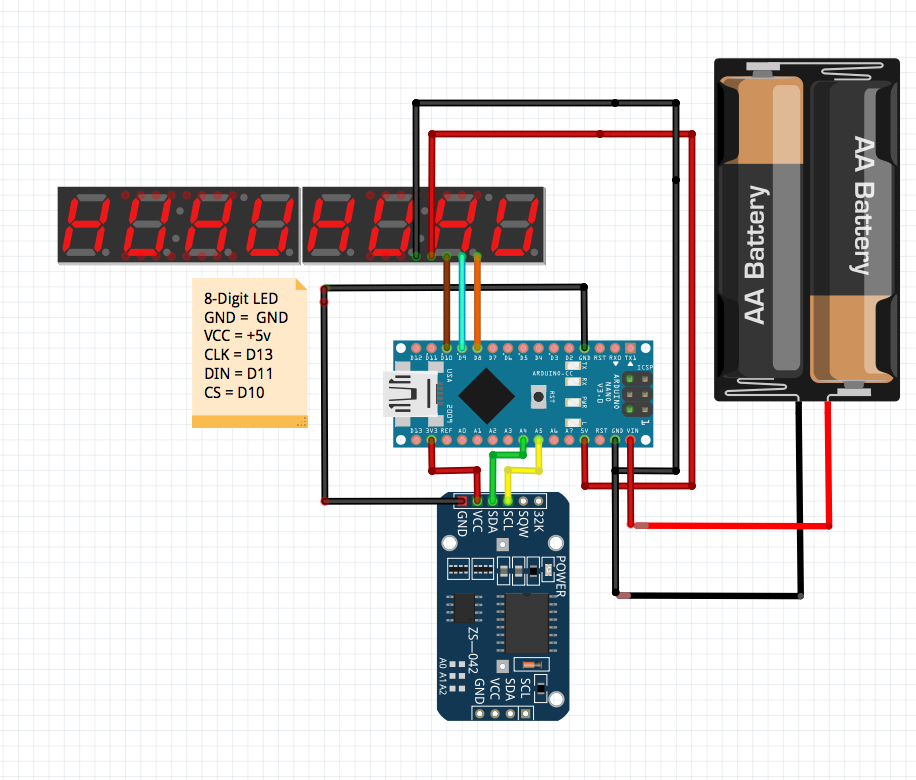 (I couldn't find an 18650 or 8-Digit LED, but you'll get the idea.)
Making it talk
So, we have the components and we need to bring it to life. First, we need to set the time and date on the RTC. Once we've done that, we need the Arduino to read the data from the RTC, then translate it for display on the 7-segment display.
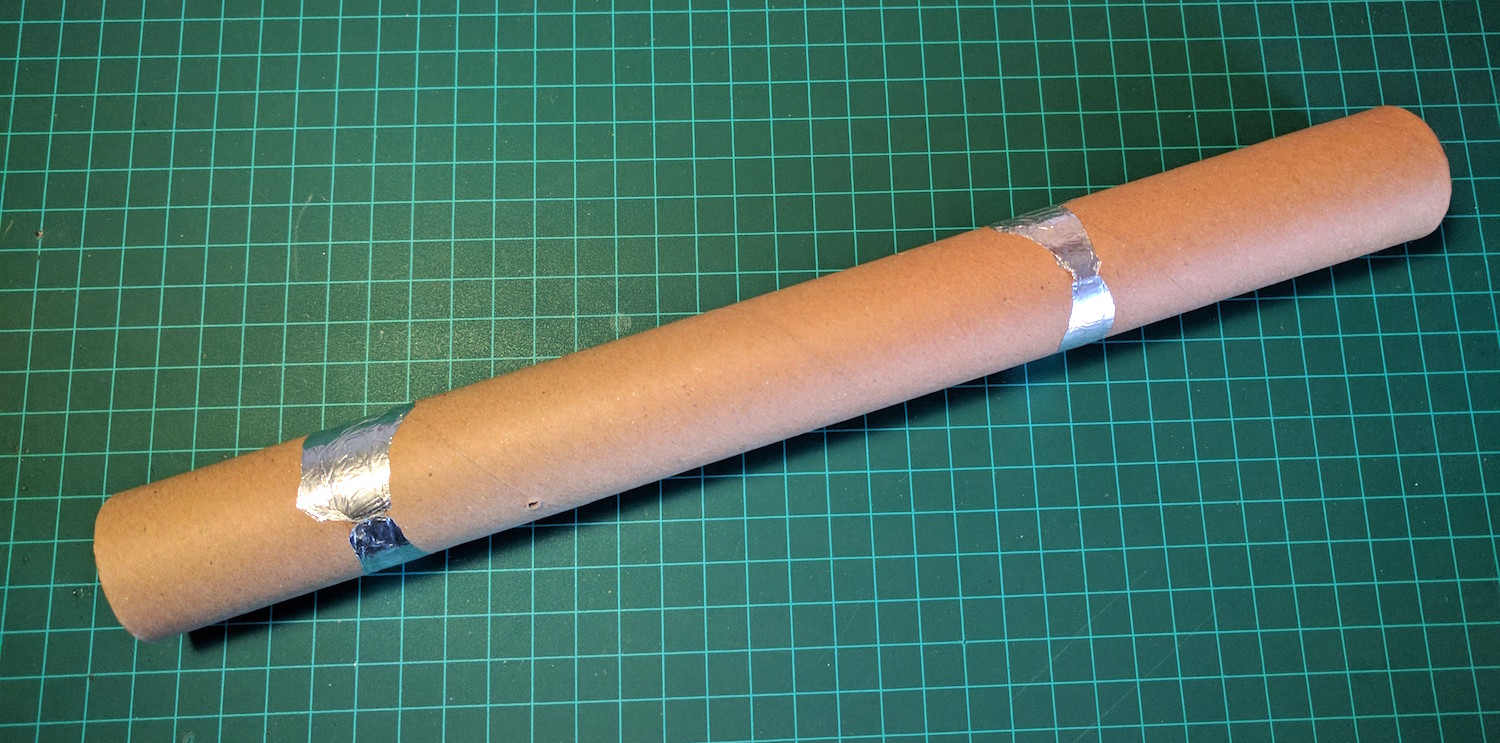
And that's where I connect you to my co-blogger Allan's post. But before you go, take a look at my kitchen roll creation. All components are discretely held in the tube. Zip ties stop it from rolling over and hold it at the correct angle.
Allan explains how it cycles through time, date and temperature, reading the RTC and lighting the segments through the MAX7219 chip.