UPDATE: This is a two part post. The second part can be found here
I've been going to a lot of music festivals the last few years. It is usually the same - 3 days over the weekend in the middle of the desert or the forest, bringing a tent, listening to good music with thousands of other people. The last two years I noticed more and more people, including myself, switched from "stupid" phones to smartphones. The smartphone is so smart that after one day in the festival it will tell you "Hey man, my battery is low but it's cool cause you should disconnect a bit from the outside world anyways, so I'm shutting down". Some people like it, some people don't, but then comes the end of the festival, and you need to contact with your friends to get a ride or to give them a ride and when there are no phones available the situation can become a bit annoying, not the end of the world - but still annoying.
Some people bring with them a power bank and charge their phones. That's a great solution but it is not very social, everyone always want to keep the energy for themselves. That's when I started thinking about building a solar station for charging many phones at once. This is how it looks like eventually:
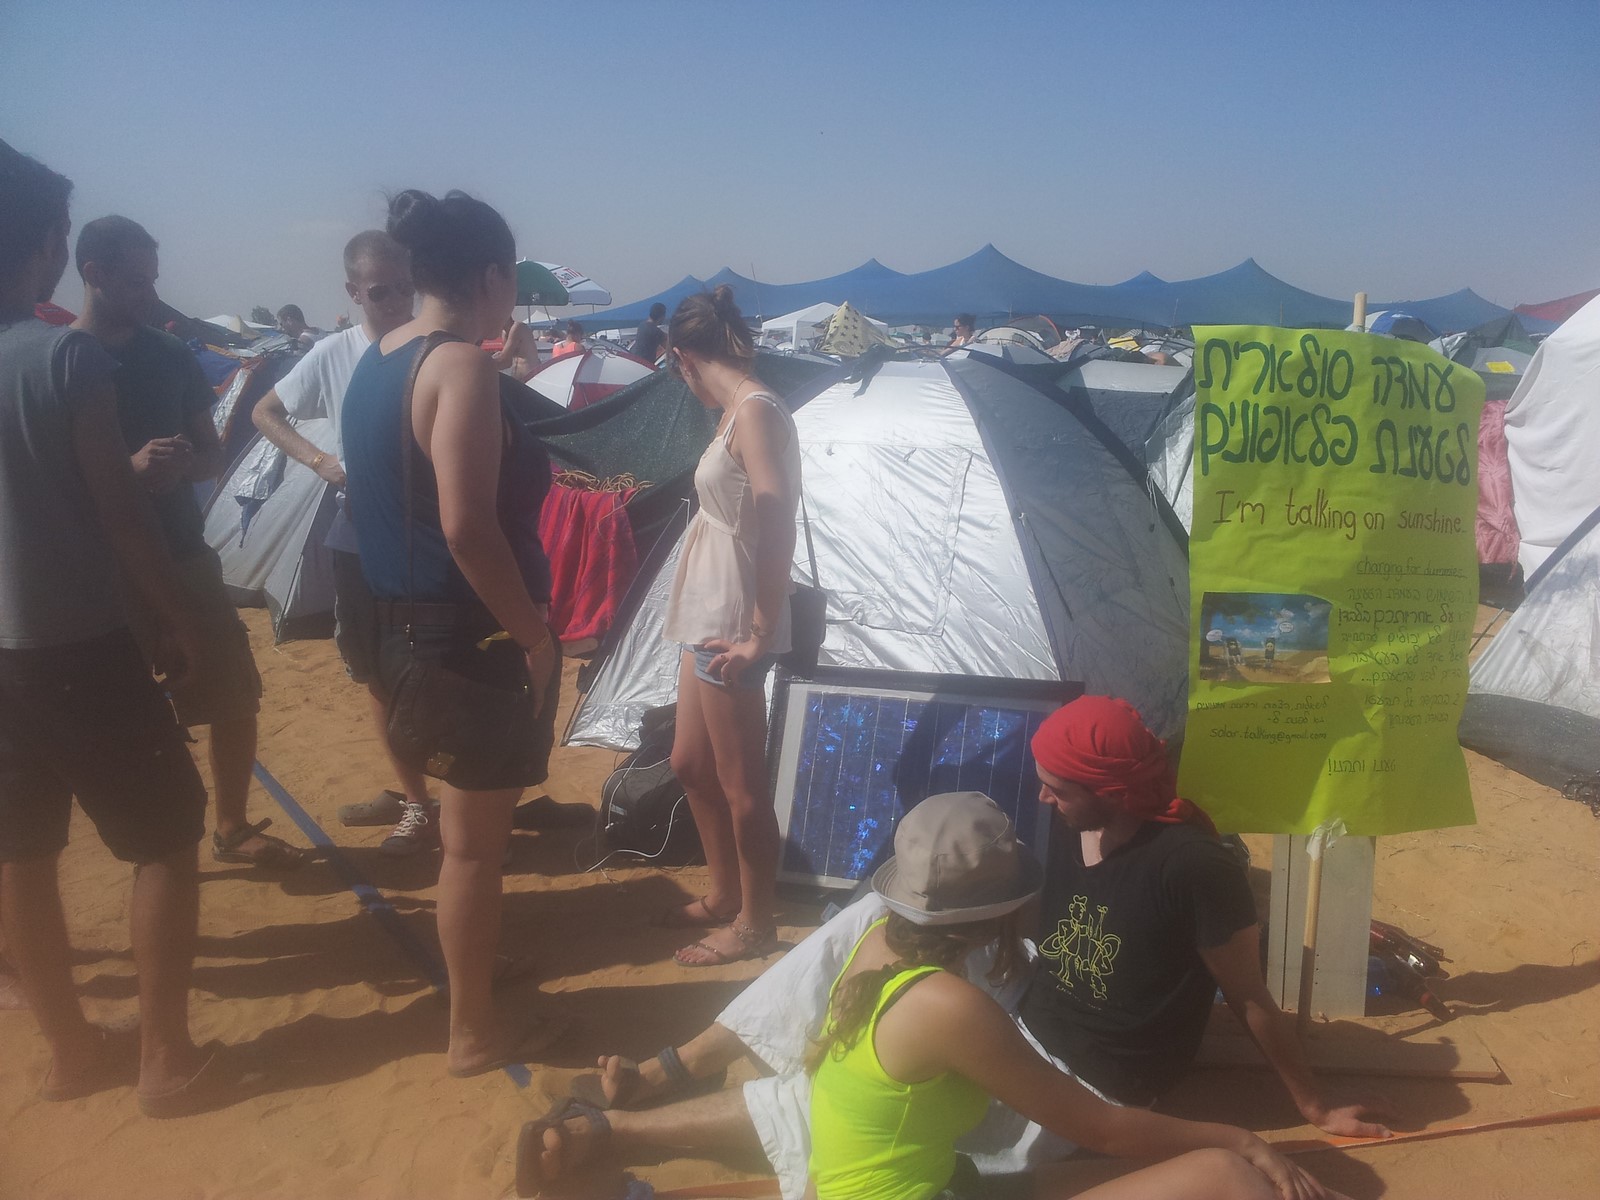
This idea was a great success!! It made people to come from all around the festival area to charge their phones, stay there for a while, social with other people charging their phones, exactly like a smoking area - only smoke free! Unless the times when people were smoking... :P
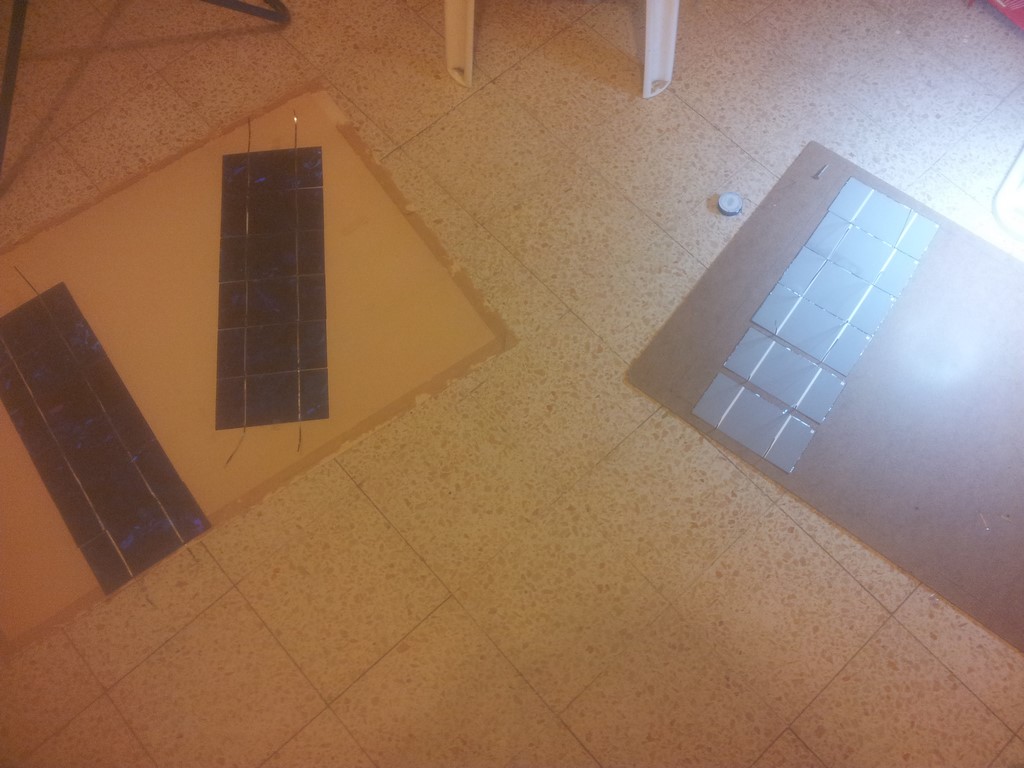
I started thinking this project 3 months before the festival and had no idea at all about solar power, so I began by getting some of the ingredients I knew I need and watched a few youtube movies on the subject. I ordered about 50 pieces of DIY solar cells for about 50 USD, each can prduce 0.5V and 4A at best. I thought it should be enough and also 2 Watts for 1 USD is a good price in the solar power world. Until I got my orders, I watched 3 parts of the DIY solar panels on the "GreenSciencePower" channel on youtube. The tutorials were awesome and very well explained but it made me realize building a robust solar panel is more expensive than I thought. I decided to aim to my target - building a panel as fast and as cheap as I can, which will still be robust enough to survive a festival. Together with my order I also got a tabbing wire and flux pen which I realized later were VERY crucial for this project. According the tutorial I watched, the stages to get the panel done (In short) are:
- Solder tabbing wire on each of the cells.
- Connect all cells into one panel.
- Build a frame to put the panel in, and put a glass to cover it.
- Pour resin over the panel and the glass, wait a while until it is hard and close the frame.
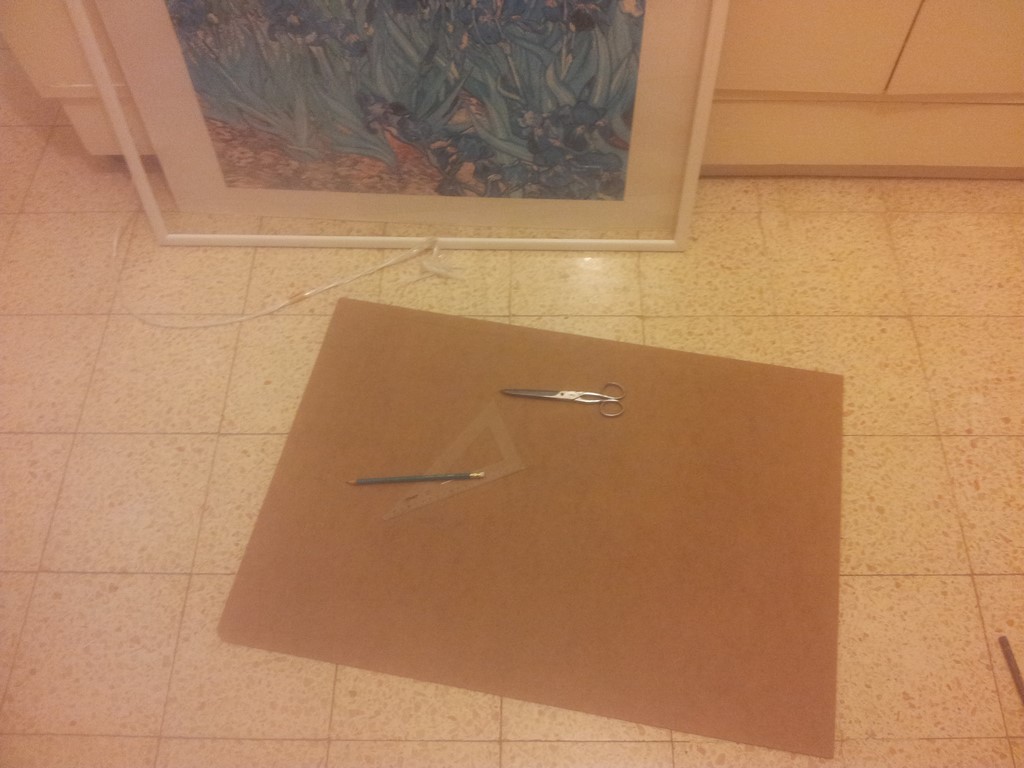
If you follow these instructions you'll get a real professional solar panel which will hold through sun, dust, rain and storms for at least a few years. In terms of pricing, the glass and the resin at steps 3 and 4 can cost up to double the price of the solar cells - making the solar panel very expensive. As part of my line of work I decided to skip step 4 and reduce the expenses of step 3. Instead of building a wooden frame and cutting a glass with the right measures, I've used an old picture frame and got everything I need. The only disadvantage was that I couldn't choose the size of the frame and had to fit the panel into the frame.
So I started by disassembling a picture frame:
 While measuring the frame I realized I could fit 24 (4x6) cells in it, which means if I connect them in series the panel will produce 12V and max 48 Watts. Let's calculate a few numbers - Charging your smartphone using a USB on your computer will take 2.5 Watts (5V x 0.5A). Charging the newest smartphone with a fast charger can get up to 10 Watts (5V x 2A).
Step 1 - Soldering the tabbing wire
Soldering the tabbing wire to each cell is a very delicate work. The cell usually has one or two conducting lines, where the line on the front part of the cell is the negative and the line on the back of the cell is the positive. The cells are so fragile that soldering a common wire using tin wire will most likely break your cells (believe me! I've tried...). The idea is to use the flux pen on the conducting lines of the cell, then put the tabbing wire on the line and solder it gently. The tabbing wire is covered with tin and will connect to the conductive line of the cell. In case it does not connect you can add a bit of tin from a tin wire. Each tabbing wire should be as long as two cells since you will connect each two cells with the same tabbing wire afterwards:
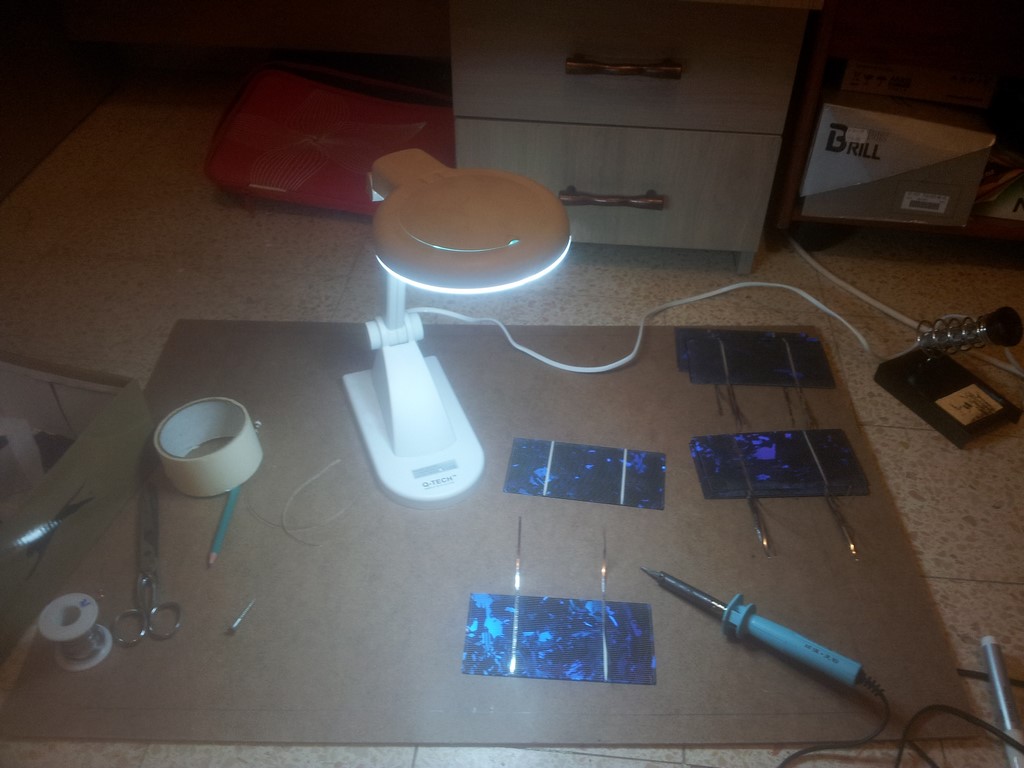
If you have two conductive lines on the cell use both of them - It'll make the panel more robust such that even if a cell breaks in the middle it will still work since it is connected at two parts.
Make sure you have extra cells since some will break for sure! I bought 50 cells, used 24 and broke another 20. Failing and keep trying is the right way to success :)
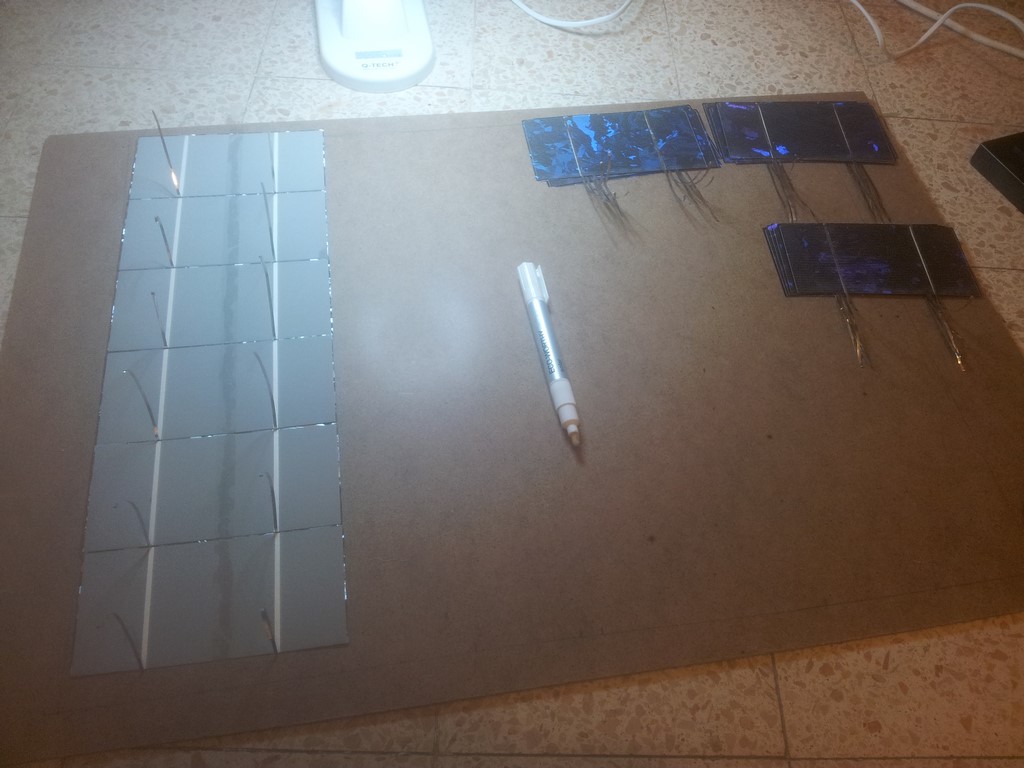
Step 2 - Connecting all cells
After having 24 cells with soldered tabbing wires we can continue connect all cells in series. This is also a very delicate work. We put one column of 6 cells together upside down as seen in the last picture, taking the tabbing wires to the back of the cells and connecting the wires from each cell to the back of the next cell.
After finishing all 4 columns we can put them together next to each other. Since we are going to connect all column in series we should make sure each column is the in the opposite direction to the one next to it in.
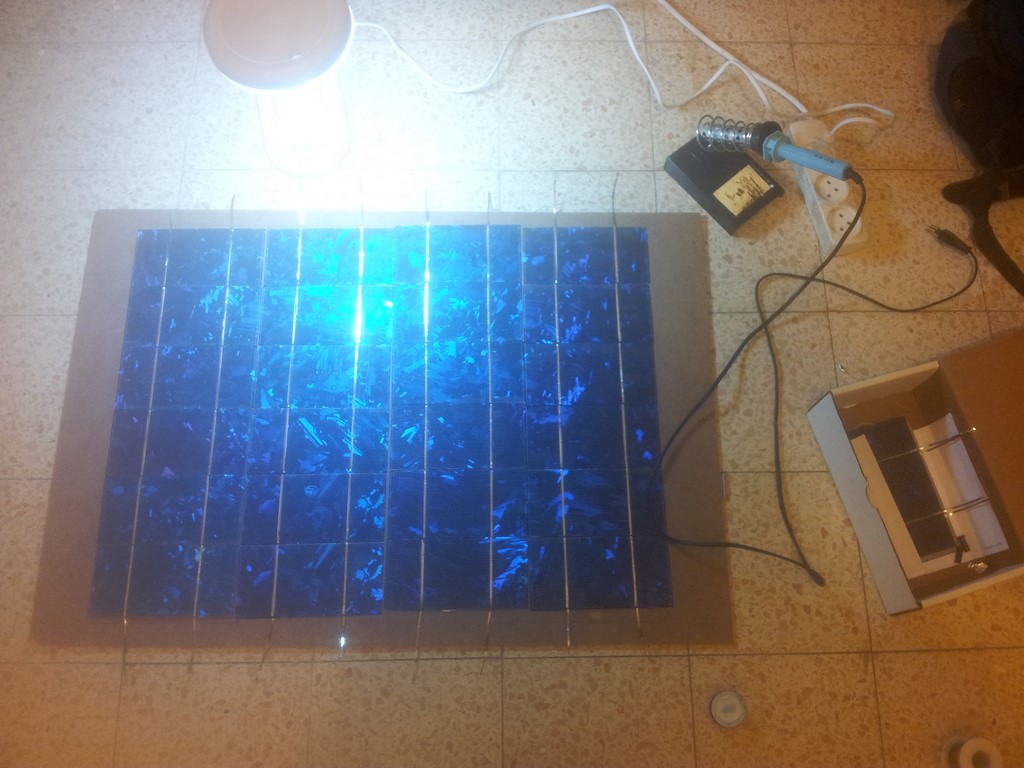
Now we can connect each two columns (note the "zigzag" shape) and test that one side of the panel is connected with the other side as it should.
Step 3 - Putting the panel in the picture frame
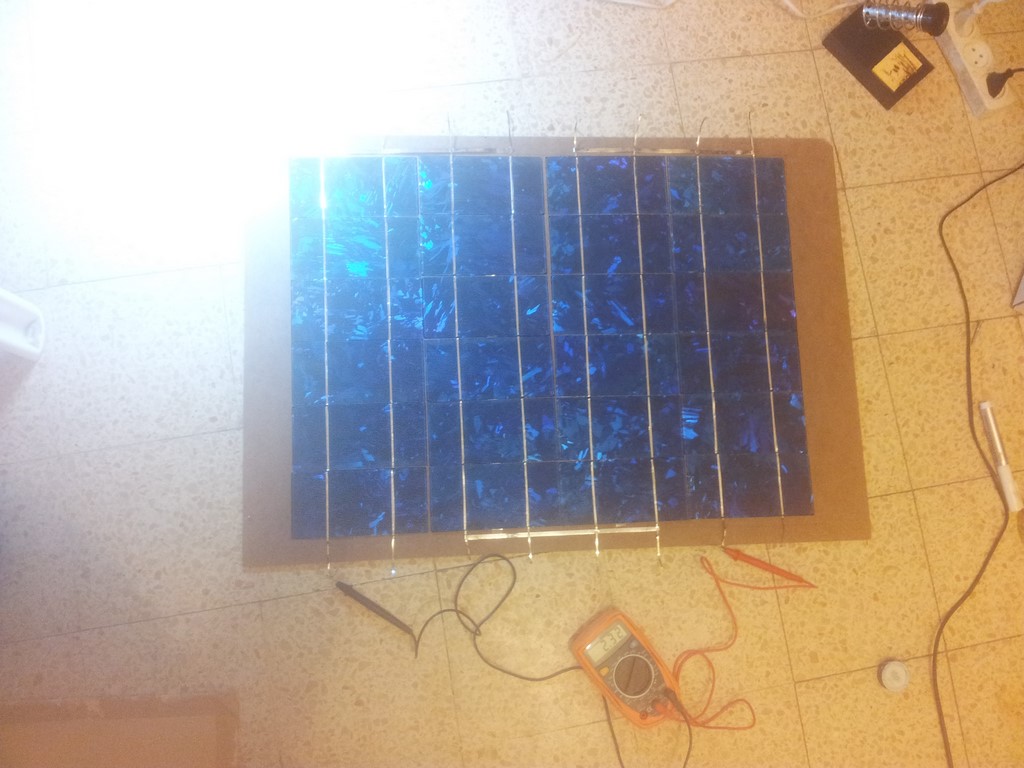
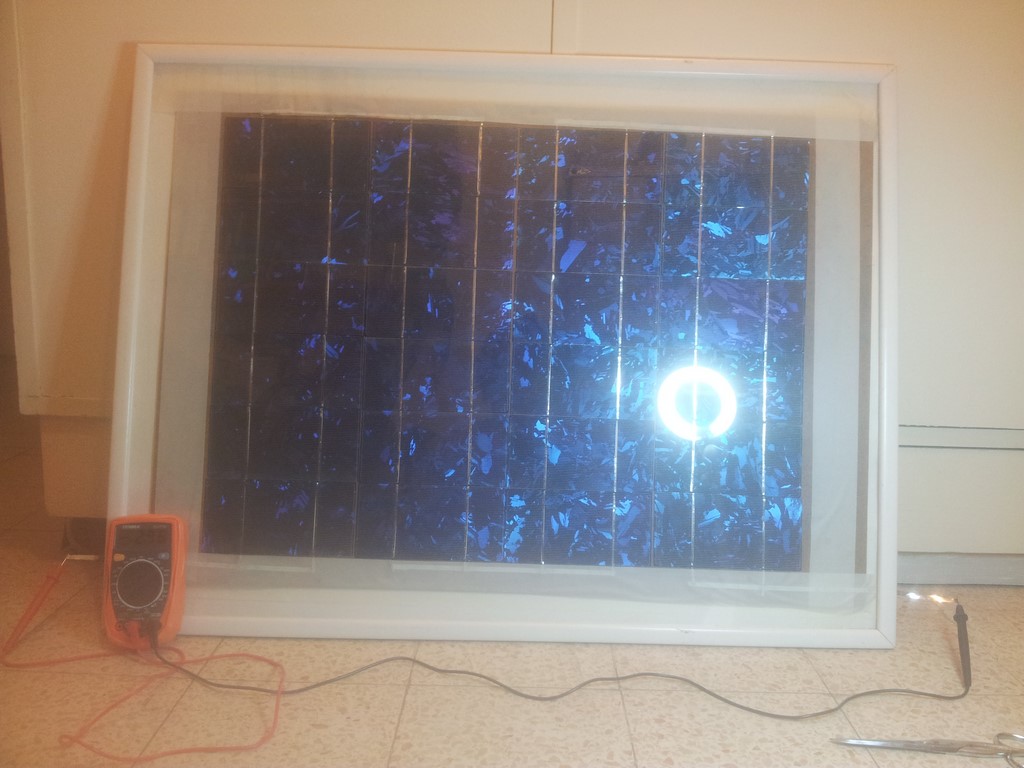
Our panel is ready, and working, but now come the really scary part. We need to take the entire fragile panel, put it on the glass, and close the frame. If it will break now all what have done was for nothing. A smart thing to do before continuing is to solder two more long tabbing wires to both sides of the panel which will be used later as the negative and positive connectors of the panel, and also tape everything you can to the board. Another good idea would be to put some glue behind a few spots of the panel so it will hold until you tightened the glass on it.
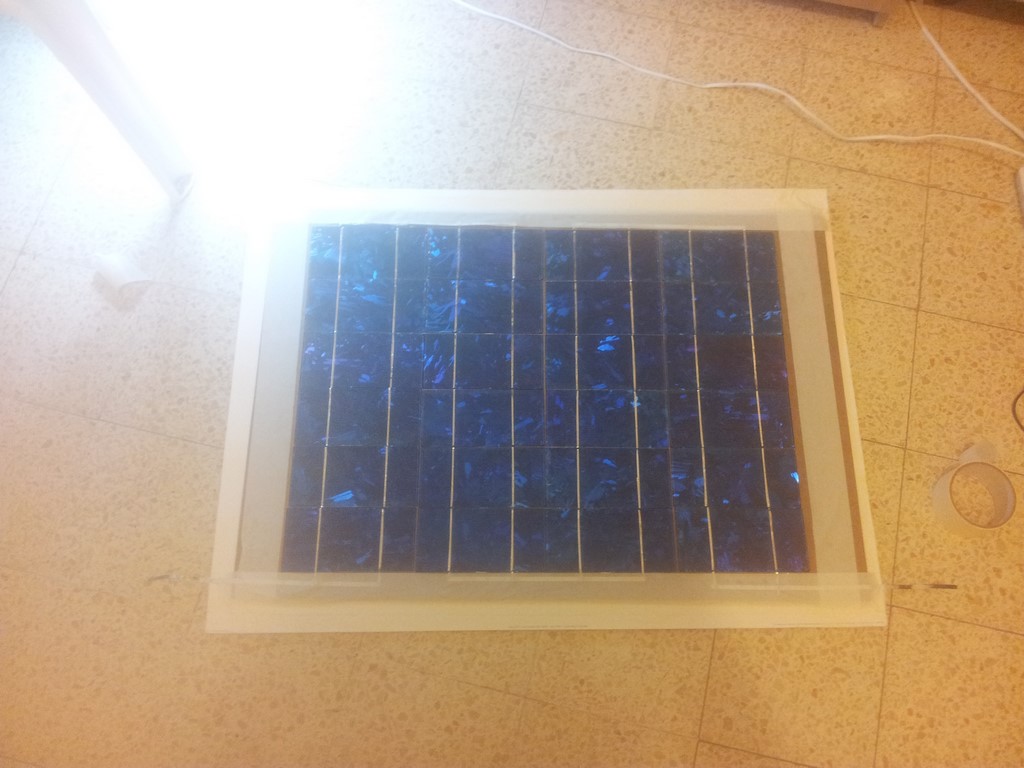
Carefully put the glass and the frame on the panel and then turn it over and close the frame. Make sure to tighten the cells and the glass one to another as much as you can when closing the frame - This will determine how robust your panel will be.
Testing and notes
That's it! Our solar picture/panel is ready, and it looks nicer than many other pictures I've seen at other people houses. My first attempt to examine this panel was with one of my led strips. We expect it to give 12V and the led strip need 12V as well so I thought it'll be a good candidate. I connect it on my porch and slowly started opening the windows:
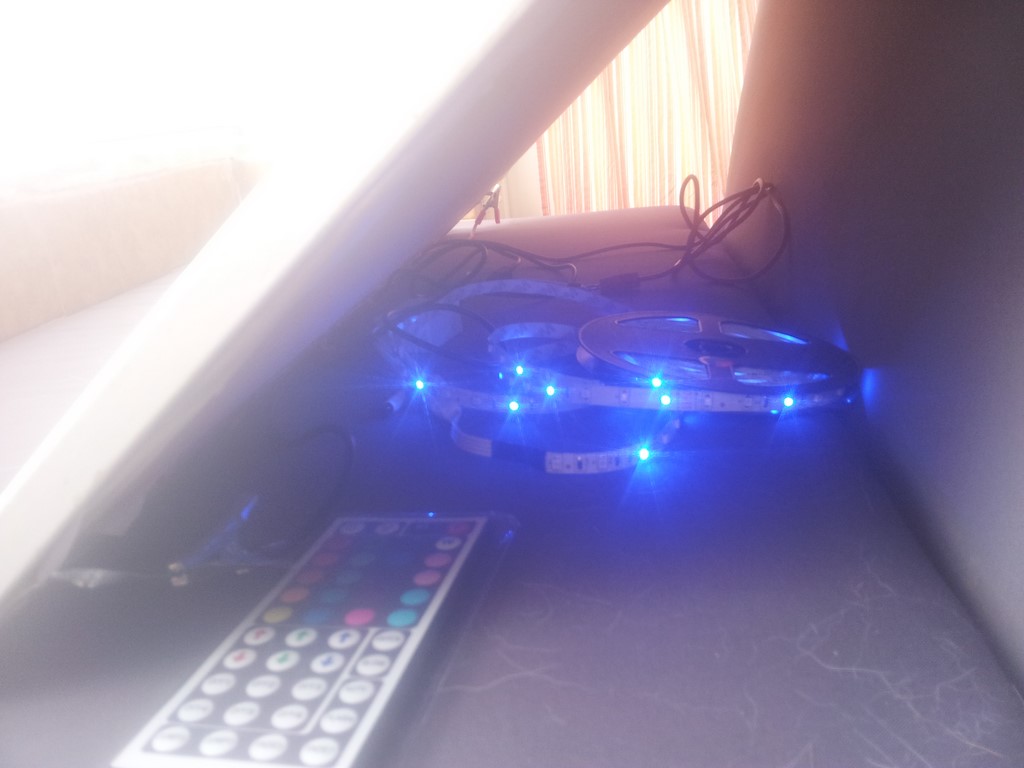
It works!
A few more notes I figured out after testing the cells:
- Each cell will give 0.5V when decent light is available (even from a lamp). The current will become higher as more light is available. A lamp will give a very small amount of current.
- You'll get the highest currents when the panel is directed straight to the sun. Any angle between the panel and the sun will reduce the panel efficiency.
- All cells must give the same current, just like batteries in series. If you cover even one of the cell the entire panel will not work. If part of a cell will break into many pieces, the panel efficiency will be reduce drastically.
To conclude this part, building a solar panel, even when skipping some of the steps, is not such an easy job, it takes a lot of patience, could be expensive, but it is a very cool product to make. The first time it will work you'll feel like a caveman succeeding making fire for the first time - making energy out of "nothing" is really cool!. Finally, The cost of the panel was mostly the cost of the solar cells, and up to now it has been more than a year, passed through two festivals and it is still working perfectly.
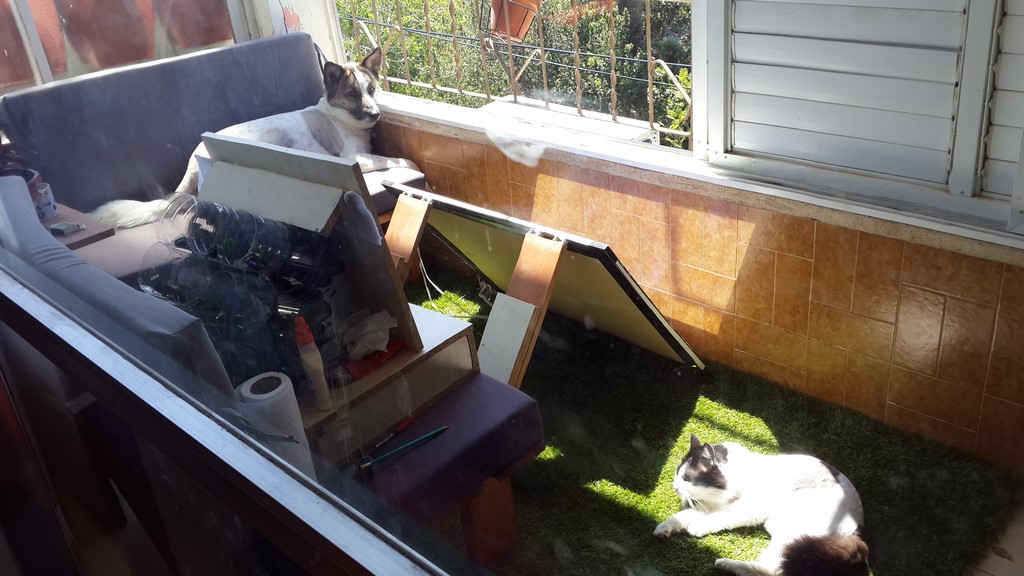
Charging phones using the solar panel is a major issue by itself and I will describe it in the next part of this post. I'll end with a photo I like very much of my pets enjoying the sun next to the panel which shows everyone benefit from the sun - it's awesome and it's free!
To keep reading, the second part of this post can be found here
AA