It's vacation time, and like everyone else, I wanted to protect my home while I was away.
I don’t have a dedicated alarm. (Prospective burglars please note - I’m back now and, the house is heavily fortified!) I did have a few Raspberry Pis and SD cards lying around, as well as a some projects I’ve already written about in this blog. I had 24 hours to do it, and using a few components and some imagination, I managed to put together a fairly extensive home protection and control system.
My Governing Principle
I decided that I would only use equipment I already have at home. No additional purchases were allowed.
I also wanted a variety of systems. They ended up including:
- web accessible cameras that would record motion and email photos in real time
- remote switches to allow activation of appliances remotely to simulate home occupation
- motion-sensitive speaker with prerecorded messages that would bark loud warnings to scare off intruders
- door and window sensors that would send an alert to my phone if something was opened
Costs
By my estimate, a system like that described above would cost a few thousand dollars. Mine, made from existing equipment, cost less than $100. (Mainly three old Raspberry Pis that would revert to their original use when I returned from vacation).
It worked
Now that I'm home I can reveal that my entire system worked perfectly. My only false positives were emailed photos taken by the motion cameras that detected extreme light changes as the sun penetrated at different times of day. This turned out to be useful because it forced me to view incoming photos and confirmed that the house was still intact.
Web cams with Motion Detection
For this I chose MotionEyeOS. Not only is it a beautifully designed UI, it is stable and works flawlessly. I had one instance running on an old Raspberry Pi 1, model B, and another on a simple RasPi model A+. The latter has only a single USB port, so I needed a powered USB hub to attach the Wi-Fi dongle and external web cam. The fact that I was running MotionEye on such "old" and minimalistic equipment is a testament to its stability. Kudos to programmer, Calin Crisan.
This is a view of the Admin page - which can be accessed remotely. Several cameras can be attached to the Pi. In my case, I had two Pis in different parts of the house.
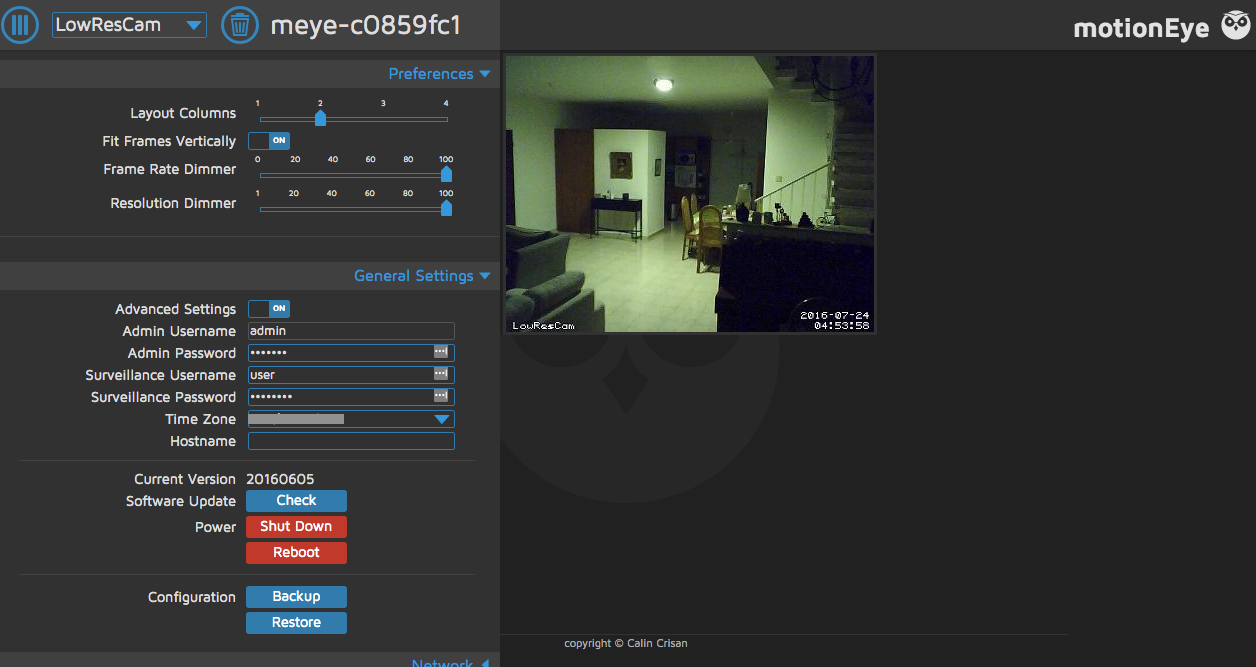
"Motion sensing" in such systems is performed by comparing successive frames. If pixels in one frame are substantially different from pixels in the next frame, it is assumed something moved in the frame. Images of "changed" frames are stored, and a copy emailed to a specified account. The "change threshold" can be specified by the user. I had mine set to 5%. In other words, if 5% of the pixels in one frame are different from the next frame, "movement" is detected.
I encountered two significant issues with emailing of photos.
I instructed MotionEyeOS to send photos to my gmail address. I spent some time trying to figure out why it didn't work. By examining the logs I eventually discovered that my Google two factor authentication got in the way. To resolve the problem I installed an App Specific Password.
After a while, on one Pi, the OS stopped sending photos. The email would arrive, but with no attachments. I struggled with settings for a time before discovering that the RasPi's memory was over-burdened. I'd used the Pi on a previous occasion and it had recorded thousands of photos of a tree swaying in the wind. With so many photos to index, the application wasn't able to "find" my latest photos in time to attach them to the outgoing email. Thus, the email would be sent without the photos. I resolved the issue by deleting 3,800 photos of a tree!
In addition to emailing photos, both cameras allowed live streaming. To achieve that, I needed to forward a port in my router. (A home router is usually closed to the outside world. To allow access to a device inside the home network, it's necessary to "open" or "forward" the incoming request for access to the intended device.) I used no-ip.com to track the dynamic IP address provided by my ISP. No-ip allows a free incidence of Dynamic DNS. (That has to be renewed monthly). A script running on the RasPi informs No-ip of the current IP address.
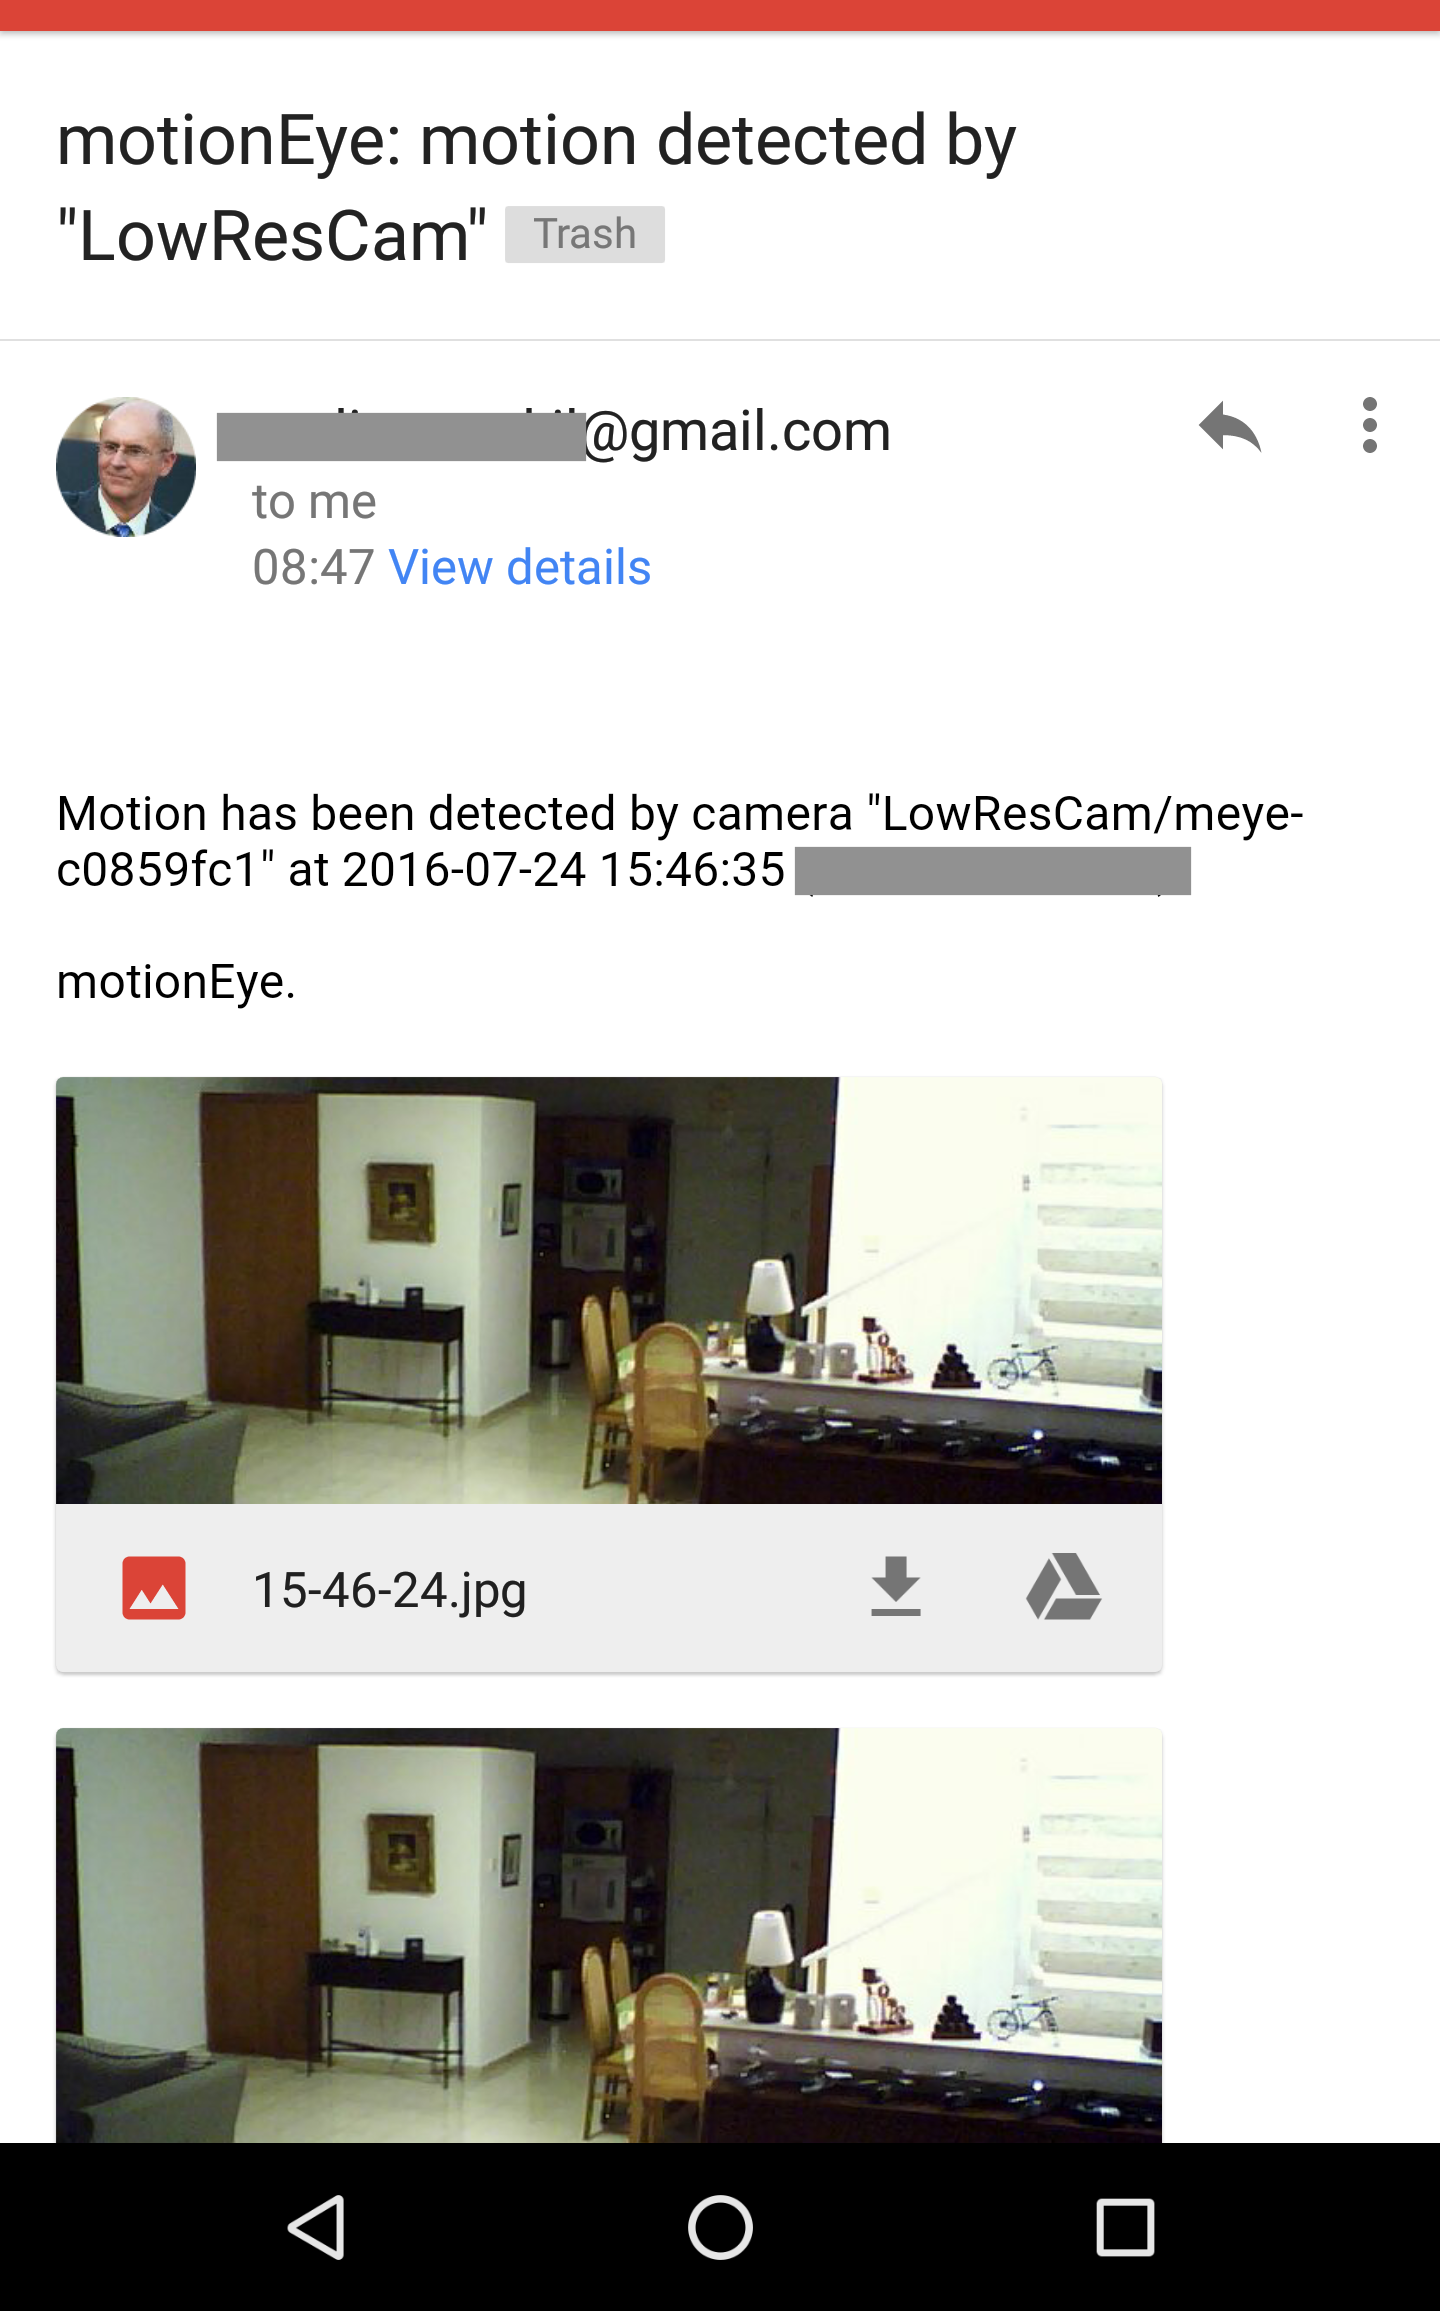
This is what the incoming email message looks like on an Android phone:
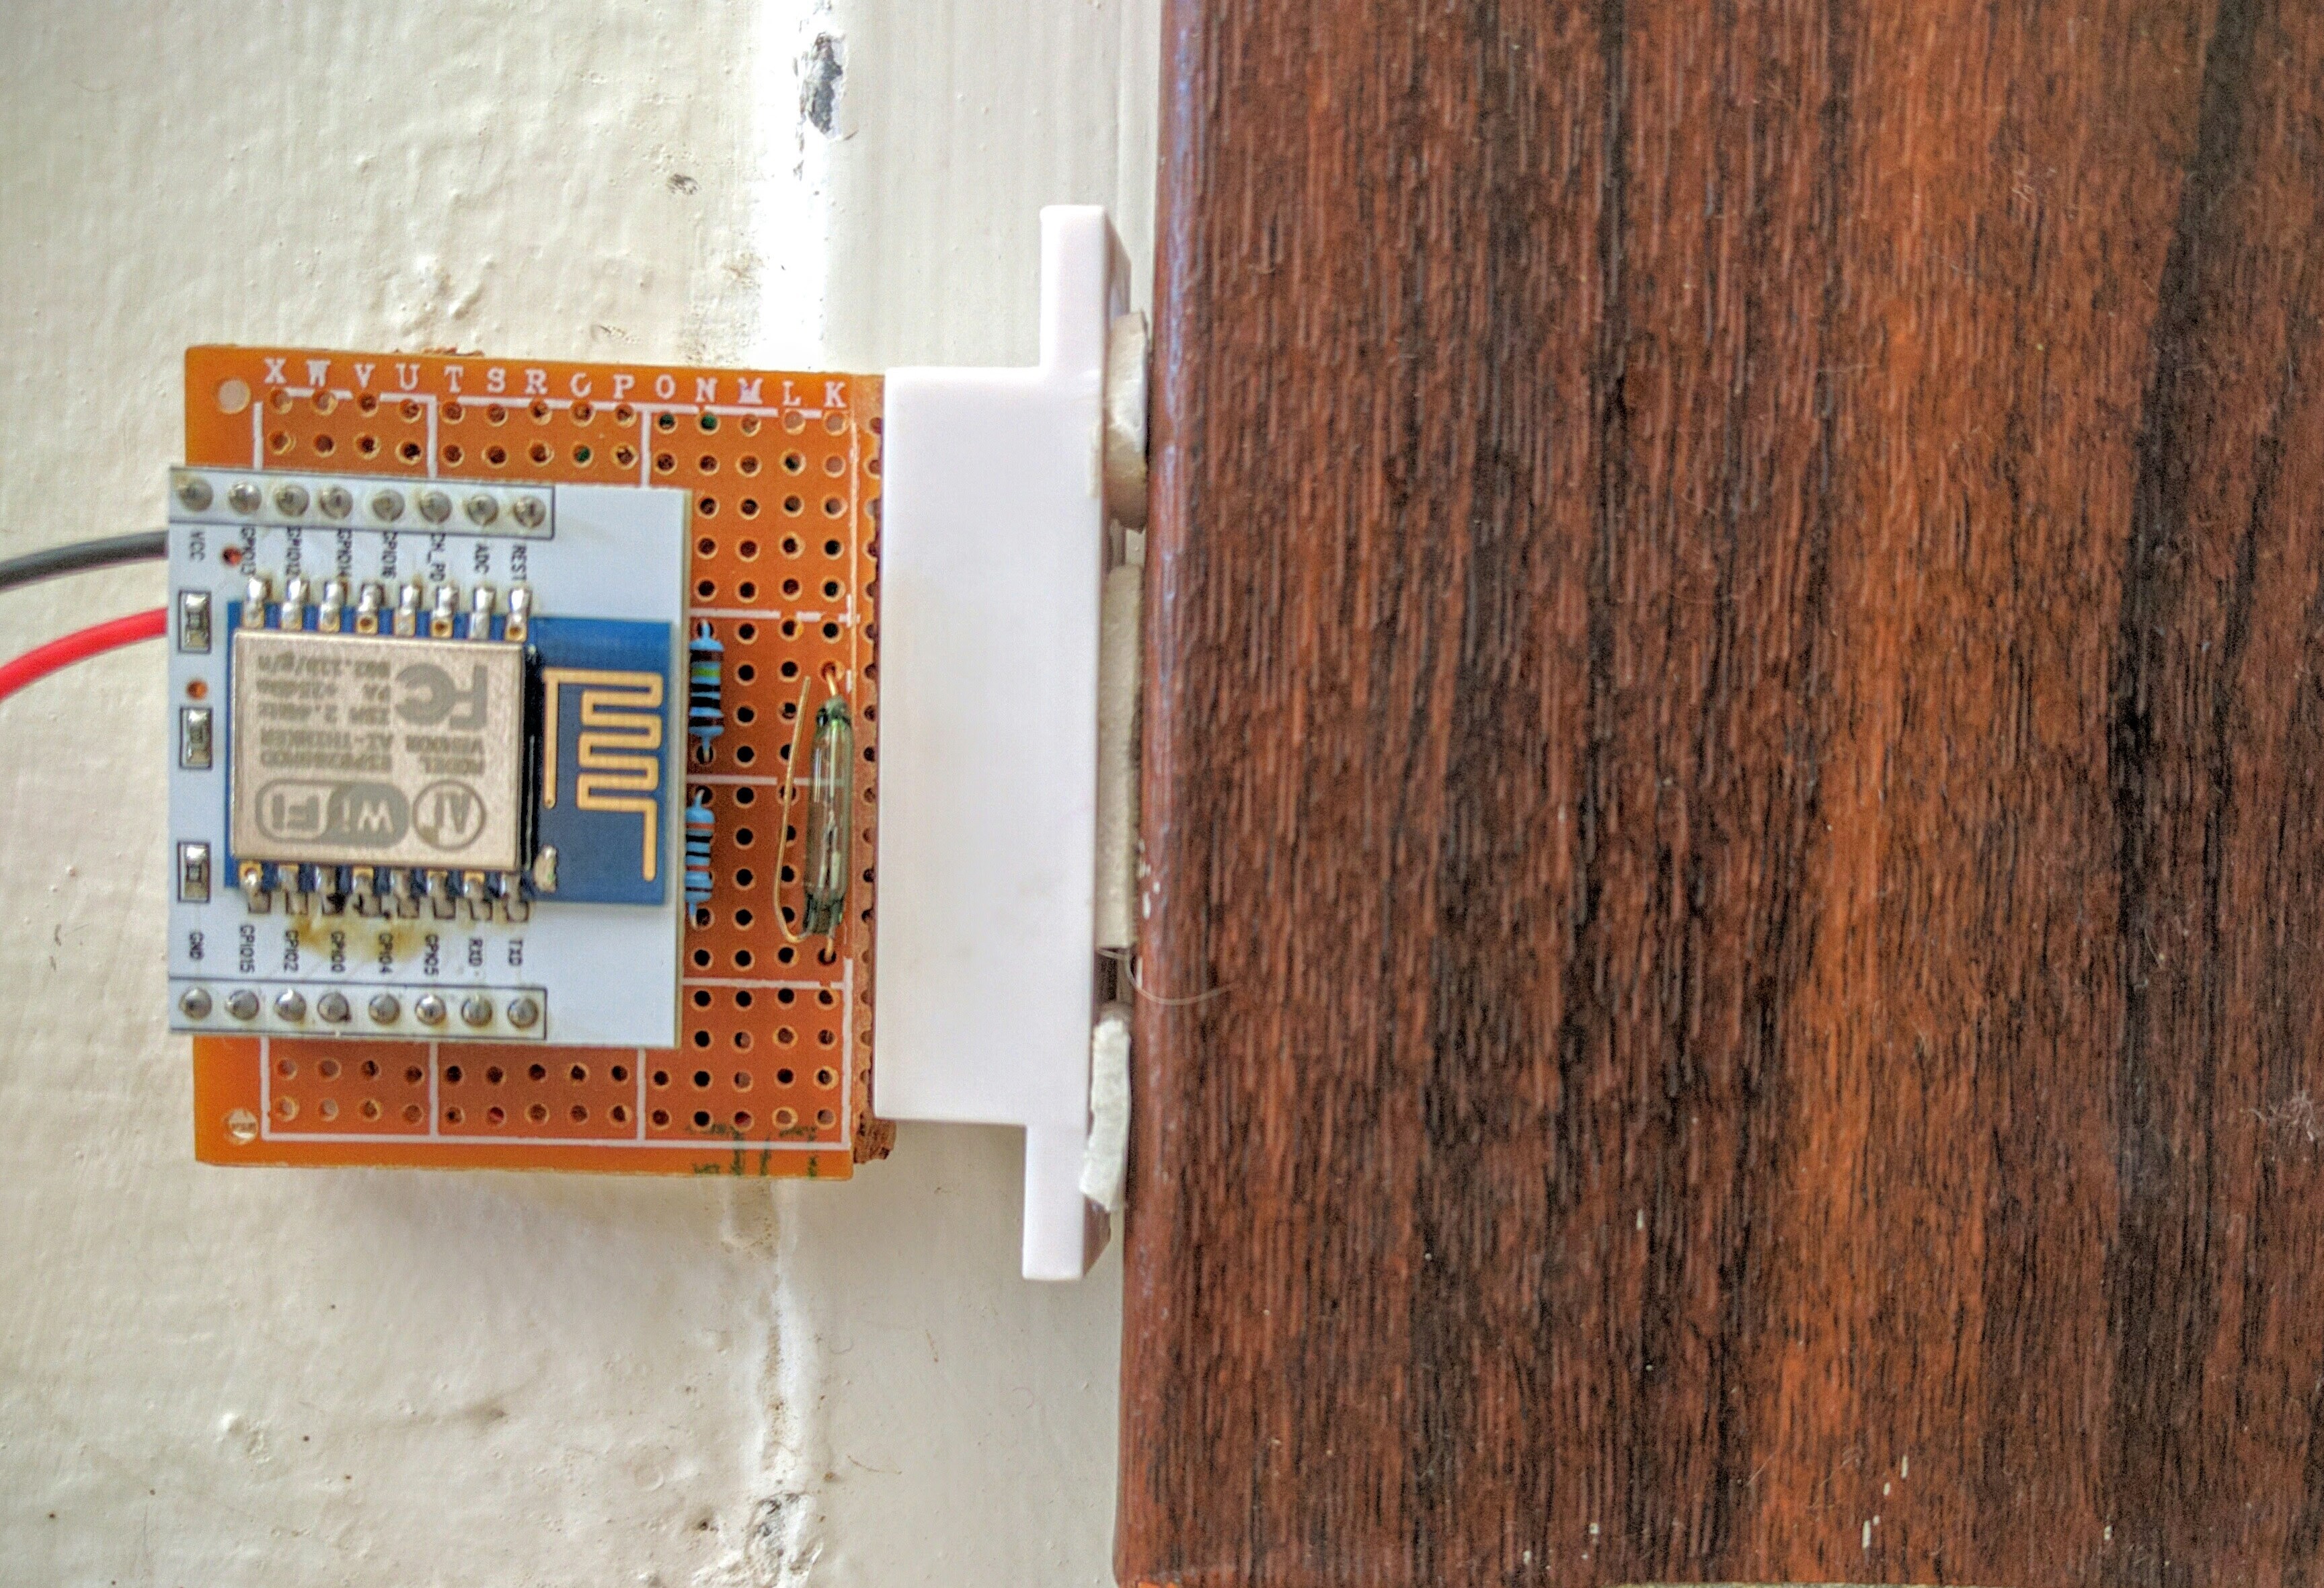
Door/Window Sensor
My door/window sensors were exact copies of the Mailbox Alert System described in detail on this blog. The only difference was that they were easily accessible to Wi-Fi, so I used a standard ESP8266 12 with no external antenna. As I had two such sensors at separate locations, I used two incidences of Blynk to send emails if the switches were tripped. On hindsight, I believe I could have used a single Blynk screen but was in a hurry to finish things before my flight.
Motion-activated audio warning
This was my latest project, designed specifically for vacation time. It's very simple, and fun to play with.
I've always thought that a sudden, shouted audio warning to an intruder might be quite effective. I commissioned another Raspberry Pi for this job, connecting a Passive Infra Red sensor (PIR) to a GPIO pin of the RasPi. I also connected a powered external speaker to the Pi's audio output. To force output through this port, type:
sudo raspi-config
and select "Advanced Options" and then "Audio"
This terminal command will do the same thing:
amixer cset numid=3 1
where the number 1 forces the RasPi's audio jack.
Once this was done, I had to program the Pi to play the recorded message when the PIR sensed movement. The message was a simple mp3 file. It shouted at maximum volume: "INTRUDER, YOU ARE BEING FILMED! INTRUDER, YOU ARE BEING FILMED!" The code is written in python and my thanks to Allan (a future contributor to this blog) for helping to set it up.
The apparatus was situated at the top of the stairs. If anyone moved within a few meters of it, it suddenly burst into life and created quite a racket. Situated where it was, it was designed to surprise an intruder coming up the stairs, or someone entering from an upstairs window.
Here's the python script:
import RPi.GPIO as GPIO
import time
import sys
import os

GPIO.setmode(GPIO.BOARD)        # set the mode of the RPi I/O for pin numbering
PIR = 11                        # PIR "Passive Infared Sensor", pin 11
GPIO.setup(PIR, GPIO.IN)        # setup this pin to be a GPIO input port

#note: to change volume use the following command
#os.system('amixer sset PCM,0 90%')
#note: to change to analog sound output, use the following command
#os.system('amixer cset numid=3 1')

while True:
    time.sleep(.1)              # sample once every tenth of a second
    if (GPIO.input(PIR) == True):
        # sound an alarm, play a short 4 second mp3
        os.system('mpg321 -q ./Music/Alarm.mp3') # the mp3 file to be played
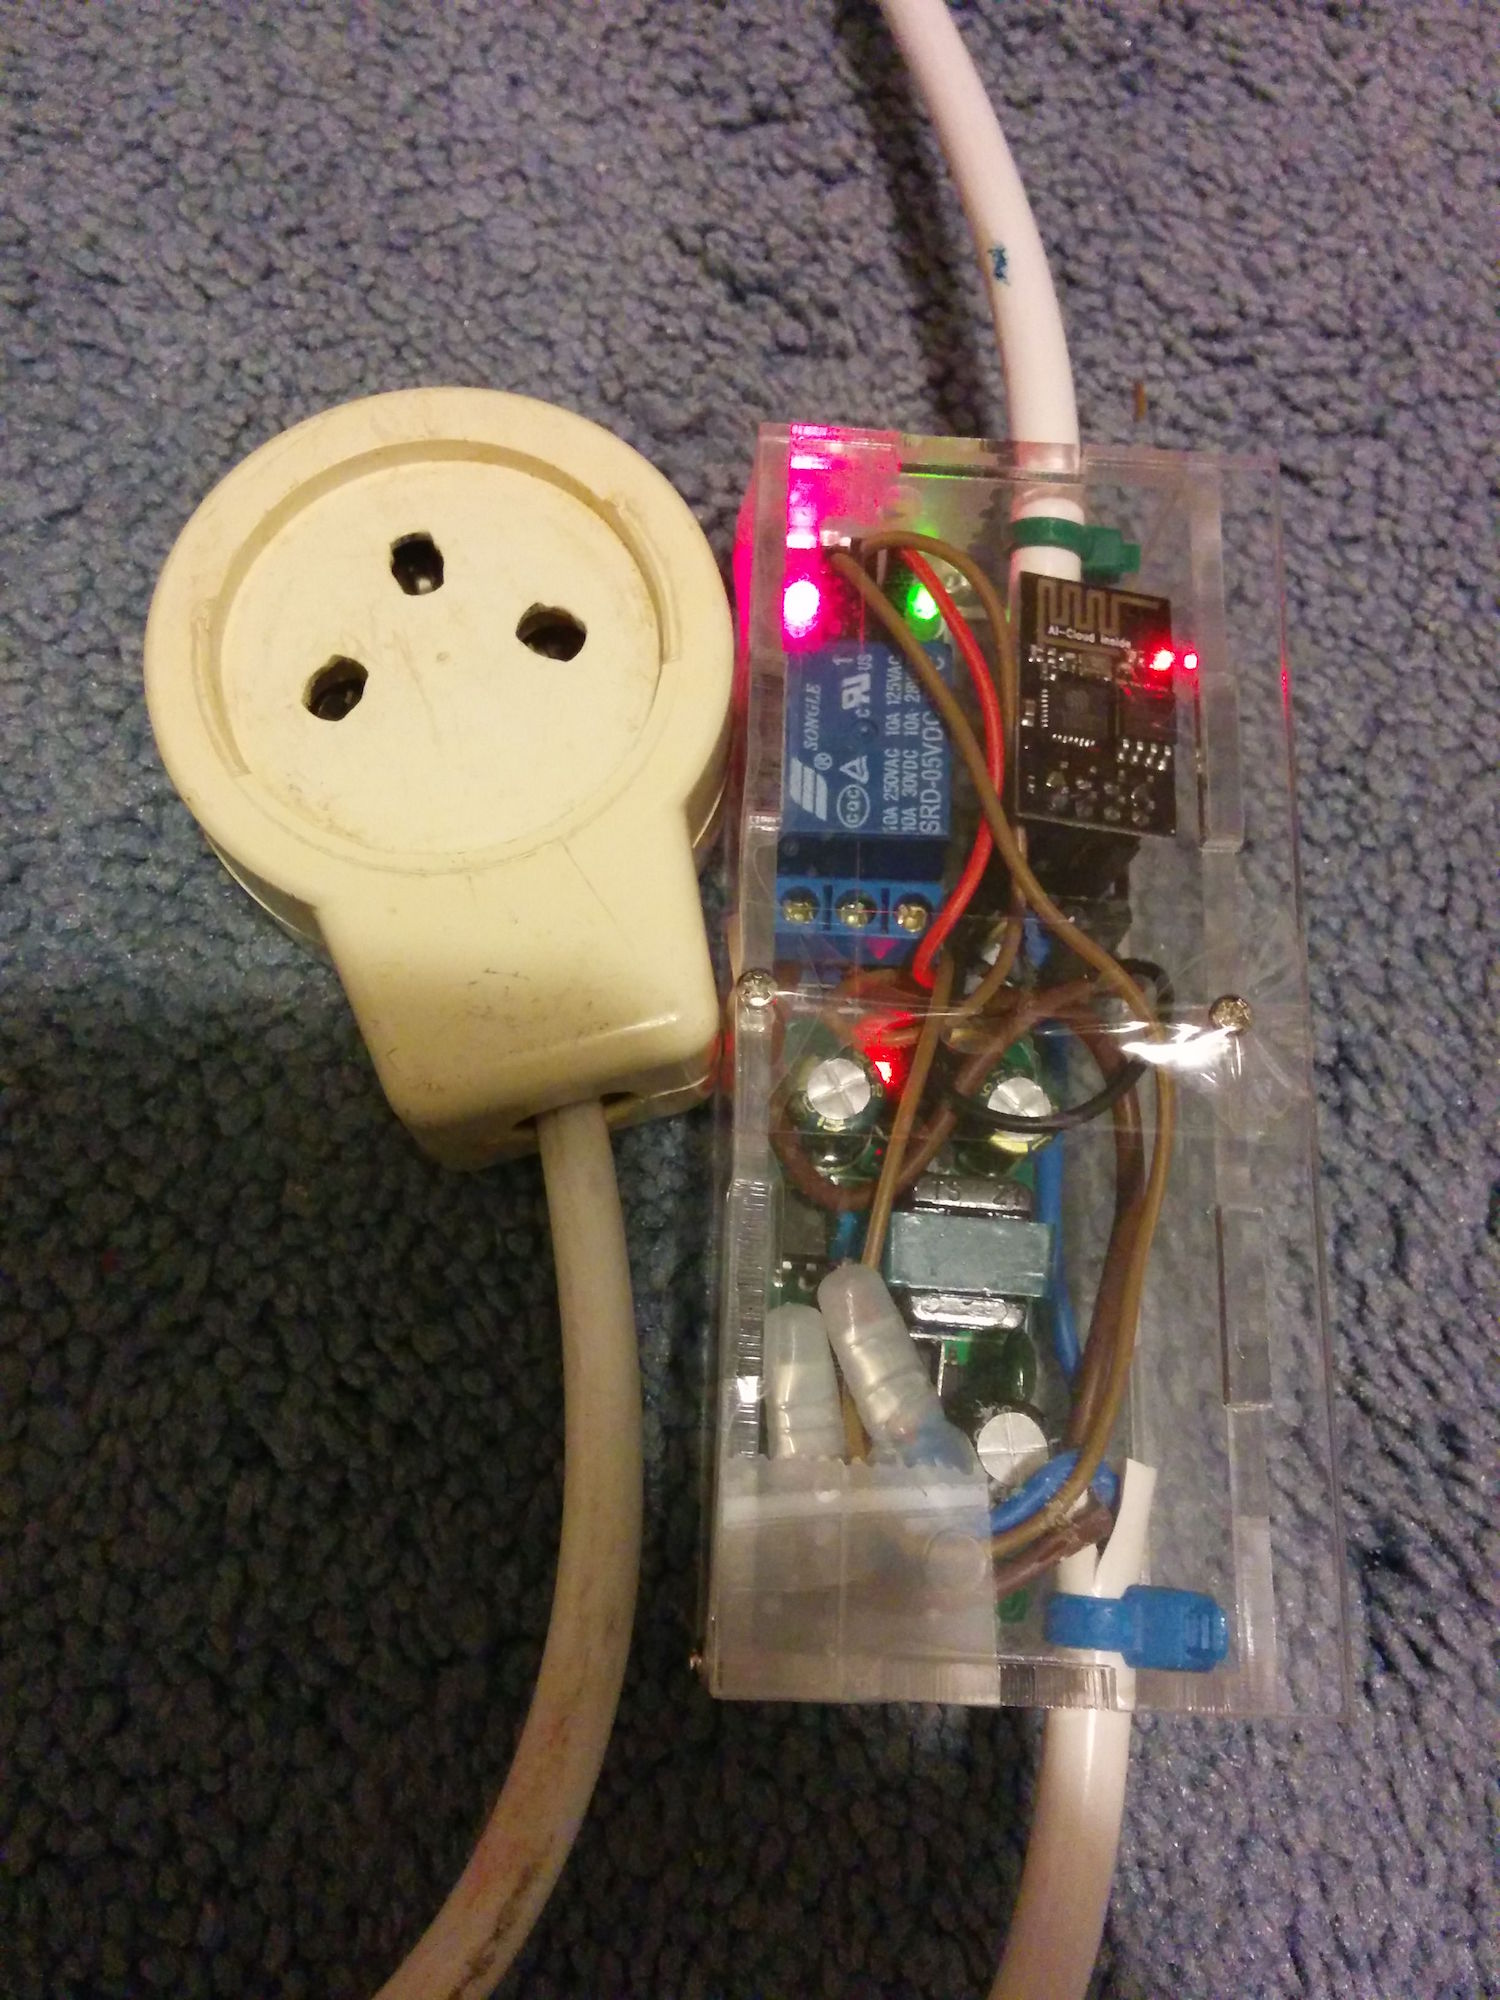
Remote Activated Switching
My final project was another application of the ESP8266 and Blynk. This time I used the ESP01 as I only needed a single GPIO port to activate a relay.
Warning: this project involves mains electricity and should only be implemented by qualified personnel.
The circuit included:
- ESP8266 01 with the very simple Blynk sketch below
- 110v - 3.3v convertor
- Relay (purportedly 5v, but being low quality, would only work on 3.3v - the same as the ESP!)
- Blynk
- Mobile phone
- Suitable case
Sketch
#include <ESP8266WiFi.h>
#include <BlynkSimpleEsp8266.h>

// You should get Auth Token in the Blynk App.
// Go to the Project Settings (nut icon).
char auth[] = "xxxxxxxxxxxxxxxxxxxxxxxx";

void setup()
{
  Serial.begin(9600);
  Blynk.begin(auth, "SSID", "Password");
}

void loop()
{
  Blynk.run();
}
One end of the ESP switch has a mains plug, and the other end, a socket. It's basically an internet-connected extension cable. The plug, naturally, goes into the wall socket. When it does so, it powers up the voltage convertor and the ESP. The latter logs on to my home Wi-Fi. The appliance is plugged into the socket.
In my case I attached an RGB LED floodlight. My blinds were closed, only allowing a bit of light to filter through. When my LED came on, it cycled through colours, giving the effect of a TV screen flicker. Of course, it can equally well be attached to any mains appliance, limited only by the wattage of the relay.
Occasionally from abroad I'd trip the switch - particularly at night. I'd leave it on into the wee small hours. I could see it worked because my motion-detecting cameras picked up the pixel changes and sent me photos of the colour-changing scene!
Altogether, at very low cost and with little effort, I had set up a fairly comprehensive home monitoring system. The only thing missing was automatic plant watering. On my excursion to foreign shores, I picked up a small water pump, so that will be included next year.
Author's Note
I realize I haven't provided circuit diagrams or ESP flashing instructions in my above descriptions. This is because most of what appears here has already been covered in detail in other parts of www.whatimade.today. This post was to illustrate how simple projects can quickly be adapted for specific use - in this case home monitoring/protection while absent on vacation.