I'm assuming most readers of this blog already know what a Magic Mirror is. There are any number of tutorials on the web explaining how to make them. Look here or here for tons of examples and instructions.
I'd like to concentrate on a single aspect; easily constructing your Magic Mirror from a Raspberry Pi and an inexpensive 50x50cm IKEA frame.
If you're looking for instructions about setting up the Raspberry Pi itself, click the Magic Mirror link above.
Before you run out and buy your IKEA frame, please be aware that the one I'm about to describe is good for relatively thin glass. I used 3mm but anything thicker may require some strengthening of the frame.
Parts
- Raspberry Pi - preferably V3. I used V2 - which meant I needed a WiFi dongle. You can use earlier models (and the Zero) but it's more complicated to set up.
- Micro SD - 8 giga is enough. Class 10.
- Good power supply - at least 2.5 amps. You also need a decent cable.
- Transparent reflective mirror - see below for a more detailed account.
- Black card for the screen mask.
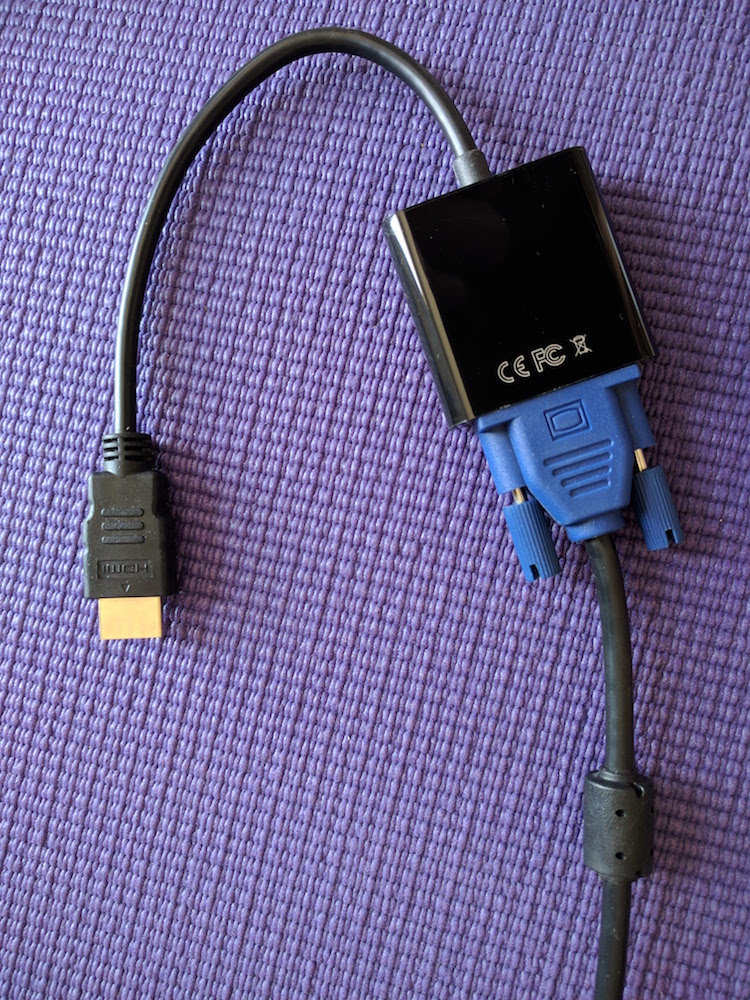
- Screen - suggest an old computer screen - ideally 15-17 inch. You'll also need a video cable (and probably a converter to HDMI) and power cable.
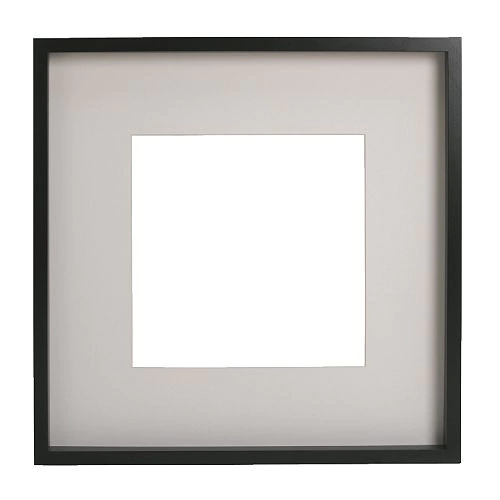
- IKEA's RIBBA frame (No.: 200.780.50.) I specifically suggest this frame because of a certain characteristic that simplifies construction of the mirror. You'll understand as you read on.
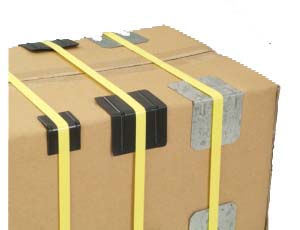
- Strapping band - I found the single meter I needed wrapped around a box of printer paper. It's ideal because you can find it anywhere, it's strong and it doesn't stretch.
- Extension power cable - you'll probably cut the power cable from your screen and splice it to another cable.
- Standard wire connectors.

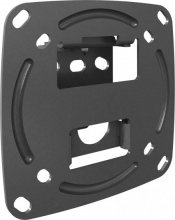
- Screen wall mount - usually called a "VESA" mount and you'll need one for your specific screen. You'll probably want it flush to keep the screen as close as possible to the wall.
Tools
- Sharp knife.
- Cutting board.
- Good stapler.
- A few wires and cable connectors.
- Screwdriver.
- Drill (for attaching VESA mount to wall).
The Mirror
The glass/acrylic for the mirror is about the hardest component to get right. It can be difficult to get in many countries. See here for discussions about acquiring in different places.
Personally, I used 3mm acrylic and although it looks great, I'd prefer to replace it with glass that eliminates distortion. Acrylic is good because it's very light, but from experience, I think it's better for smaller mirrors only.
I scoured the internet looking for the definition of the "best ratio of reflectivity/transparency." Most sources say 70% reflective, 30% transparent is ideal.
That said, from my research I came to the conclusion that two mirrors from Pilkington are probably the best available:
Unfortunately these brands may not be available outside North America.
Mounting the screen
In constructing my Mirror I did something I haven't seen elsewhere. Most builds seem to use a heavy wooden frame to support the substantial weight of the screen. Invariably they have a wooden bar across the back to hold the screen in place.
In my build, I've reversed this situation - making my Mirror much lighter, cheaper and easier. In my Magic Mirror it is the screen that supports the frame, not the other way around. You'll understand the concept better towards the end when I attach the screen to the wall.
Why this frame?
If you look carefully at the photo above you'll see that the frame has depth - and the passe-partout appears to be set at the back of the frame. It's that characteristic that simplifies construction.
The frame is designed to place the picture about 3cm back, providing depth and shadow. It's basically a shallow box with glass is at the front.
When I first saw it in IKEA, I thought it wouldn't work; I knew I needed to make the screen flush with the glass. How could I do this if the glass was set 3cm in front?
That's until I looked inside...
The space between the glass and back is created by a removable internal frame. This frame fits snugly inside the outer frame and holds the back and front apart. When you extract this frame, you can easily access and remove the glass, replacing it with your own mirror glass.
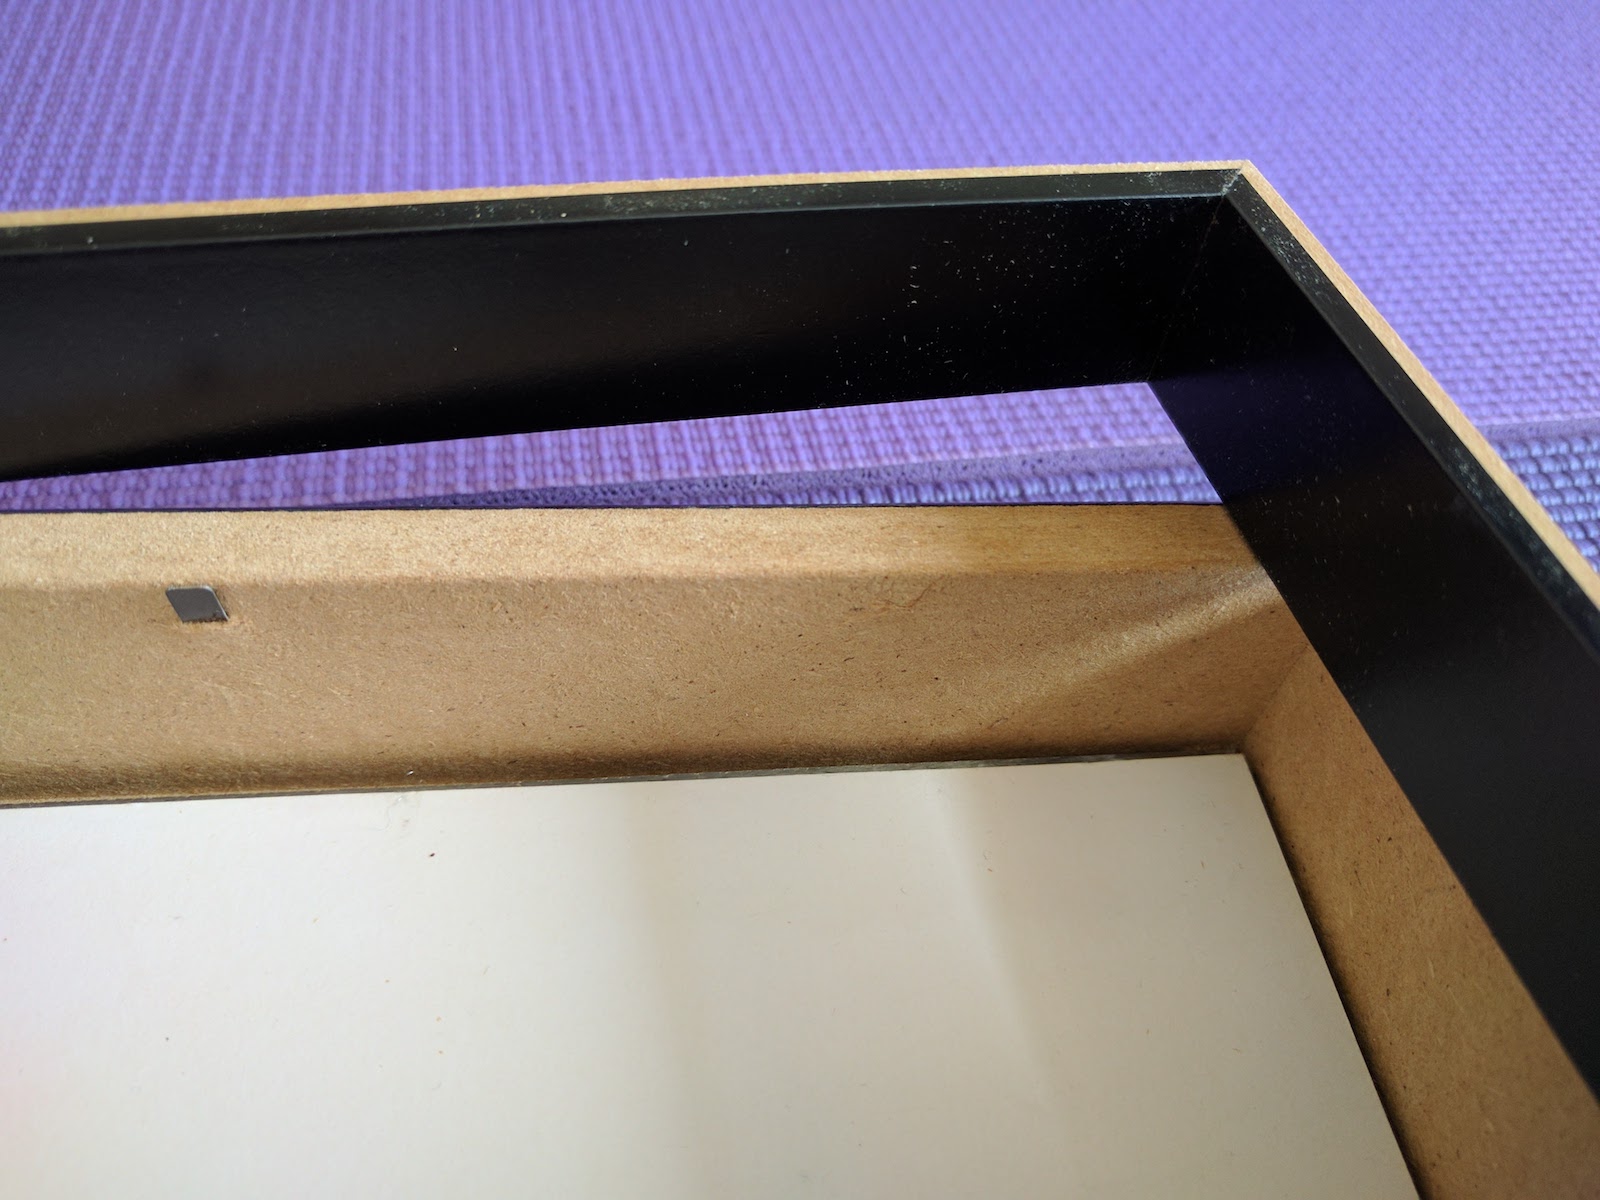
And this is where the genius begins...
Getting the Screen Right
The secret of a good Magic Mirror is:
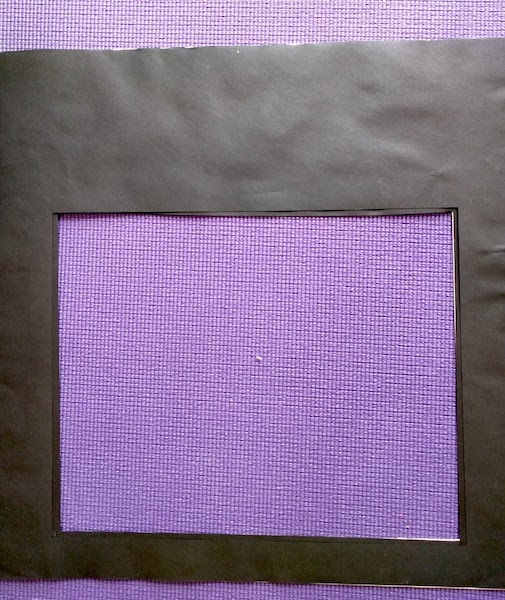
- A black mask that fits behind the entire glass, with a space cut exactly where the screen will fit. You can see my mask below.
- A snug fit of the screen against the mask/screen to make sure light doesn't penetrate from the sides.
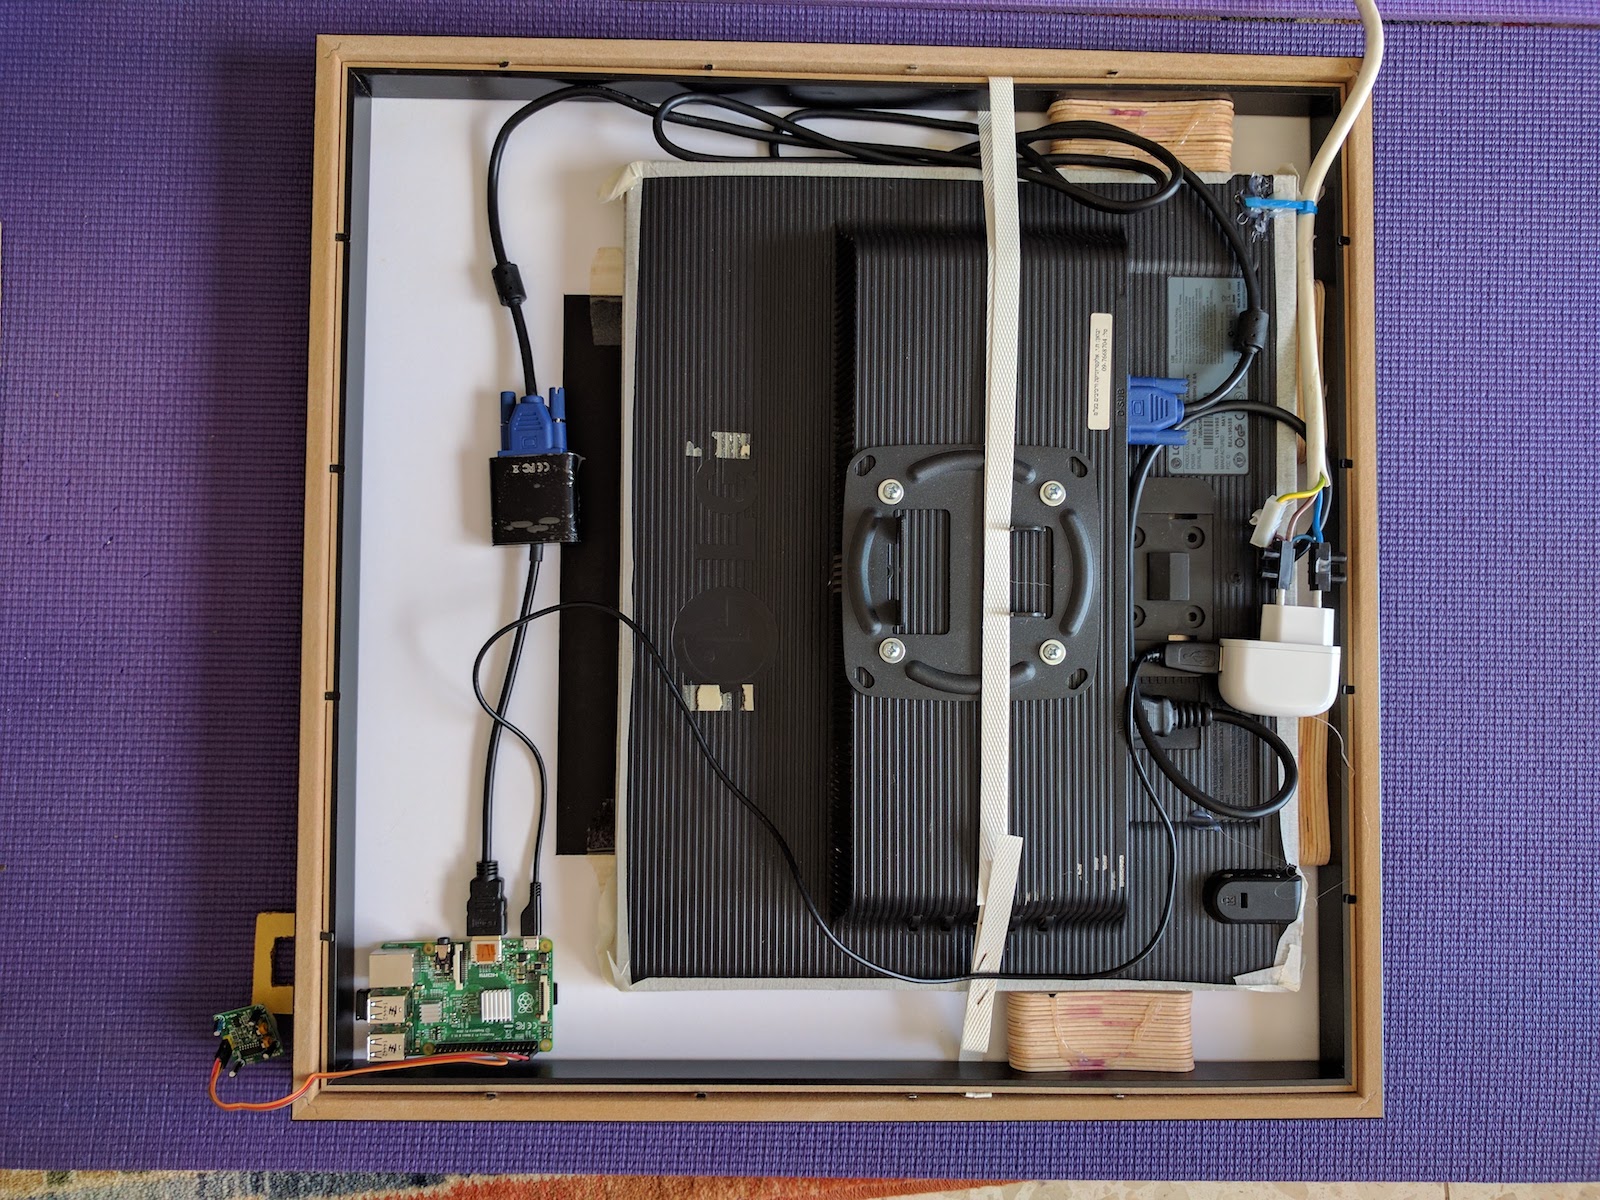
Unlike other builds, I did not remove the screen entirely from its housing. Instead, I only removed the front bezel. This has several advantages. First, it keeps all the electronics safe and protected. Second, if you save the bezel, you can easily reclaim your screen. Third and most important, because it still has its back on, you can screw on a VESA mount to attach the screen to the wall.
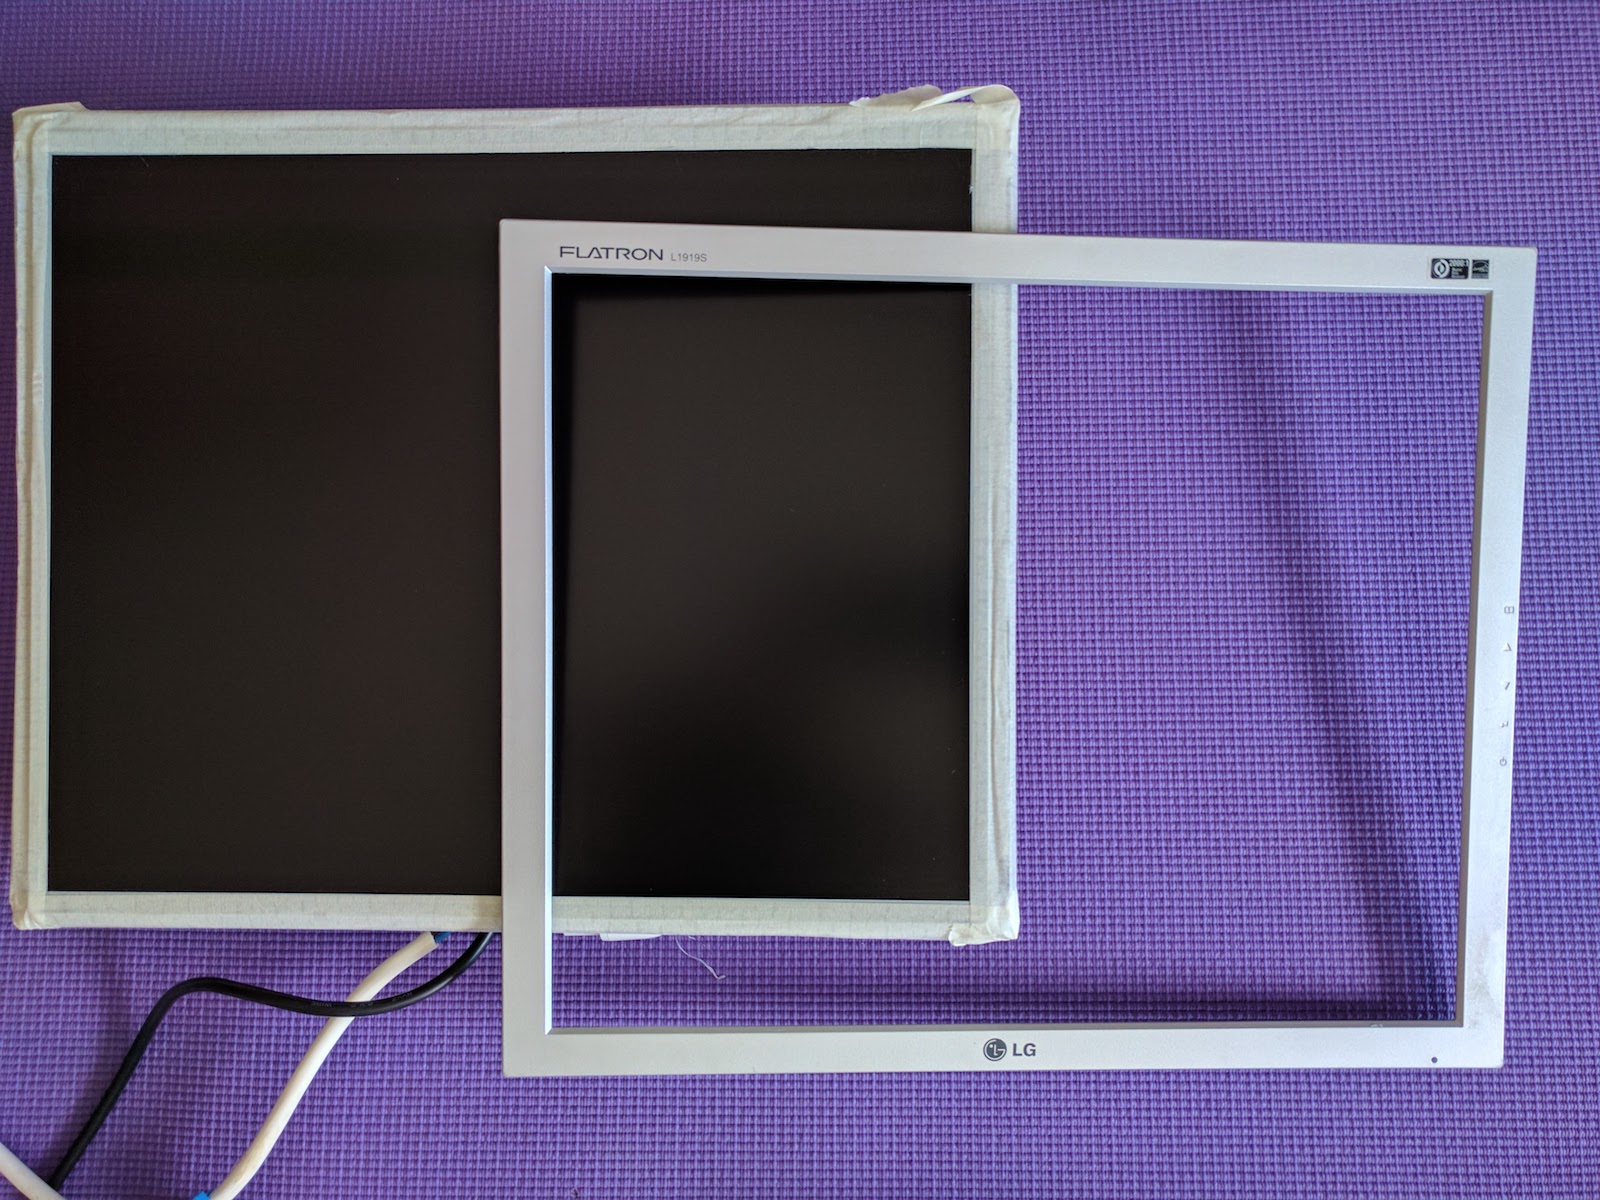
Note that I put masking tape around the screen to minimise movement in its case.
Positioning
Many people reading my blogs have seen my simple projects on YouTube. As you'll see from this example, I'm a frequent user of popsicle sticks.
I used the same sticks to place my screen exactly where I intended it to fit inside the frame. They're ideal because you can easily adjust the number if you need to move the screen a fraction in any direction. Once I was happy with the placement I glued the sticks together creating permanent spacers.
Some of you may have noticed that I placed my screen at the bottom of the mirror, not the top. I did this because by my reckoning, most of us look at our faces in the mirror and I wanted this area uncluttered. I prefer having weather clouds and calendar appointments at chest level.
Now that I had the screen snugly in place, I cut the mask from stiff black paper.
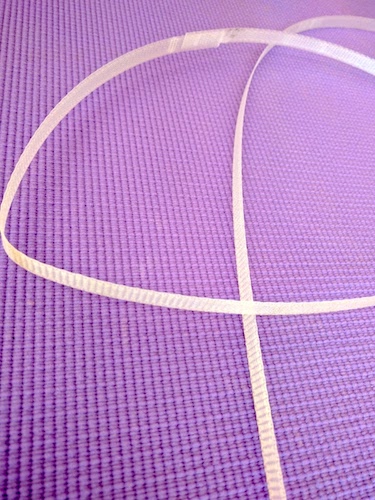
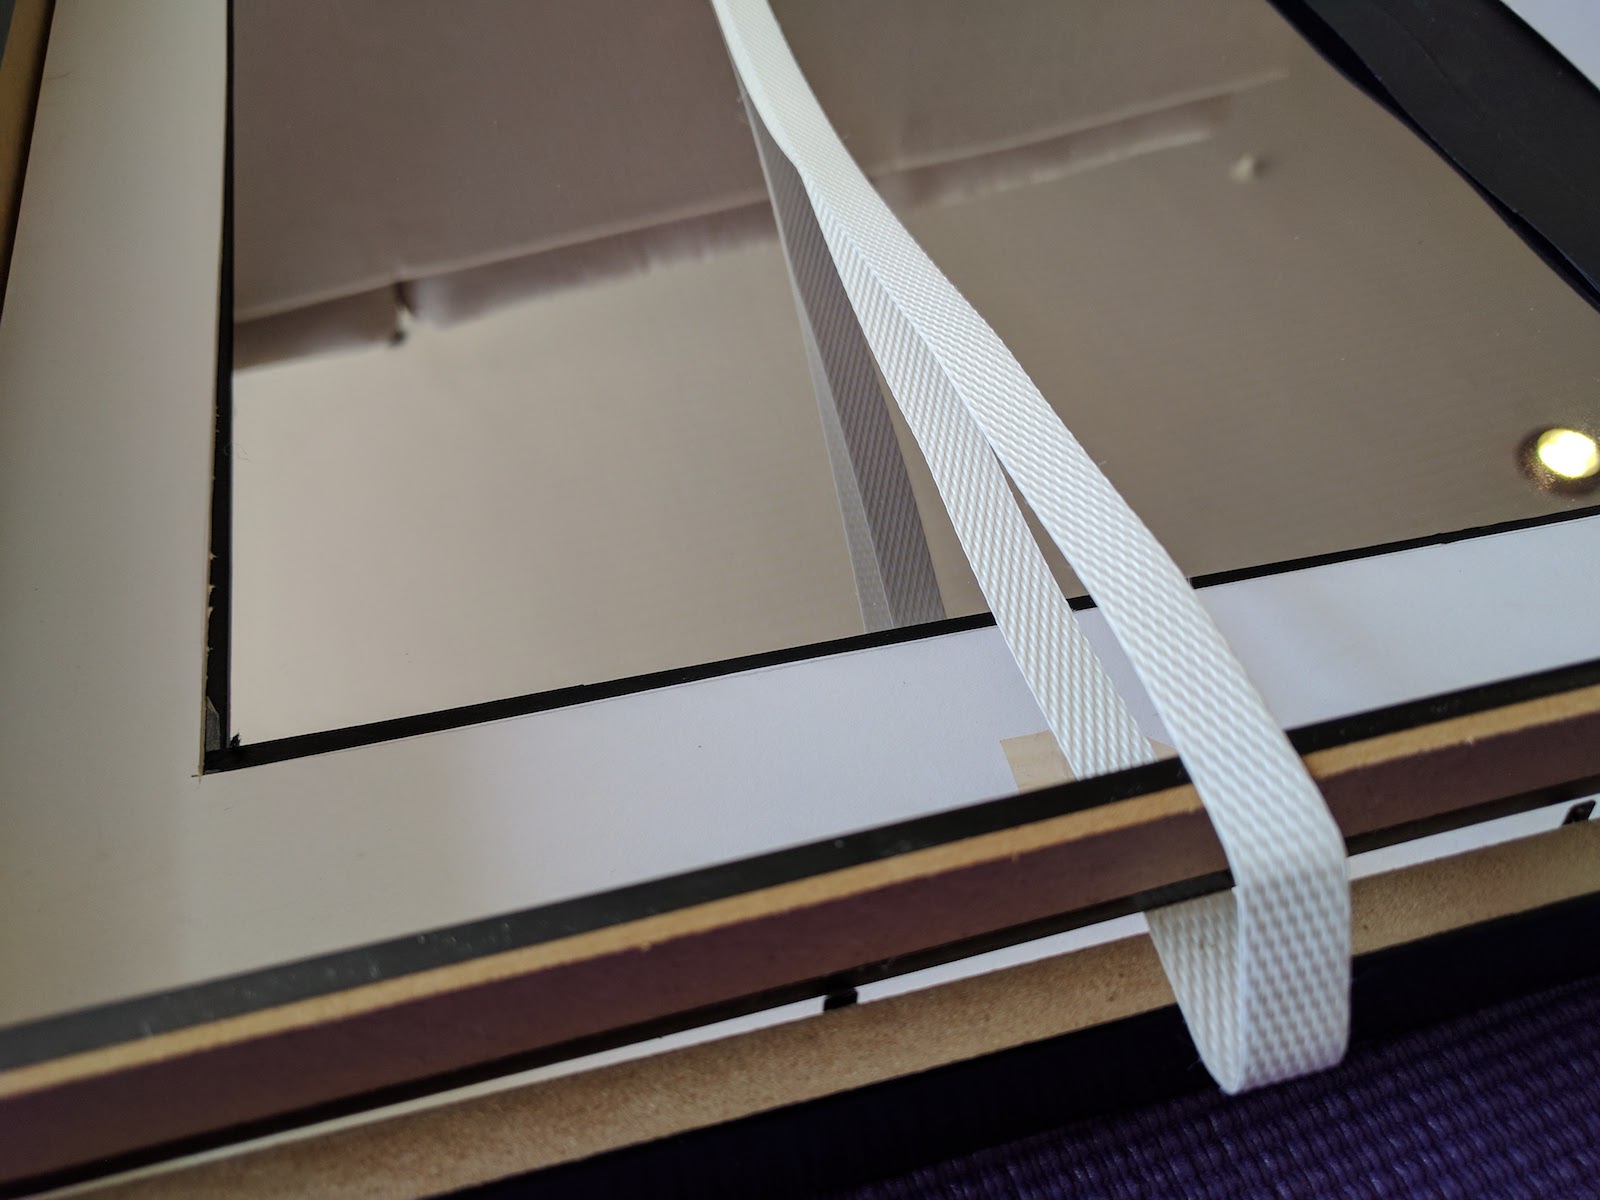
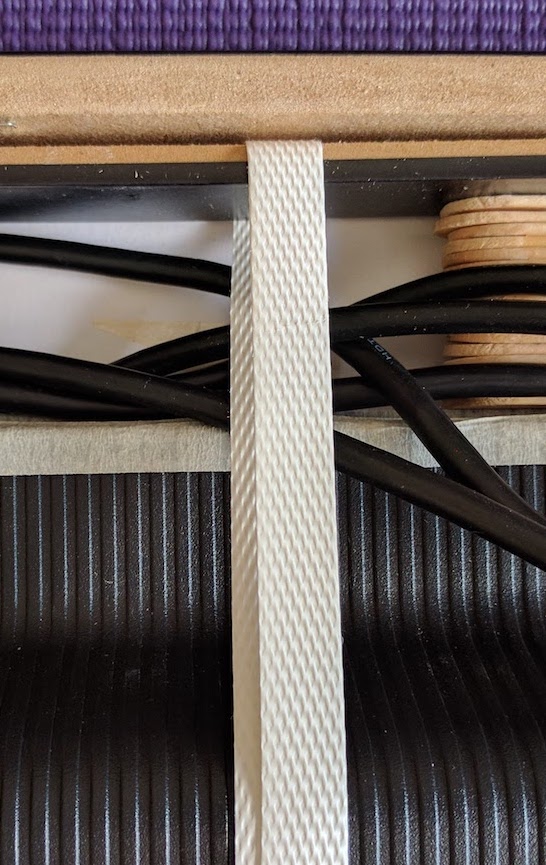
The next step is my pièce de résistance. It's the reason this frame makes it easy to construct a Magic Mirror.
Take the internal frame and wrap your strapping band loosely around it. Place your screen in its position (between the popsicle sticks) and place the internal frame (with its strapping band) in its position too. The strapping band should now be firmly against the back of the screen. Gently tighten and when you're satisfied, staple the ends of the strapping band to hold its tension.
When you push the internal frame firmly in its place, the strapping band will push the screen flush against the glass. The bottom and sides of the screen will be held in place by the popsicle sticks.
Keeping it all in place
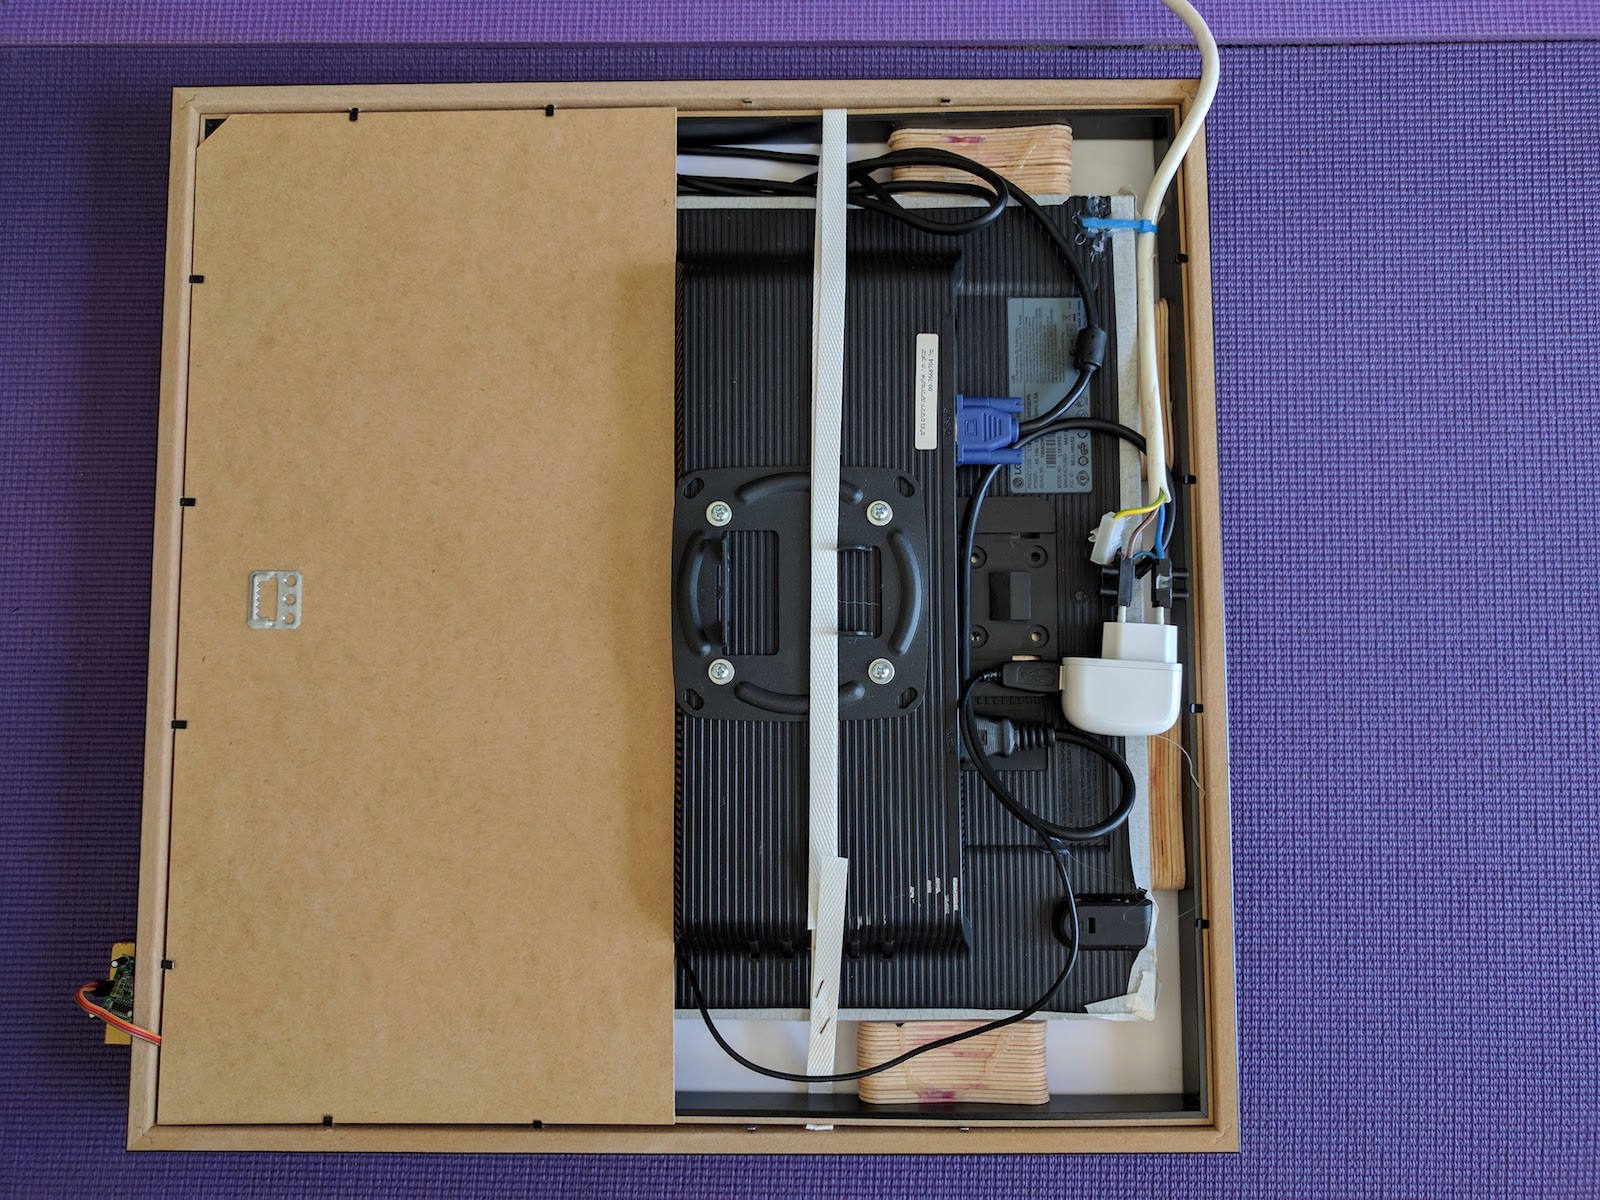
Take the hard back of the frame and measure it carefully. You want this to hold half of the screen in place so it needs to be cut so that it fits in the frame, but exactly meets the "bulge" at the back of your screen.

Fortunately, the frame back appears to be made of hard cardboard, not wood. This makes it easier for those without a saw. It's easy to cut with a few deep scores of a utility knife (box cutter).
There are several advantages of this method:
- The screen remains outside the frame and its vents allow air to circulate as normal - preventing overheating and the risk of fire.
- The board hides the Raspberry Pi, and any loose cables.
The Electrics
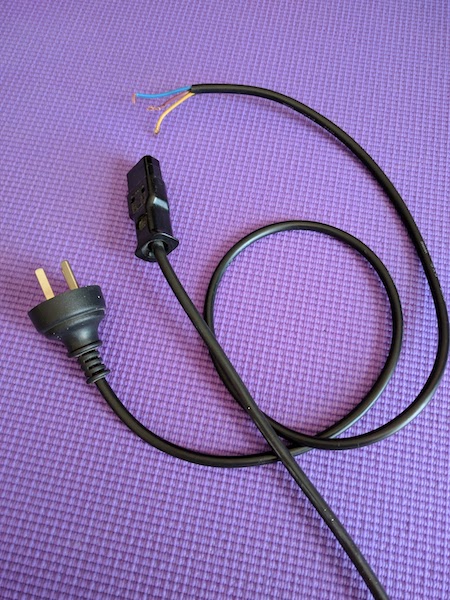
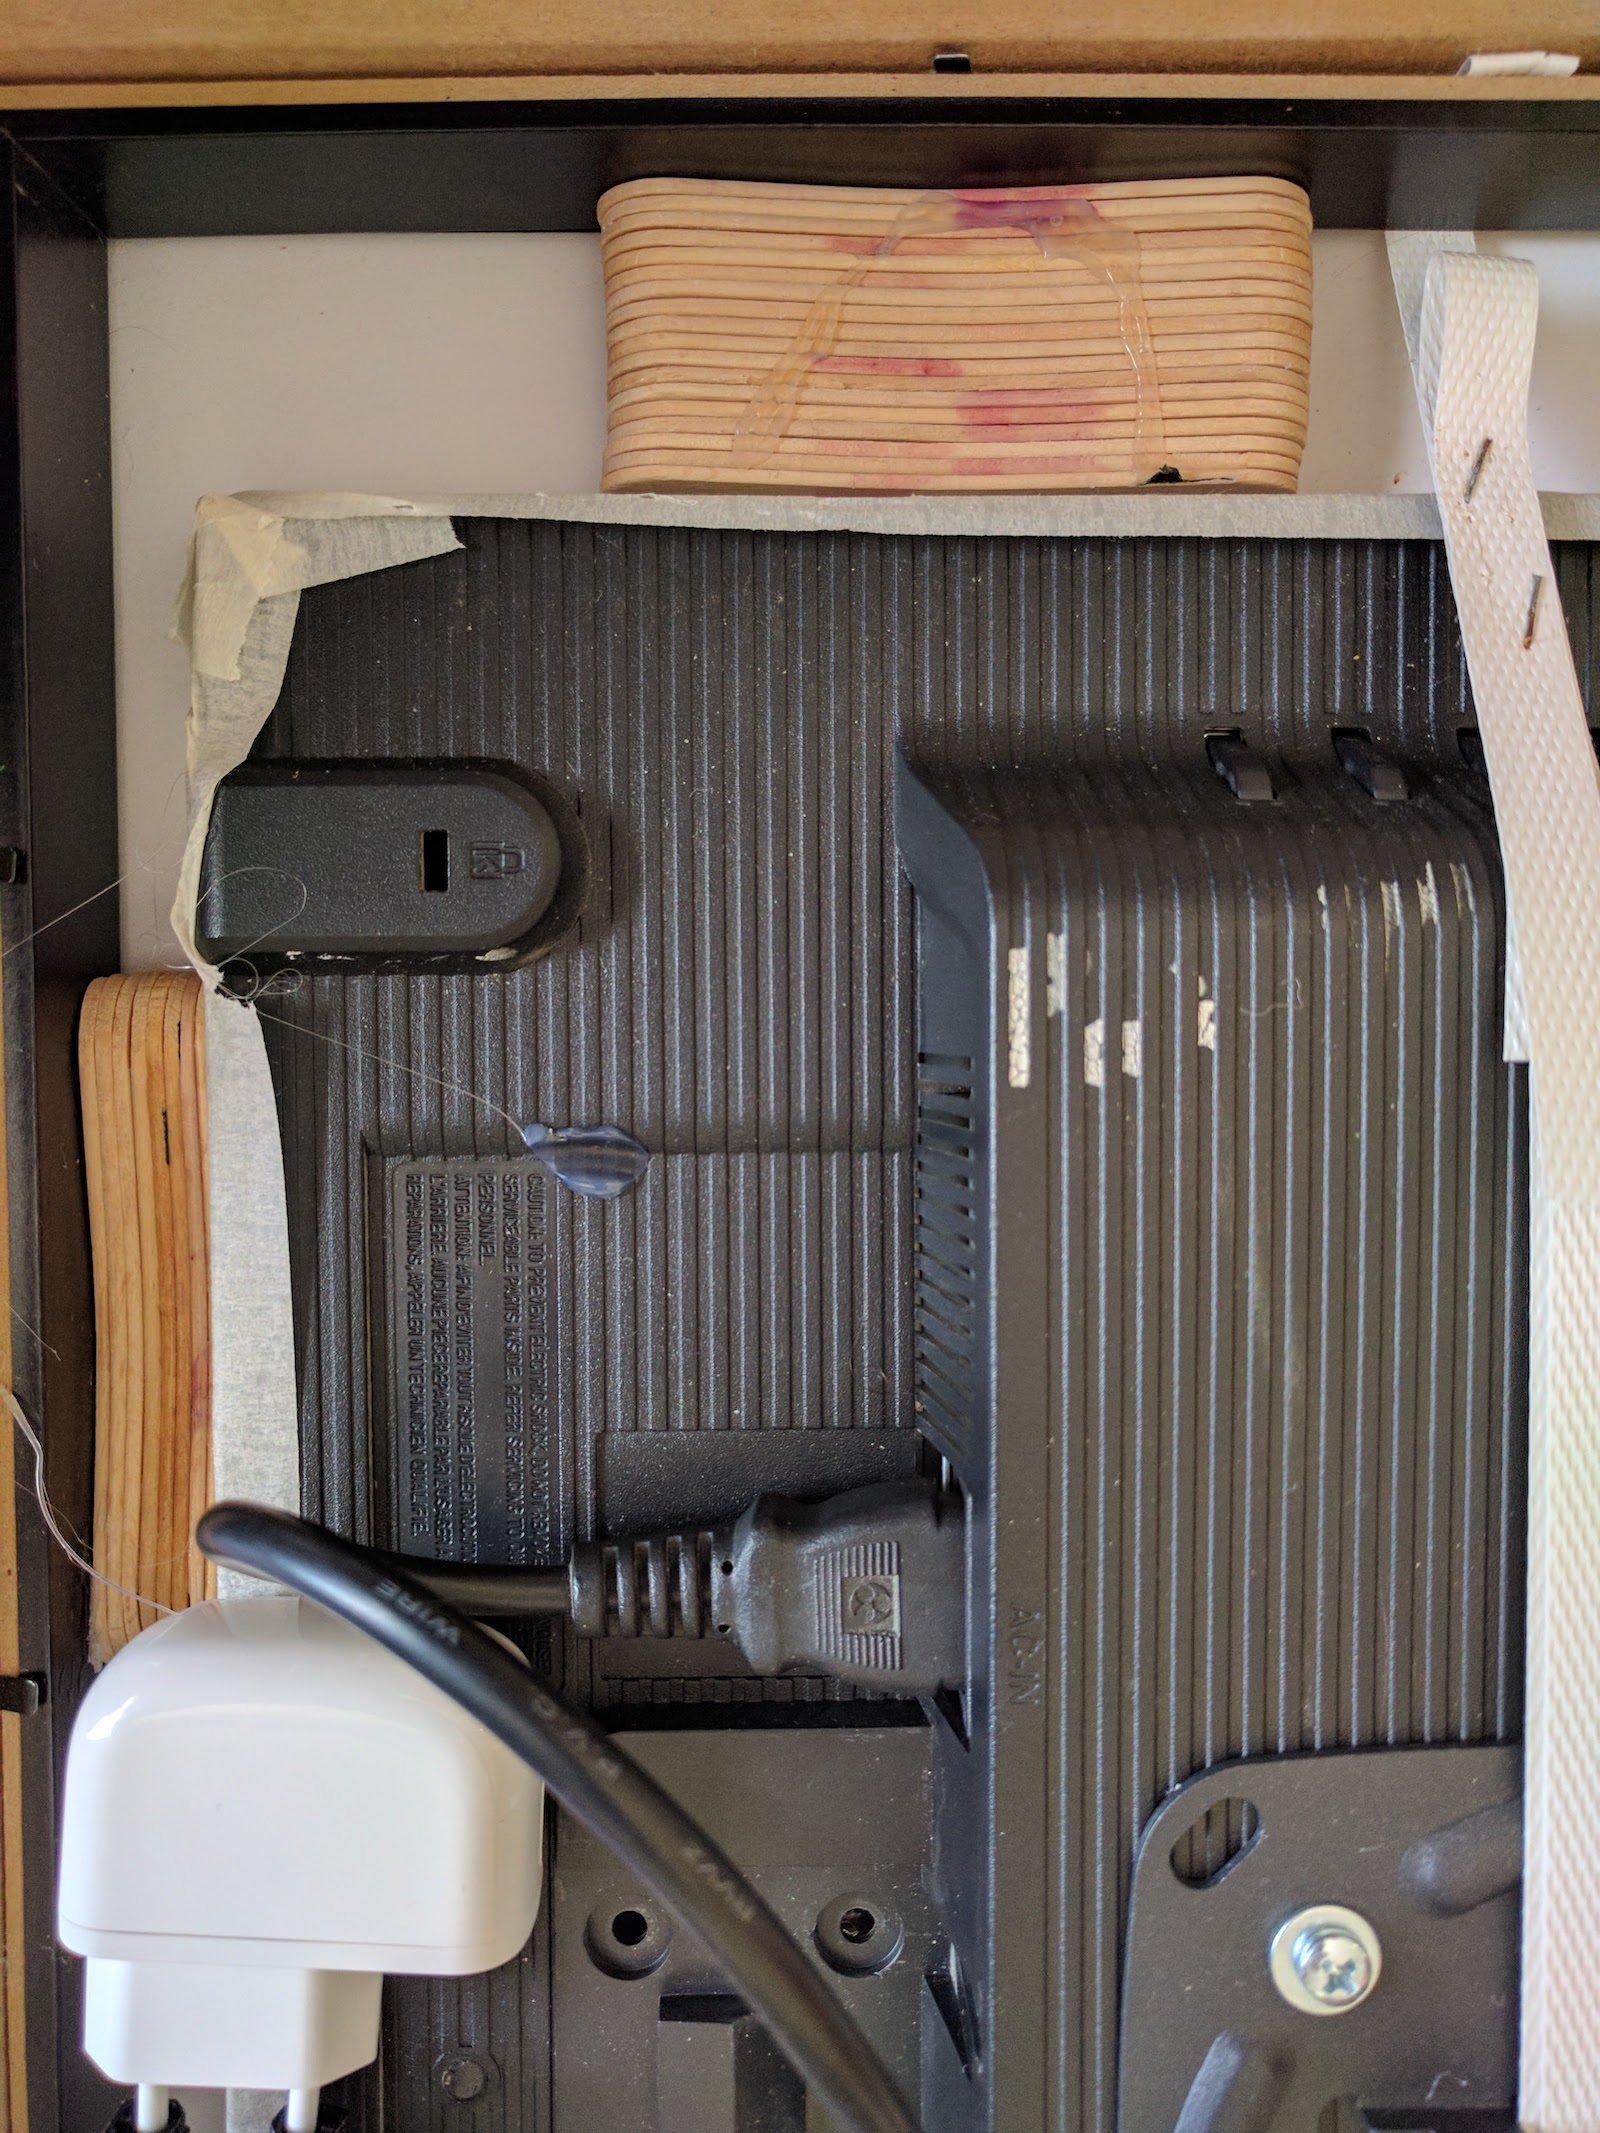
You need to power both the screen and the Raspberry Pi but naturally, you don't want to run two wires into your Magic Mirror; just a single neat wire to power everything.
To achieve this you need to cut the screen cord, then splice it together with the Raspberry Pi power source onto a single cable.
This is very easy to do using the cable connectors referred to in the parts list.
As you'll see in this photo, I didn't want to destroy my Raspberry Pi power source, so I tightly screwed one side of the cable connector onto the pins, then split the other side off to the screen cable, and the wall socket. This also allowed me to neatly glue my RasPi power unit onto the back of the screen and keep everything tidy.
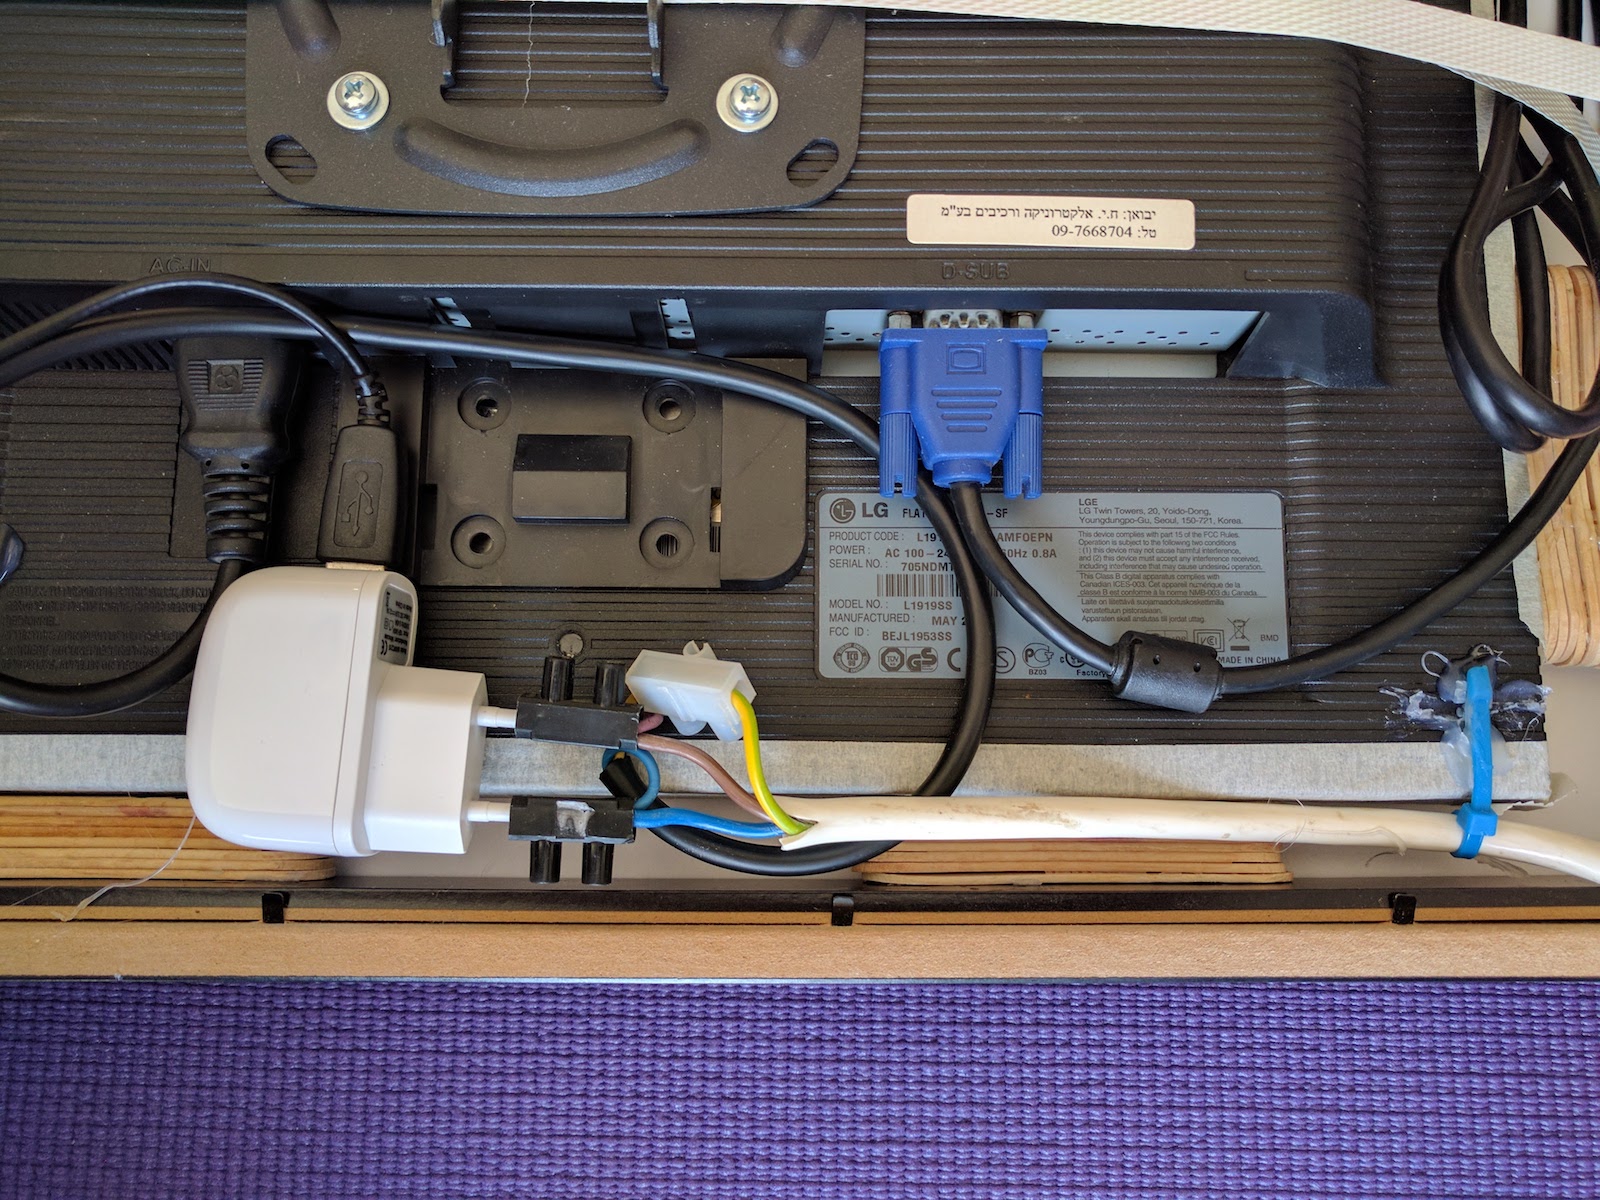
I'm sure 99% of those reading this blog don't need a circuit diagram. That said, do be careful to make sure your screen is earthed. (The yellow wires with the white connector. It's a straight connection from the screen input plug to the wire running to the wall socket.)
Hanging it on the wall
As I explained above, in this build it's the screen that's supporting the frame, so, it's the screen you attach to the wall, not the frame. Attach the VESA to the back of the screen, attach the support to the wall, plug it all in and hello Magic Mirror!
Adding Motion Sensing
Adding a motion sensor is pretty simple. You can see it on the top of my mirror frame. The PIR sensor attaches to a pin of the RasPi according to instructions here. (PIR sensors are useful in lots of scenarios. You may want to look at Happy DIY Home). This particular method turns your Pi's HDMI on and off, not the screen itself. However, many screens have built-in power saving and if they don't receive a signal they automatically lower their power requirements. In my experience, the screen restarts pretty quickly when the sensor detects movement, but it may take a few seconds to reach optimum brightness.
Here's a short video of the finished product.